Your cart is empty
Tax included and shipping calculated at checkout

Menú de cajones
Tax included and shipping calculated at checkout
A professional account gives you stylist pricing, priority support, early access to new releases, and education developed by working stylists.


The most popular advice about K-Tip extensions before and after is to judge the result by length and fullness. That is the wrong test. A K-Tip install is a mechanical system: individual bonds carry added mass on a finite number of natural strands, and the visible result lasts only as long as those strands tolerate the load.
A useful before and after records two outcomes at once. The first is cosmetic, meaning the blend, density and shade match. The second is structural, meaning the part line, hairline, scalp comfort and condition of the natural hair at every bond. Stylists who document both make better method decisions, and they have something credible to show when a client asks why the same set looked different at the six-week follow-up.
A fuller after photo can hide a poor mechanical result. Judge the change by the blend and by whether the natural hair and scalp remain comfortable under the added load. Treat the photograph as the final entry in the record.
Expected outcomes by starting hair condition
| Starting condition | Visible change to expect | Watch for after install |
|---|---|---|
| Healthy, dense natural hair | Length and fullness that blend with careful shade matching | Matting near bonds and breakage at the bond line |
| Fine or fragile hair | Added fullness, with less tolerance for mechanical load | Traction signs at the temples and hairline |
| Chemically processed hair | A blend that depends on the condition of the natural hair | Breakage or tenderness during wet combing |
| Active thinning or traction alopecia | No suitable result until the concern is assessed | Do not install; refer before planning |
Starting condition determines how much added weight the natural hair can carry. Fine or compromised strands have less room for error in bond size, placement and tension, even when the finished blend looks convincing.
Check how the bonds sit and how the client's hair moves around them. If fullness depends on pulling the hairline tight, the placement or load needs reconsideration.
Wear time also changes what the comparison shows. A 2026 salon dataset covering more than 3,200 K-tip transformations, published by CK Studio Salon, reported that 70% of clients kept extensions for 16 to 20 weeks, while 15% lasted 12 to 14 weeks and 15% lasted 21 to 24 weeks. Those figures describe how long clients kept the extensions, not a continuous-wear recommendation. Compare the result again at the maintenance appointment, after the bonds have grown out and the hair has been washed, styled and slept on.
Before sectioning, record baseline density, part-line visibility, hairline condition and strand diameter in consistent lighting. Blending determines whether added length reads naturally; the guide to blending hair extensions explains how section placement supports the shade transition.
A full-looking after photo cannot show whether the scalp is tolerating the install. Defer K-Tips for clients with active thinning, preexisting traction alopecia, scalp inflammation, crusting, folliculitis, visible tenting, or pain and redness in the planned bond zones. Fragile or chemically processed perimeter hair also calls for caution. In a study of 12 women who wore extensions, researchers found broken hairs and trichoscopic signs of traction alopecia in all participants, although none reported hair-loss symptoms, according to the journal article on extension-related hair loss. A client's comfort alone is not a reliable screening test.
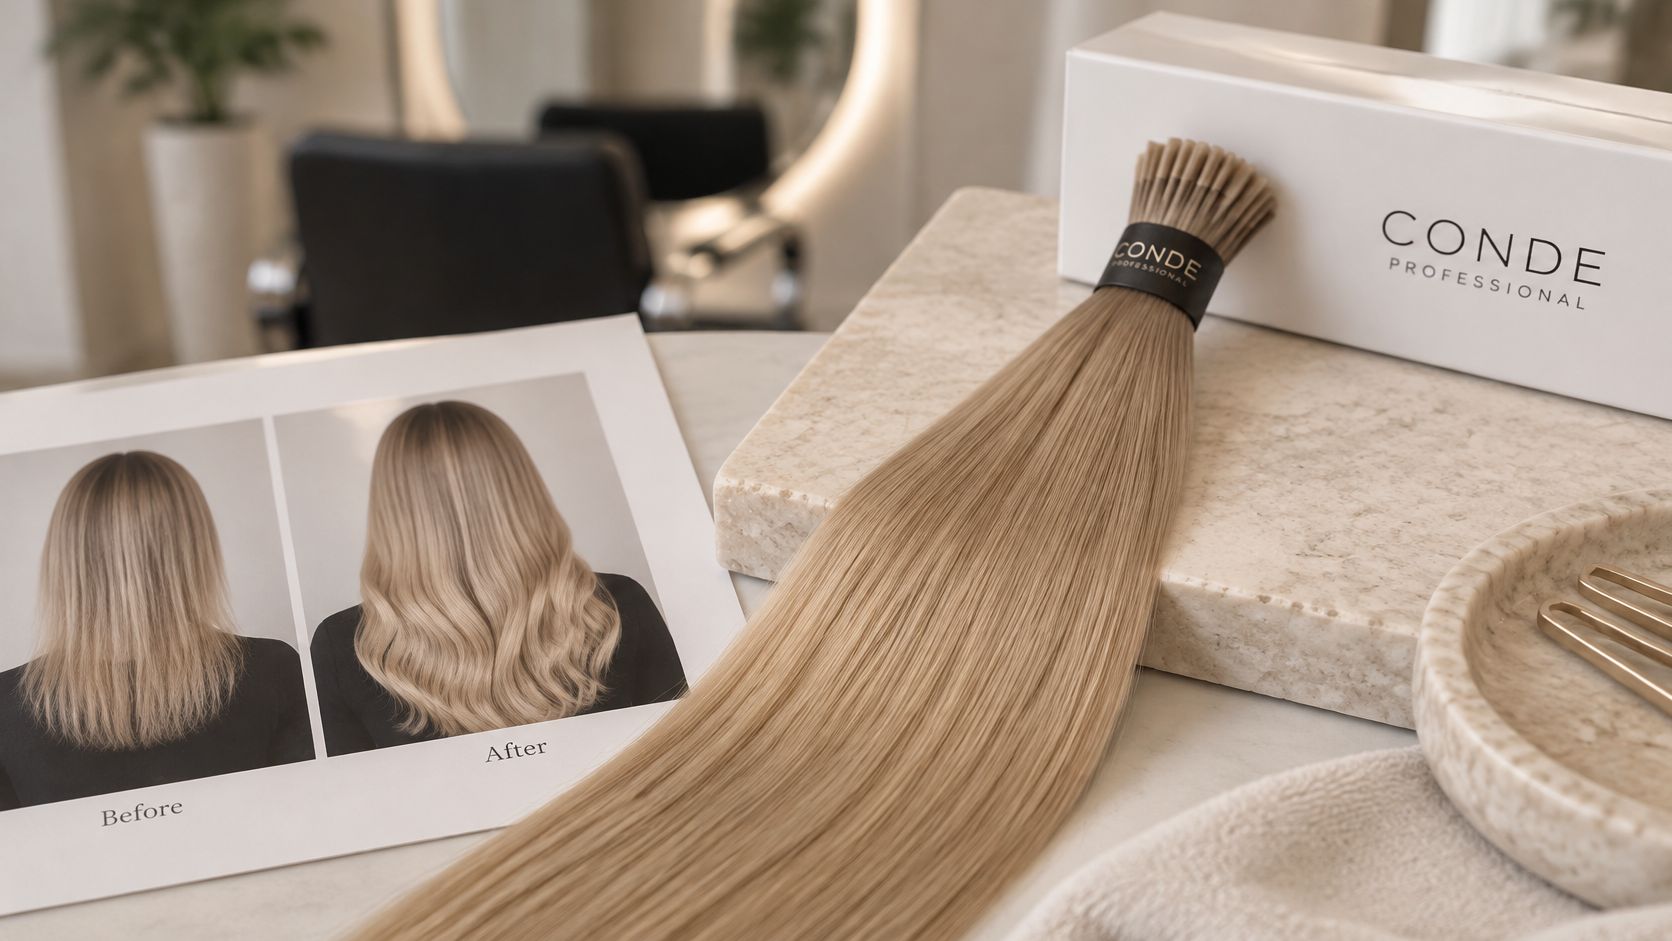
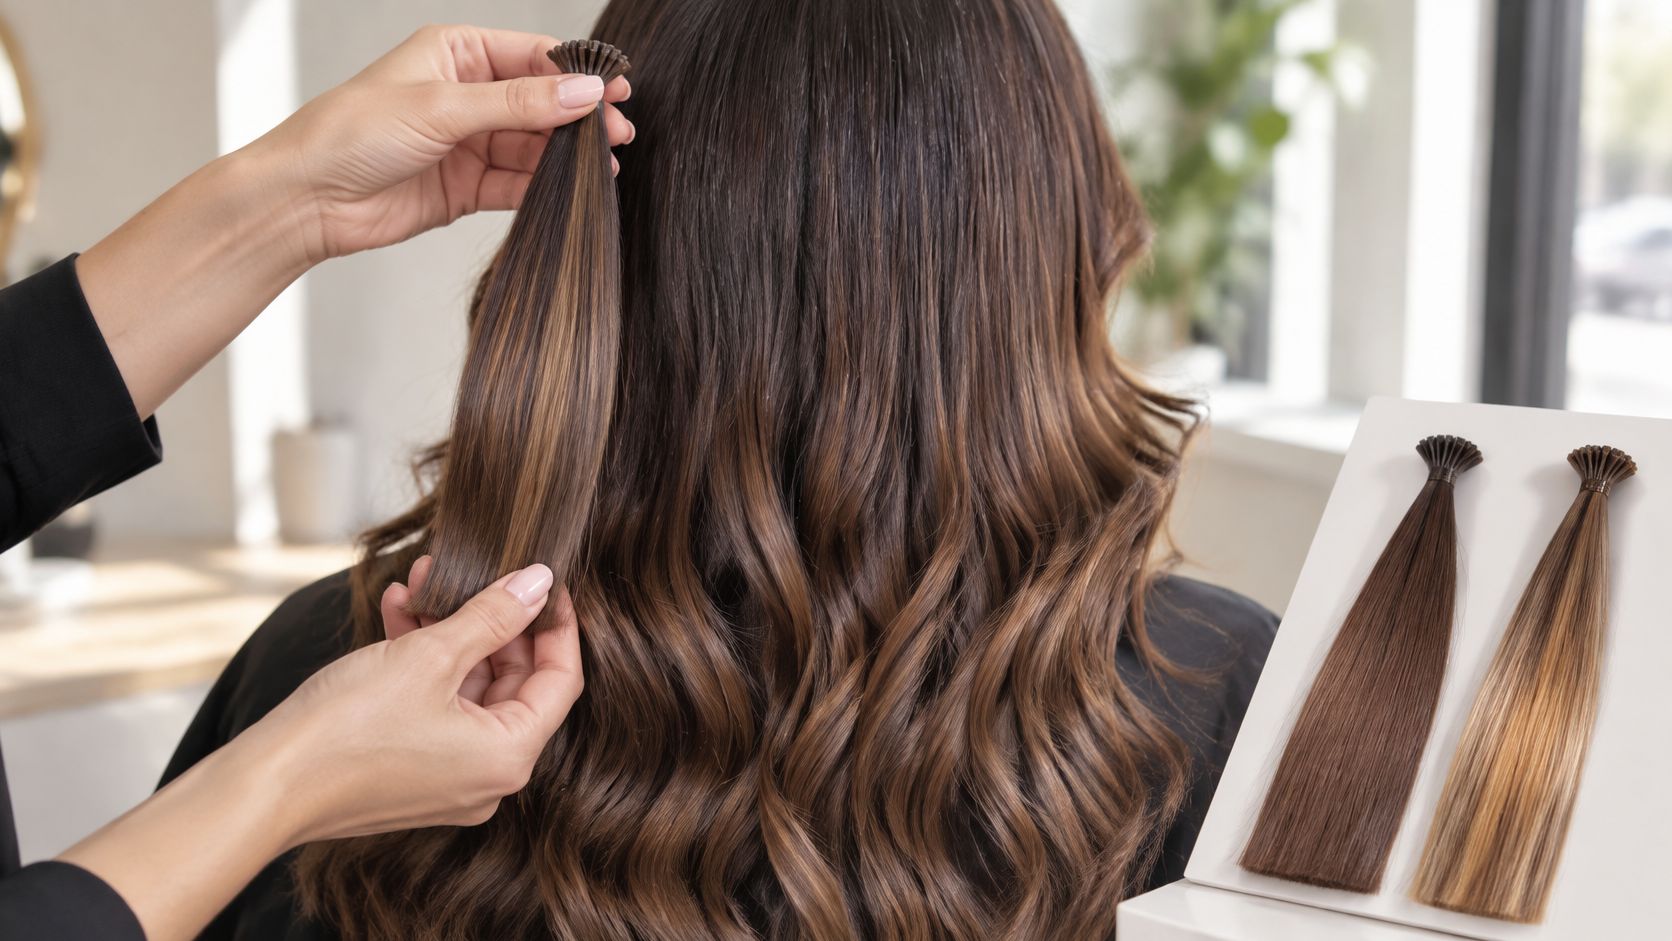
The reference image shows a solid light blonde against a mid-tone base. Use shade as a cosmetic target, never as a reason to proceed when the scalp or hair is unsuitable.
| Finding | Action |
|---|---|
| Pain, headache or persistent pulling | Stop; do not proceed with the install |
| Active thinning or preexisting traction alopecia | Decline and refer for medical assessment |
| Scalp redness, crusting, folliculitis or tenting | Defer until the scalp is comfortable |
| Fragile or chemically processed perimeter | Keep perimeter sections light and reduce extension mass |
| Length beyond shoulder level | Treat as a load factor; reassess whether the client's hair can support the added length |
Longer extensions add mechanical load. For fine, chemically processed or fragile hair, reduce the mass and keep perimeter sections light rather than trying to make the same set work with smaller sections. One review recommends limiting continuous wear to approximately 3 to 4 weeks before alternating with a natural style when feasible. That is a different schedule from the 16 to 20 weeks many clients may request.
Refer clients with persistent symptoms for medical assessment rather than trying to diagnose the cause in the salon. Record the baseline in the before image, including density, part-line visibility and hairline condition, so the comparison captures more than visible fullness. For clients already managing density loss, guidance on extensions for thinning hair can help set placement limits before discussing a quote.
A full-looking after photo cannot show whether the natural hair is carrying the bonds comfortably. Pickup size, bond position and extension weight determine both the visible blend and the mechanical load. A bond placed too far from the scalp gives tangles more room to pull on the natural strand, even if it feels secure at installation.
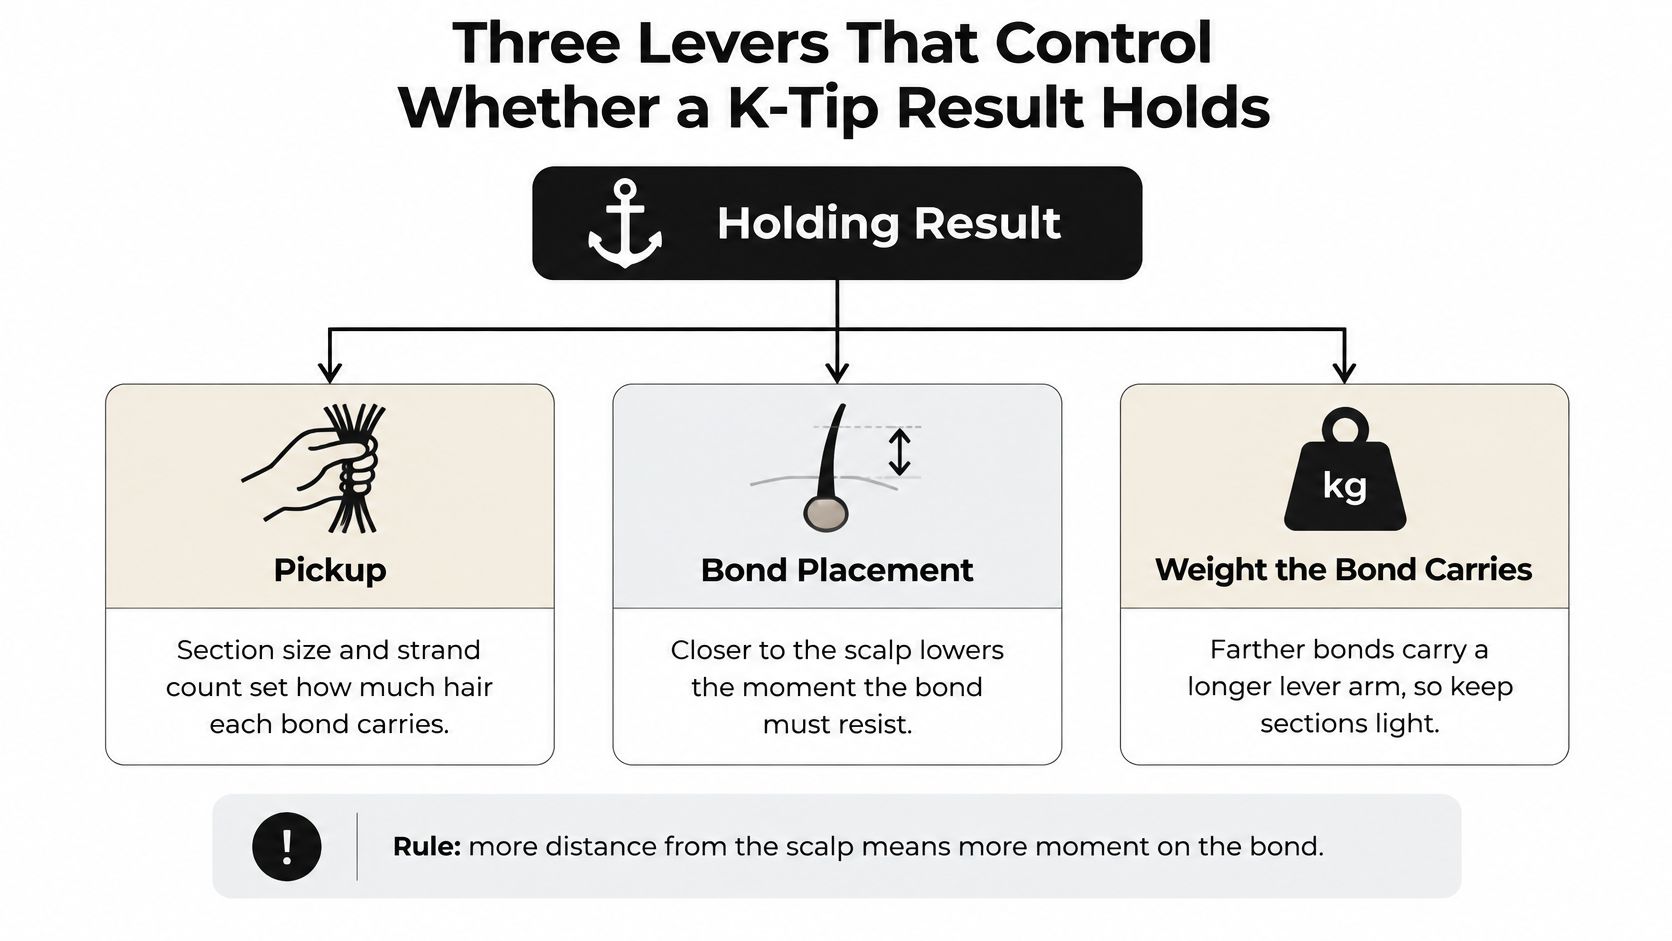
A keratin bond needs a clean pickup, clearance from the scalp, and enough natural hair to support its extension load. If the pickup is too narrow, the weight falls on too few strands. If it is too wide, the bond becomes bulky and harder to conceal and keep clean. Use a consistent parting pattern so neighbouring bonds do not compete for the same hair.
Before sectioning, assess the hair's ability to carry the planned set. If its condition calls for less weight, reduce the plan or decline the service. Choosing the set size before assessing the hair can lead to overloading weaker areas to meet a target.
Keep perimeter sections light and place more mass where the natural hair is strongest. Test one section under movement before proceeding with the full plan, checking bond stability and scalp comfort. Record the placement pattern so you can inspect the same areas during wear and follow the original layout during removal. The guide to K-Tip extension wear time provides context for setting expectations with the client.
A striking after photo cannot show whether each bond sits comfortably or whether the hair is under strain. Set heat by the keratin product's instructions, not by a universal salon default. Some formulations soften at approximately 120 to 150°C (248 to 302°F), while others specify higher temperatures. Check the product documentation and applicator compatibility before starting; do not transfer one product's setting to another.
The steps below use a flat keratin-tipped strand, such as K-Tip Light Blonde #8 Solid, a 100% human hair K-Tip in Level 8 Light Blonde listed at $300.
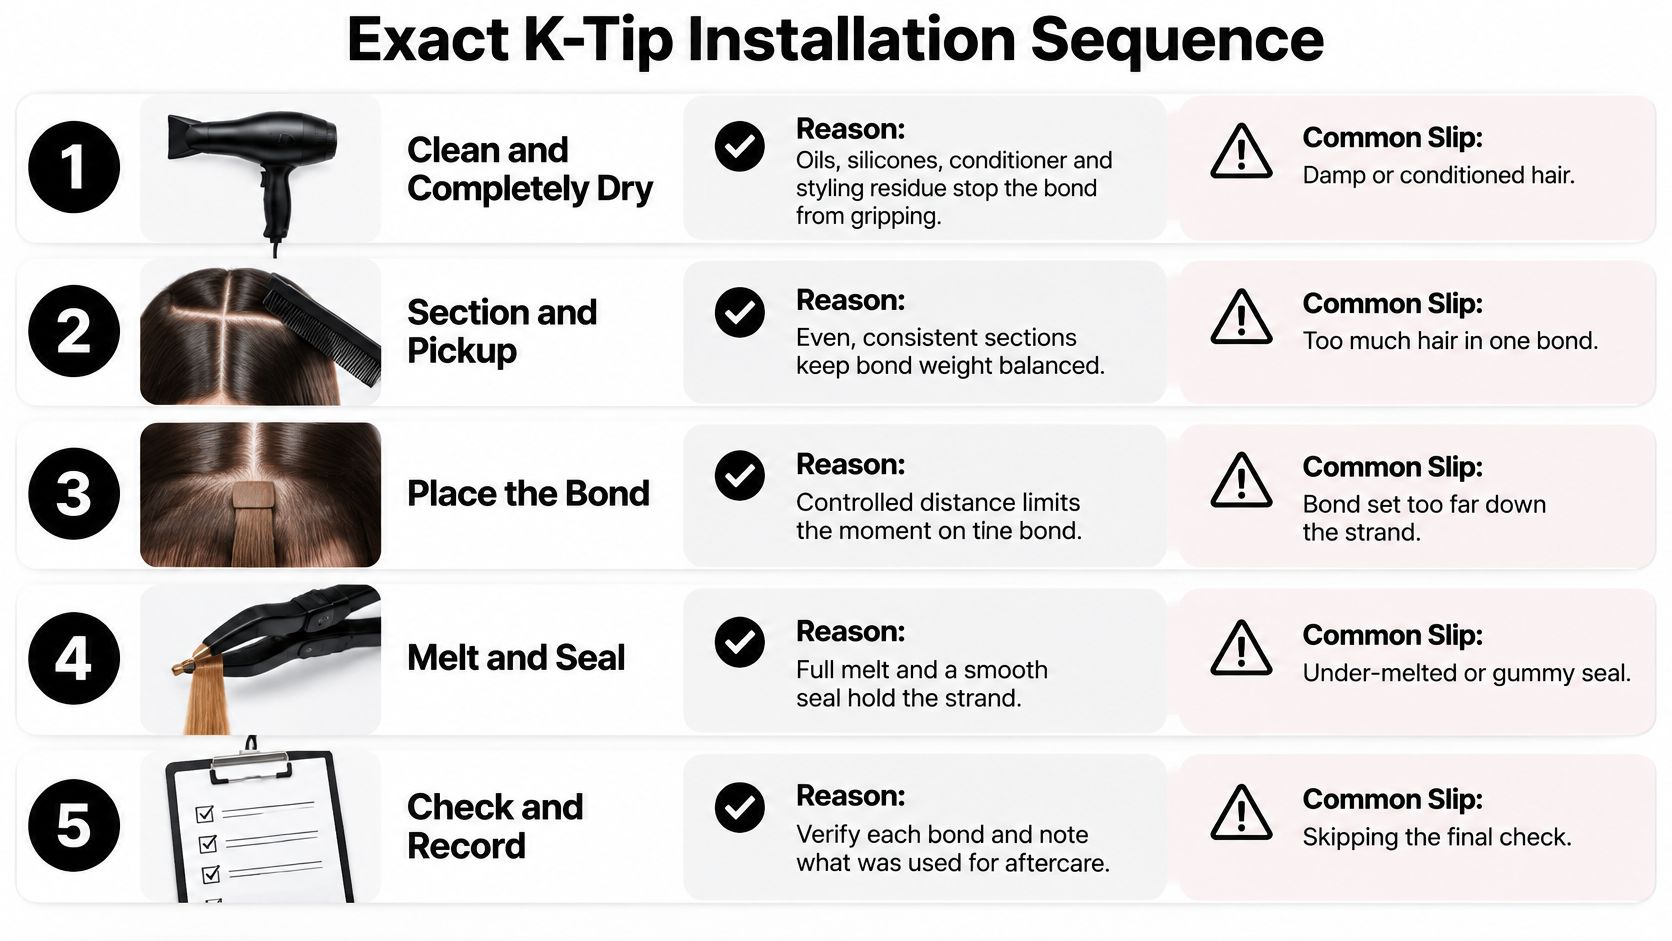
Heat-setting reminder: Follow the instructions for the specific keratin product and applicator. There is no single temperature that suits every formulation.
Bonds sit flat, and the client feels comfortable rather than merely tolerating the install. The color blend should hold up in daylight, not only under salon lighting. A polished photo is not enough if the bonds feel uncomfortable or the placement looks strained. Remove or correct any bond that fails those checks before calling the service complete.
Matting near the bonds can turn routine movement into repeated pulling on the attached hair. As bonds grow away from the scalp, they have more room to move, so tangles near an attachment deserve prompt attention. A full-looking after photo cannot show whether a bond is pulling or a client is tolerating discomfort.
| Symptom | Likely cause | Action |
|---|---|---|
| Tenderness or burning at bonds | Excess mass or tension at the attachment | Reduce mass and recheck placement promptly |
| Matting close to the bonds | Movement and tangling transferring pull | Detach and reinstall before severe matting forms |
| Thinning at temples or hairline | Sustained traction | Stop the service and refer for assessment |
| Broken fibers at the bond line | Overheated bond or aggressive removal | Adjust heat and slow the removal technique |
| Bond slipping or lifting | Contaminated hair or poor pickup | Clean the hair and reform the bond from a clean pickup |
Use the symptom to guide the response. Tenderness or burning calls for a prompt check and reduced load, rather than asking the client to endure discomfort until a routine appointment. For matting, release the affected bonds before the tangle tightens; forcing a comb through it adds pull.
Thinning at the temples or hairline requires stopping the service and referring the client for assessment. If fibers are breaking at the bond line, review heat control and removal technique. A slipping bond calls for a clean section and a fresh pickup, not extra heat on a bond that has already failed.
At follow-up, check each bond for separation and address tangles before they become severe. The extension aftercare guide covers daily brushing and washing practices that help keep bonds separated between visits.
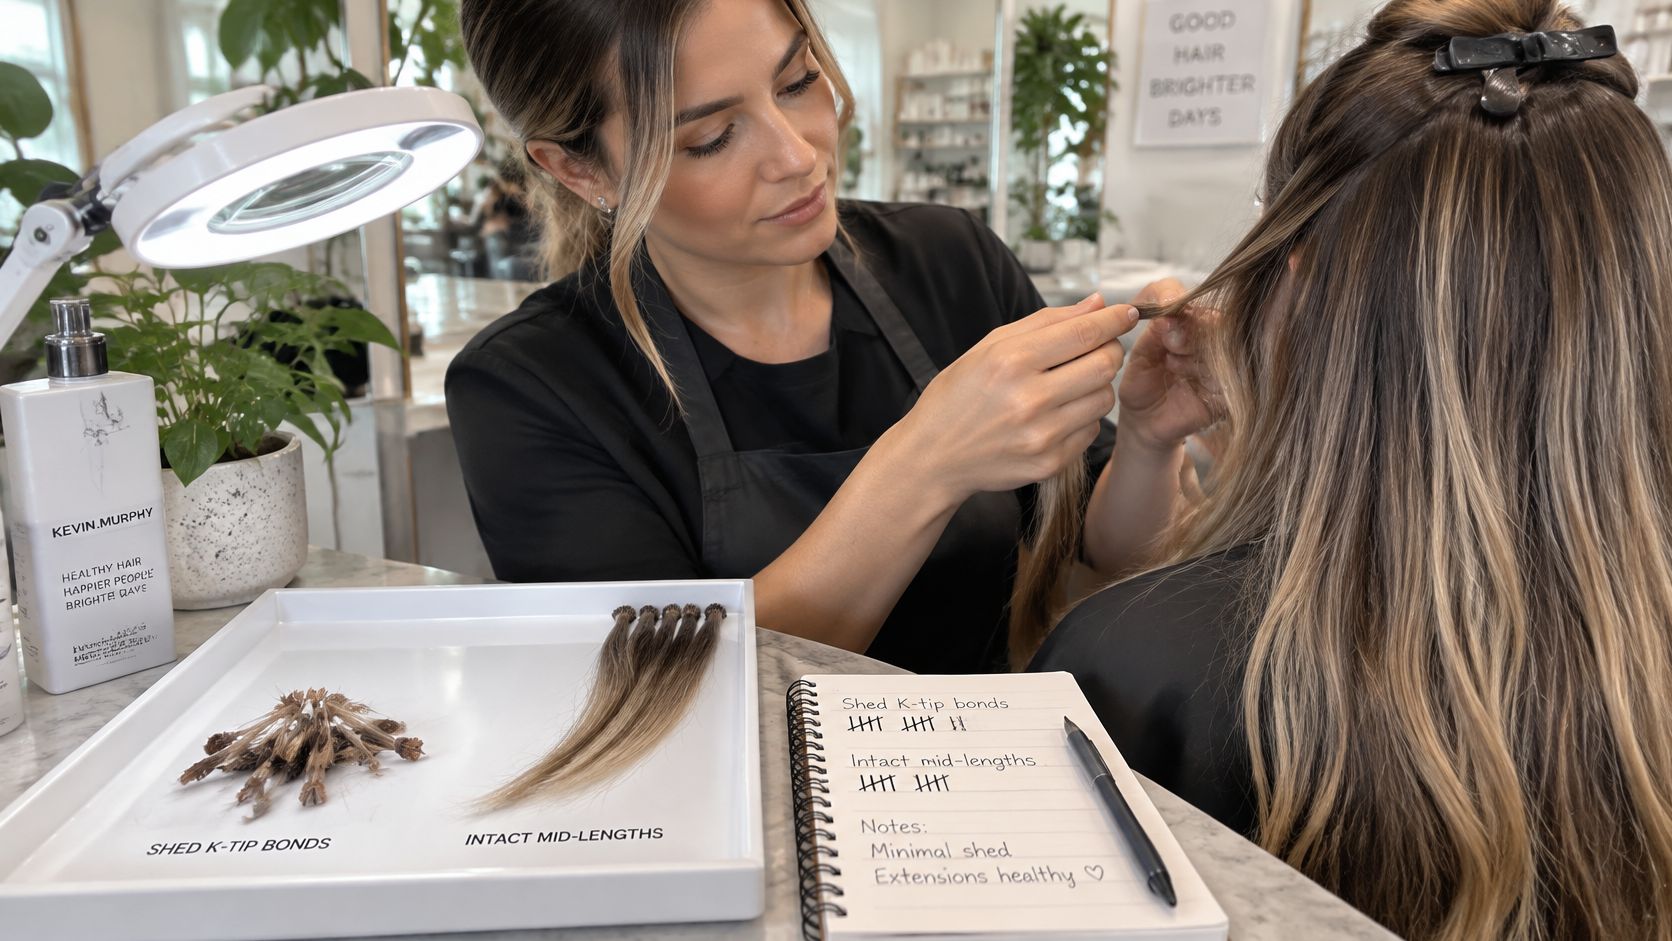
A full-looking after photo cannot show whether the scalp and hair are tolerating the bonds. Length and fullness do not indicate a safe install. At removal, compare what came out with the client's baseline: shed strands are generally full length, while breakage leaves shorter fibers with snapped or rough ends, often concentrated near attachment points. Persistent thinning, smooth patches or ongoing scalp symptoms call for referral rather than another install.
Treat removal as a chance to assess the hair. Photograph the attachment zones before and after the bonds release, distinguish shed strands from snapped fibers, and compare the hairline with the pre-installation baseline. A dermatology case report described acute hair loss 7 to 20 days after application, with alopecic patches at attachment sites, as noted in the British Journal of Dermatology case review. Check for changes in the weeks after removal, not only on the appointment day.
Repeated or prolonged tension can lead from reversible, nonscarring hair loss to permanent scarring alopecia, according to guidance on traction alopecia. Refer clients with persistent thinning, pain, itching, redness, pustules or smooth patches. When the hair is vulnerable, allow it to recover before considering another install. To distinguish a snapped fiber from a shed strand, review the structure of hair.
A full-looking after photo does not prove an install is sound. Judge the result by visible fullness and by whether the natural hair can carry the attachment without strain. For shade selection, assess the base in daylight: depth, undertone, lift, and regrowth. Compare samples with the mid-lengths and ends, then check the blend under the client's usual styling conditions.
Solid shades suit a consistent single-tone match; blended families can better reflect varied color through the lengths, but require careful shade selection. Conde Professional offers K-Tips in Solid, Balayage, Bronde, Highlights, Superblend, Rooted, and Fantasy shade lines. A blend that looks convincing at rest can appear busy in motion, so assess it styled, not only against a pinned sample.
The client's density, scalp condition, wear goals, and tolerance for attachment load guide the method choice.
Conde methods compared against K-Tip
| Method | Choose when | Trade-off |
|---|---|---|
| K-Tip | The client wants a salon-installed, semi-permanent result and the natural hair can support individual bonds | Each bond needs suitable placement and a baseline that can carry its load |
| Tape-In, Tape Weft, Volume Weft, Thin Weft, Clip-In, Bulk | A different attachment or wear pattern better suits the client's hair and intended use | Rows, panels, loose hair, or removable pieces behave differently from individual bonds; confirm method fit with product guidance |
Same-day check: Review the baseline and vulnerable zones, clarify intended use, and ask about the product's intended use, softening range, and safety documentation before installing the first bond.
Active thinning, scalp pain, or a fragile perimeter are reasons to defer K-Tips. They are also a poor fit when the client needs a short-term event look but does not want the ongoing care the method requires. A weft, tape, or clip-in method may better fit the client's hair and plans.
Ask for the intended use, softening range, and safety documentation. Confirm applicator compatibility, stated wear time before removal, and whether the shade family can match the client's base or requires a color service first. Written answers make it easier to select a method and set clear expectations.
Conde Professional's stylist education covers extension techniques and business skills, including improving installs, setting prices, and building an extension service. Those skills help turn a suitable method choice into a repeatable salon offering.
A sound next step is to match the method to the baseline, confirm the shade in the client's usual styling conditions, and resolve product questions before installation.
A K-Tip result should be judged by more than its first photo: the color must blend, and the attachment must suit the natural hair. Conde Professional offers K-Tips alongside Volume Weft, Thin Weft, Tape Weft, Tape-In, Clip-In, and Bulk hair, with education for stylists. Visit Conde Professional to explore the range and plan the next install around the client's needs.


