Your cart is empty
Tax included and shipping calculated at checkout

Menú de cajones
Tax included and shipping calculated at checkout
A professional account gives you stylist pricing, priority support, early access to new releases, and education developed by working stylists.


The popular map is wrong for a lot of heads. Neat, identical horizontal rows do not make a safe install, and pushing every attachment tight to the scalp is not a quality standard. How to section hair for extensions starts with the attachment unit and the load that unit puts on the hair under it. If the client's density, texture, or chemical history cannot carry that load, the row map has to change before the first bond closes.
The attachment unit sets the sectioning pattern. A tape panel, weft, bead, fusion bond, and clip each need a foundation suited to their shape and weight. Reusing one grid across methods can concentrate tension where the hair has the least capacity.
Standard cosmetology instructional materials describe four foundational designs: horseshoe, pivoting, profile, and radial. A horseshoe follows the crown while leaving the perimeter clear. Profile sections divide the head from front to back, radial sections direct hair from a central point, and pivoting sections adjust to changes in head shape. Choose the design around the client's natural part and the area the attachment must cover. Keep enough natural hair above the attachment to conceal it.
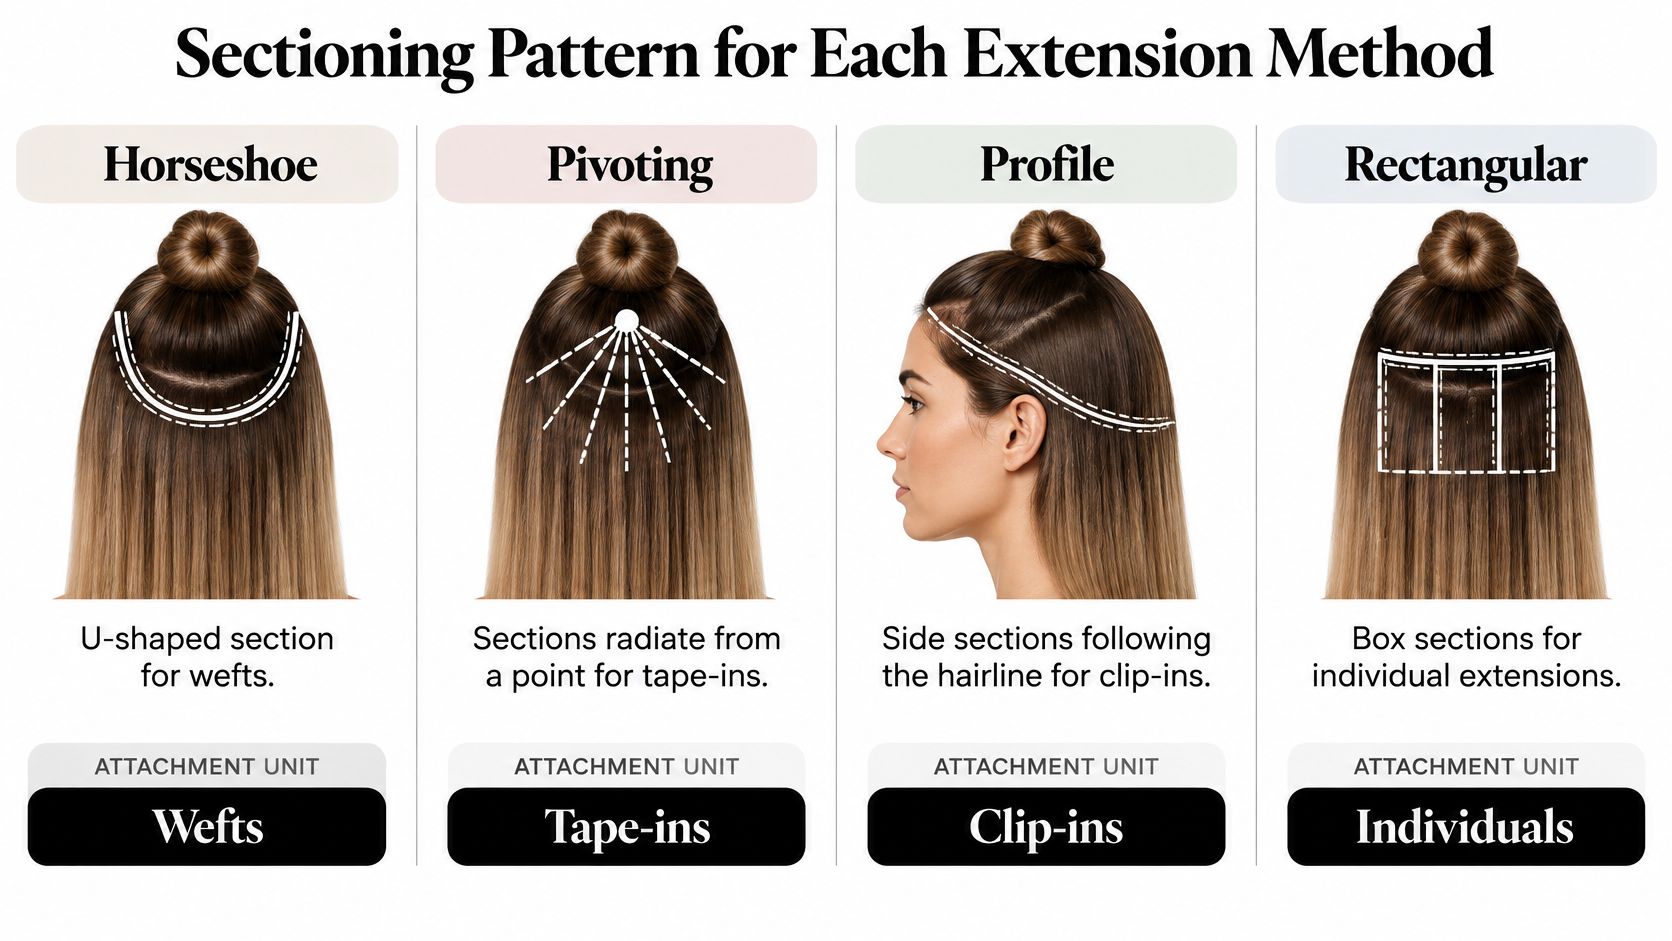
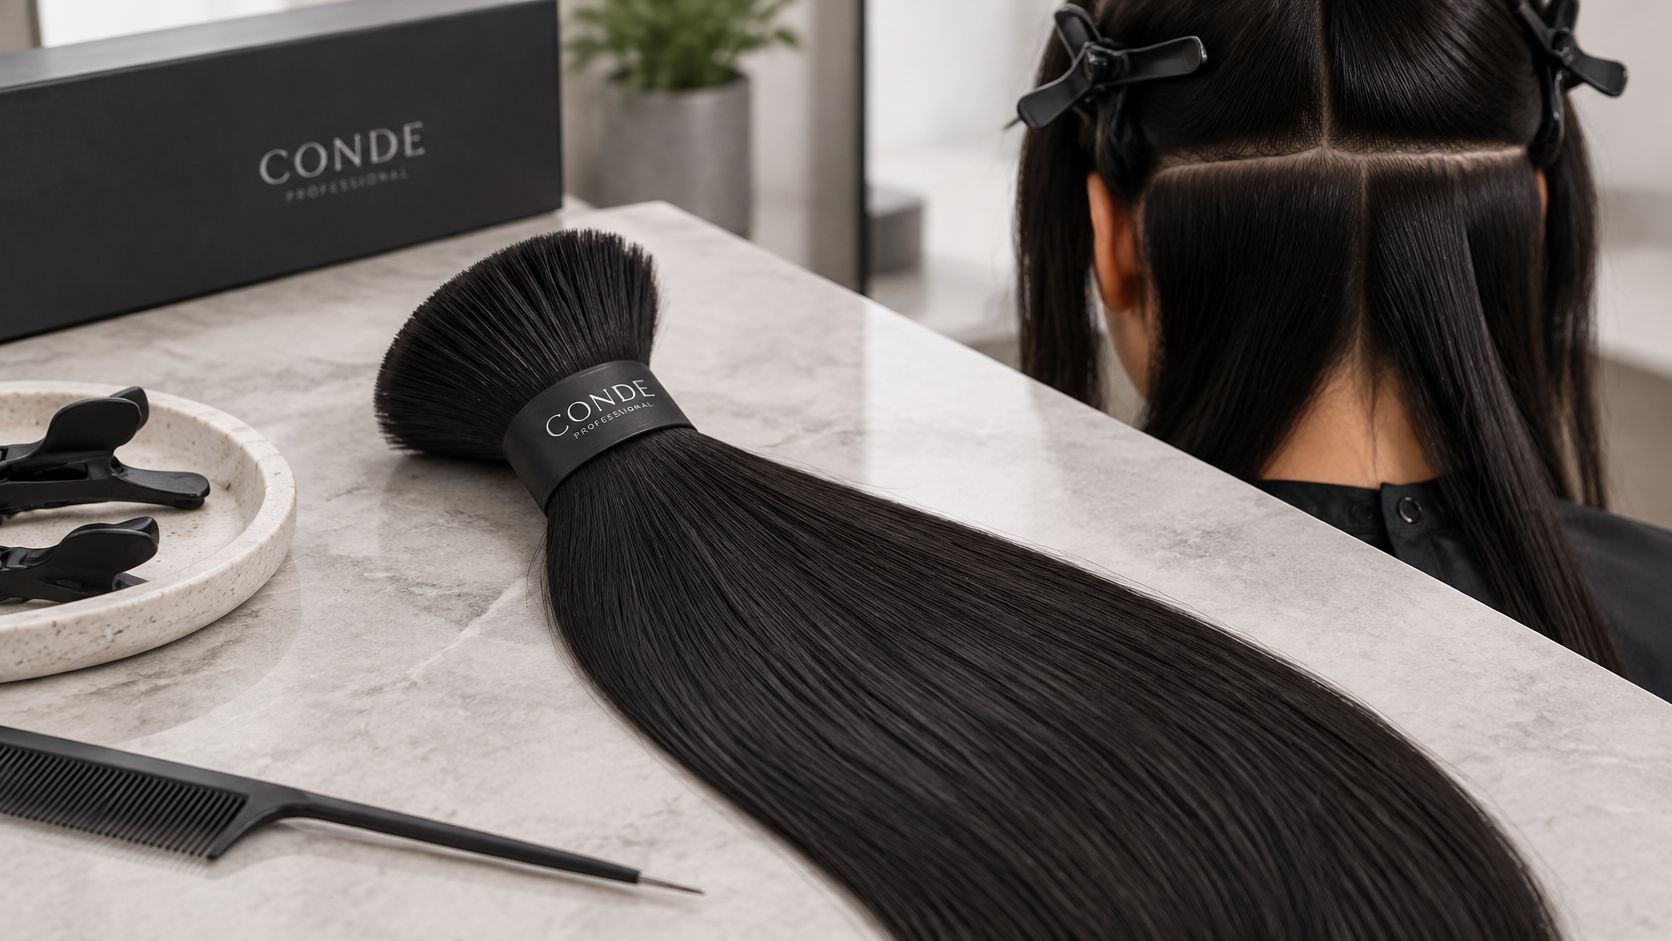
Conde Professional offers Volume Weft, Thin Weft, Tape Weft, Tape-In, K-Tip, Bulk, and Clip-In methods. Bulk extensions are loose Remy human hair bundles for custom installs. For example, Bulk Jet Black #1 Solid is a single-tone option for strand-by-strand or weft-by-weft work. The attachment units and their placement needs are compared in this guide to hair extension methods.
| Method | Sectioning pattern | Unit or section width | Spacing and placement rule |
|---|---|---|---|
| Tape-In | Horizontal rows from nape upward, offset in brickwork | Panel-width slice, no thicker than the bond can hold | Leave space between rows; increase it where the hair needs less load |
| Tape Weft | Horizontal rows matched to wide weft panels | Section matched to panel width | Leave enough natural hair above the panel to cover it |
| Volume Weft | Row geometry set by the weft coverage plan | Section matched to the weft's width | Stagger rows to avoid stacking weight on one vertical line |
| Thin Weft | Row geometry set by the weft coverage plan | Narrower slice matched to the thinner panel | Maintain coverage while limiting added weight per row |
| K-Tip | Strand-by-strand subsections, with surrounding hair isolated | Subsection matched to individual strand weight | Match each subsection to one bond |
| Bulk (hand-tied or micro-link) | Horseshoe parting curving beneath the occipital bone | One bead or one hand-tied pass per subsection | Keep the lowest row clear of the ears and nape hairline |
| Clip-In | Profile sections that follow the part and hairline | Weft cut to the section that must hide it | Place only where natural hair covers the clip line |
For beaded rows, curve the horseshoe beneath the occipital bone and keep the lowest row clear of the ears and nape hairline. Leave the center nape open when needed, then place separate beads rather than linking them into a chain. The map should protect exposed edges and avoid concentrating attachments in one narrow zone.
Wrong map: A full Volume Weft row on fine, fragile hair around the temples can overload the hair needed to conceal it, even when the panel looks covered in the chair.
A clean parting can still overload the scalp. Section size is load management: how much natural hair, and how much added weight, each attachment is allowed to carry. Fine or thinning hair needs a narrower slice than thick hair so each point holds less, not so the line looks neater.
I start fine or thinning hair at 0.5 to 0.75 inch, and use about 1 inch only where density is thicker and the hair is not fragile. That range cuts weight at each attachment and keeps rows off exposed edges, temples, and a visibly sparse crown. On a bead or weft foundation, a rectangular or square base should match the attachment width. On a curved scalp, a scooped section reduces the pressure a rigid square creates. Keep the stagger already set for weft rows, so weight is not stacked on one vertical line.
Milady's standard cosmetology curriculum uses four to six sections across the back of the head, and more when hair is thick or highly textured, because a panel too heavy to hold loses control. It uses fewer sections on thinner hair, since extra subdivision only adds handling. The front, often less dense, is divided into three or more sections when the head needs it. For row-based work, the same curriculum uses approximately 2-inch partings, or smaller when the style needs it, cut clean with a tail comb.
Widths below are starting baselines. Change them after the tactile check.
| Hair profile | Section width | Back-of-head sections | Front sections | Adjustment |
|---|---|---|---|---|
| Fine or thinning | 0.5 to 0.75 inch | Fewer, to avoid excess handling | Fewer than a medium baseline | Keep each attachment's load low; avoid overloading isolated strands |
| Medium density | Near 1 inch where the hair is not fragile | 4 to 6 | 3 or more when needed | Use as the starting baseline |
| Thick or highly textured | About 1 inch | More than 4 to 6 if control requires | 3 or more | Narrower panels give each natural section more control |
| Low-density crown | At or under the fine-hair range | No extra panels through the sparse zone | Do not park rows on the thin crown | Keep rows away from visibly sparse crown areas |
Chemically processed or fragile hair often cannot carry that medium baseline even when the style photo looks full. Narrow the slice, open the row spacing, and move the attachment off the weak zone. Highly textured hair is a control problem instead: panels near 1 inch still need more back sections so each natural section stays holdable, without adding rows the density does not need.
Before the next row, run a tactile tension check. No single strand should feel sharply loaded, and the client should be able to move that section without a grab. Persistent pulling is a correction trigger, not a break-in period. For clients who already sit in the fine or thinning row, compare methods in extensions for fine, thin hair before any parting is drawn.
Excessive or sustained tension is tied to traction-related follicular damage, and that damage can become permanent if scarring develops. Width, attachment weight, clearance, and row spacing have to be judged together.
A cleaner part will not rescue a unit that is too heavy for the hair under it. Run these checks before the first parting, and treat sectioning as load management and a scalp-health decision.
Confirm the unit against the hair that has to carry it. A K-Tip or other fusion bond needs a subsection matched to that individual strand's weight, with surrounding hair isolated and one bond per subsection. Panel width, weft row geometry, and whether bulk takes a horseshoe instead of a tape grid are already set in the method table above. Do not reuse yesterday's template on today's density.
Read the scalp, not the style photo. Fragility, chemical processing, and density at the temples and crown decide whether a standard row can sit there at all. If those zones are the thinnest hair on the head, keep the first row off them. A row parked on sparse or processed hair concentrates weight on too few strands, which is a scalp problem before it shows up as a bad finish.
Dry-run the rows. Count them against the coverage you need, then confirm the lowest row clears the ears and the nape hairline by the clearance that method requires. Mark the part the client lives in. A shifted part makes every later measurement lie.
Letter grades from 6A through 10A are supplier marketing. Stylists have no shared standard behind these letter grades. Ask for measurable criteria instead.
Match the method to the hair you just checked. Tape suits a client who needs efficient coverage and has enough hair to close the bond without a thick, overloaded slice. Strand-based fusion suits a client whose hair needs smaller, controlled loads, one bond at a time. If neither unit can sit without a sharp load on isolated strands, stop before you section. The consultation checklist is where method, weight, and placement get reset before the service starts.
A tidy part is not the point. Each slice decides how much natural hair will carry that attachment, and whether the scalp can live with the load through the grow-out.
Work from landmarks, then from the nape upward. Release horizontal sections from the nape, leave enough hair between rows to cover the row below, and hold the row spacing already set for this head and density. Offset rows in a brickwork pattern so each panel sits over the gap between two panels below, with a small gap between neighbors in the same row. Judge the rows in the client's natural fall. Reserve the front hairline, temples, and nape before anything is placed there. Attachment mechanics for each unit are covered in how extensions are attached.
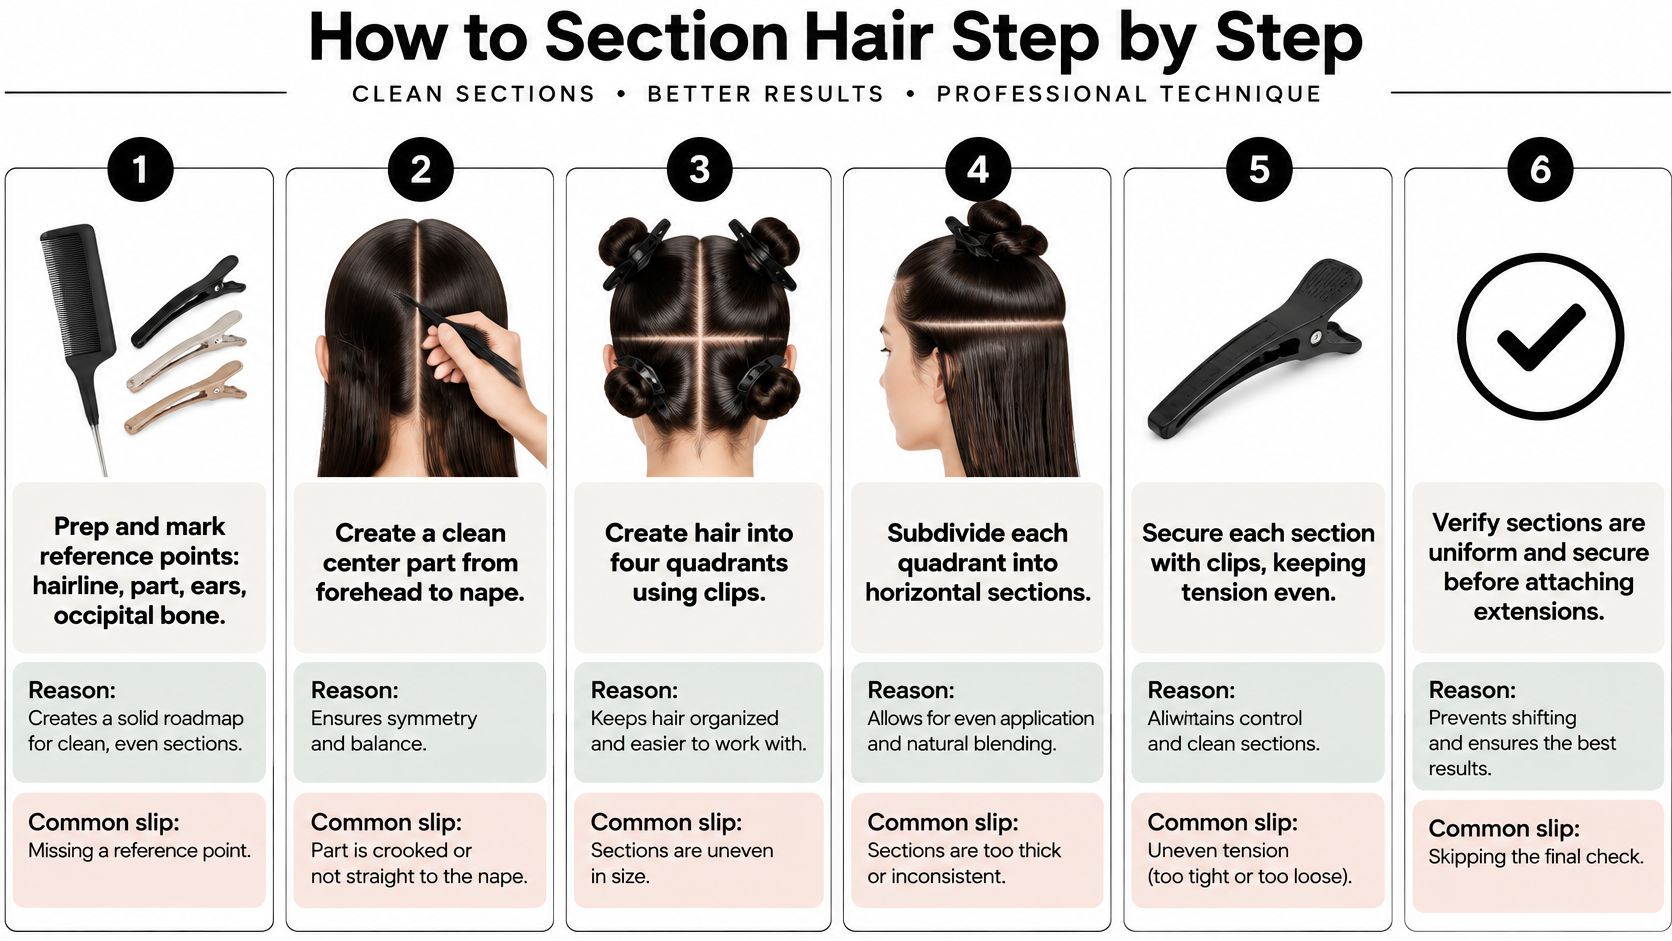
The acceptance test is simple. The attachment hangs with growth, with no pinching, distortion, or resistance.
Fine, fragile, highly textured, chemically processed, or low-density hair will not carry a standard row map. Sectioning is a load-management and scalp-health decision. Row width, spacing, and where you seat the attachment all change once the hair under the row cannot support the weight you planned.
I drop the textbook map as soon as the tactile check fails. Change the install in this order.
Thinner sections are not automatically safer. A slice packed with too much hair keeps a tape bond from closing. A slice with too little hair puts that attachment's weight on fewer strands and raises root tension. Close the bond only on hair that can hold it. Constant tension at the root is how traction alopecia starts, so a pull is a reason to rebuild the map. On a shorter cut there is less hair to hide a heavy row, so placement on a bob needs its own plan in extensions for a bob.
| Sign | Likely cause | Immediate adjustment |
|---|---|---|
| Pulling at temples or nape during movement | Excess tension or poor mapping in a fragile zone | Reopen and re-section; do not loosen surrounding rows to compensate |
| Client reports tenderness, headache, or redness | Load concentrated over a sensitive area | Stop the install and redesign the row map |
| Broken hairs at the attachment line | Too little supporting natural hair under the bond | Leave more natural hair between scalp and attachment; reduce attachment weight |
| Tape bond will not close | Too much hair in the slice | Reduce the slice width so the bond closes cleanly |
Pick the next client and write down the method, the density profile, and the row map before anyone is caped. Section a test head in that same order. Record the row spacing, then turn and tilt the head and note where the hair pulls.
If that head, or that client, showed pulling or tenderness, run the redesign before you commit to the install. Change section width, row spacing, or attachment placement until the load sits on hair that can carry it. Fine, fragile, highly textured, or chemically processed hair often cannot hold the standard map, so the practice head is where you find that out.
Conde's professional courses teach installation technique and the business of premium extensions, including how to improve installs, set prices, and build the service. The collection covers Volume Weft, Thin Weft, Tape Weft, Tape-In, K-Tip, Bulk, and Clip-In. Sectioning only holds if the attachment weight matches the map you just chose.
Order the units for the map you just tested from Conde Professional before the next head hits the chair.


