Your cart is empty
Tax included and shipping calculated at checkout

Drawer menu
Tax included and shipping calculated at checkout
A professional account gives you stylist pricing, priority support, early access to new releases, and education developed by working stylists.


More hair can make a bob extension install harder to blend, not easier: DermNet's traction alopecia guidance identifies extension weight and sustained pulling as concerns, supporting a conservative build rather than maximum density. For hair extensions for bob haircut services, start with the shortest visible layer and the client's daily styling, then select the attachment, density, and achievable length.
A bob exposes mistakes that longer natural hair can conceal. The technical challenge isn't just adding length. It's keeping a deliberate perimeter, hiding the attachments during movement, and connecting short natural layers to added hair without building a second haircut underneath.
A client who tucks one side behind her ear changes the method decision: any attachment at that exposed pivot must stay concealed through her usual styling. For a bob, compare methods against the shortest visible layer and the client's daily habits first. The right method is the one that supports the intended shape without forcing the cut around an attachment.
| Method | Best Use on a Bob | Perimeter Visibility | Main Trade-Off |
|---|---|---|---|
| Volume Weft | Interior density behind a graduated bob | Moderate; the shortest usable layer must cover the top edge | A wide weft can create a shelf line at the crown |
| Thin Weft | Discreet length along a blunt or near-blunt perimeter | Low when coverage is adequate and the ends are slide-cut into the perimeter | Requires precise sectioning and cutting |
| Tape Weft | Flat, low-profile rows along a blunt perimeter | Low when natural hair covers the tape edge | Placement is committed until removal, so plan maintenance first |
| Tape-In | Individual pieces for targeted fullness | Low to moderate, depending on coverage in that zone | Requires disciplined tape-to-hair placement and rotation |
| K-Tip | Strand-level control around the nape and temples | Low when bonds sit inside concealed zones | Labour-intensive; bonds must avoid exposed short layers |
| Clip-In | Reversible length or fullness for daily removal | Moderate; clips may show when hair is tucked | Depends on careful sectioning and the client's daily handling |
| Bulk | Custom attachments built by the stylist | Depends on attachment size, coverage, and construction | The stylist must engineer the shape; it is not a plug-in solution |
Use the extension methods guide to compare attachment types during consultation. Beaded rows, microlinks, fusion bonds, and hand-tied constructions each need a separate coverage assessment. A familiar method can still be the wrong choice if its attachment lands where the bob exposes it.
A clip-in row across the pivot is a poor fit for someone who routinely tucks that side behind her ear. The attachment may disappear in the salon, then show as soon as she repeats that movement.
With fine, short natural hair, substantial requested length may require shorter added pieces and selective fullness rather than a heavier weft. Volume Weft is also the wrong choice when concealing its top edge would put it in an exposed crown zone. Choose for the perimeter the client will actually wear, not the length shown by an uncut piece.
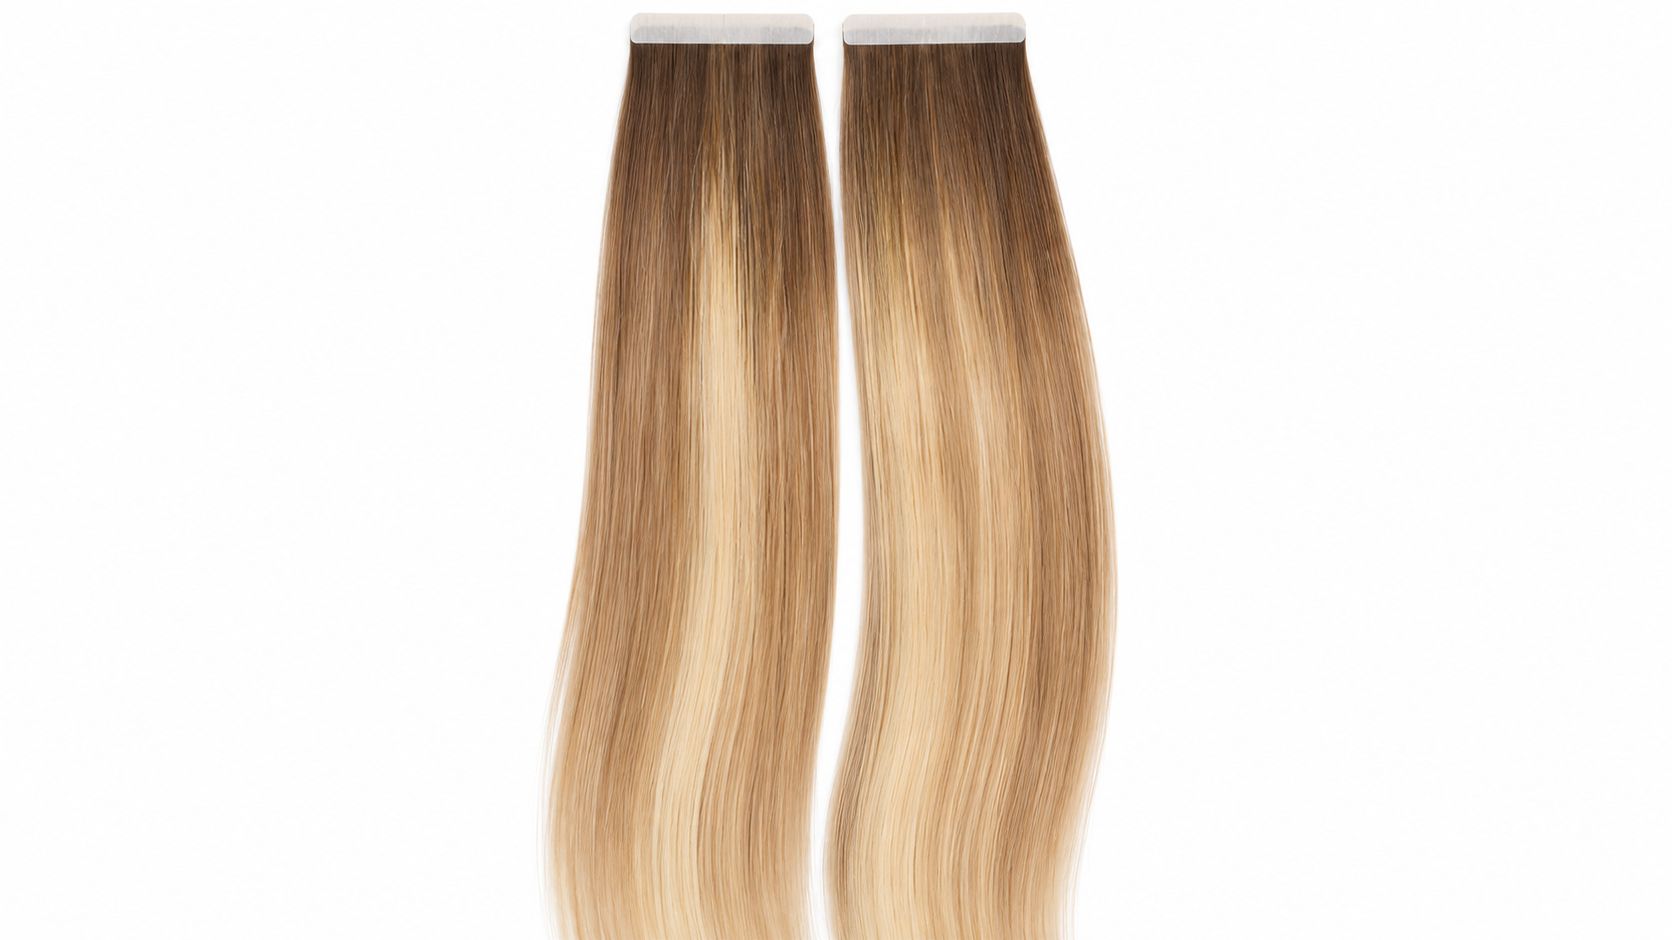
Tape-In Brunette #6/7/10 Balayage is an adhesive-backed weft panel with a multi-tonal gradient. Assess where the color transition will sit after cutting. The uncut piece can look balanced against the client's hair while its gradient falls in the wrong place once shaped.
Practical rule: If an attachment disappears only under a carefully arranged blowout, its placement has not passed.
Stop for pain, scalp tenting, or visible traction stress. A polished, invisible blend isn't evidence that an install should remain in place, and discomfort shouldn't be presented as an adjustment period.
Before sectioning, inspect for tenderness, crusting, folliculitis, existing thinning, chemical damage, and a history of traction alopecia. The dermatology review on traction alopecia supports screening, conservative extension volume and length, and avoiding installation over pre-existing traction alopecia.
| Signal | What It Usually Points To | Action |
|---|---|---|
| Pain during or after the install | Attachment tension that isn't being tolerated | Stop, remove or rebuild the attachment, reduce the added load, and reassess before rescheduling |
| Scalp tenting at an attachment | Weight or tension exceeding available support | Release the attachment, reduce volume, and redistribute rows |
| Itching, crusting or folliculitis | Possible inflammation requiring assessment | Stop and refer to a dermatologist |
| Broken hairs at attachment sites | Friction or sustained tension | Remove the stressed attachment, lighten the load, and recheck |
| Headache or loosening reported after the appointment | A possible attachment-zone problem | Schedule an early review and reduce tension |
| Existing thinning or traction signs before install | A reason to defer extension work | Don't install; refer for assessment |
Reducing a natural-hair support section while retaining the same extension load isn't a correction. Reduce the added hair or remove the attachment, then reassess the section's movement and support.
Photograph baseline density and the perimeter before installation. Record compromised areas on the placement chart rather than relying on memory at the next appointment.
Test a proposed attachment zone before completing the head. Check comfort with the head neutral, lowered, and turned, then release the surrounding hair to inspect coverage. A zone that fails this trial shouldn't become the foundation for the remaining install.
The chairside benchmark is no persistent pain, no tenting, no visible traction, and no inflamed attachment sites. Suspected alopecia, inflammation, or scarring belongs with a dermatologist, not beneath additional coverage.
Client reporting also needs a clear route. Give specific instructions to report headache, itching, broken hairs, or loosening promptly rather than waiting for the maintenance appointment. The response is an assessment and a material change where needed, not reassurance based on appearance alone.
Place attachments above the shortest exposed layer, but beneath enough natural hair to conceal them. Don't place an attachment where a layer must pivot freely, especially around the ears and a short nape.
Above the shortest layer describes vertical position, not permission to work close to the parting. Crown coverage still sets an upper boundary. If the space between those boundaries can't conceal the chosen attachment, leave the zone unfilled.
| Zone | Placement Rule | Watch For |
|---|---|---|
| Crown | Anchor above the shortest exposed layer while retaining a natural cover veil | Shelf line when hair is lifted or dried upward |
| Nape and occipital | Keep rows light and spaced; avoid stacking weight | Pulling when the head lowers or the neck flexes |
| Temples and ears | Stop before the tuck pivot and retain free-moving coverage | Visible attachment line during an ear tuck |
| Sides above shortest layer | Attach above the shortest visible natural layer | Show-through with a side part or wind-blown movement |
| Face frame | Keep bonds and beads out of exposed face-framing sections | Attachments visible during turns |
| Perimeter | Keep all attachment hardware inside the finished outline | Bulk or bond shine at the blunt edge |
At the crown, lift and dry the cover hair upward to expose a possible shelf. At the nape, lower the client's head; at the temples, perform the actual ear tuck. Test the sides with the client's alternate parting and gentle airflow, then inspect the face frame during a turn and the perimeter in a feasible ponytail.
A British Journal of Dermatology clinical report describes acute hair loss 7–20 days after extension application, reinforcing the need to assess attachment performance beyond the finished photograph.
For chemically treated hair near a short nape, consider fewer rows rather than shortening rows while concentrating the same load. The extension placement guide can support mapping, but a failed movement test requires a different build.
When the natural bob edge sits above extensions of one uniform length, the join can show even when the color matches. Build the blend from the bob's shortest visible layer and the client's usual styling, then shape the added hair to support the natural perimeter. A guide to blending extensions into a bob offers a finishing reference, but the haircut still needs to work at its everyday length and movement.
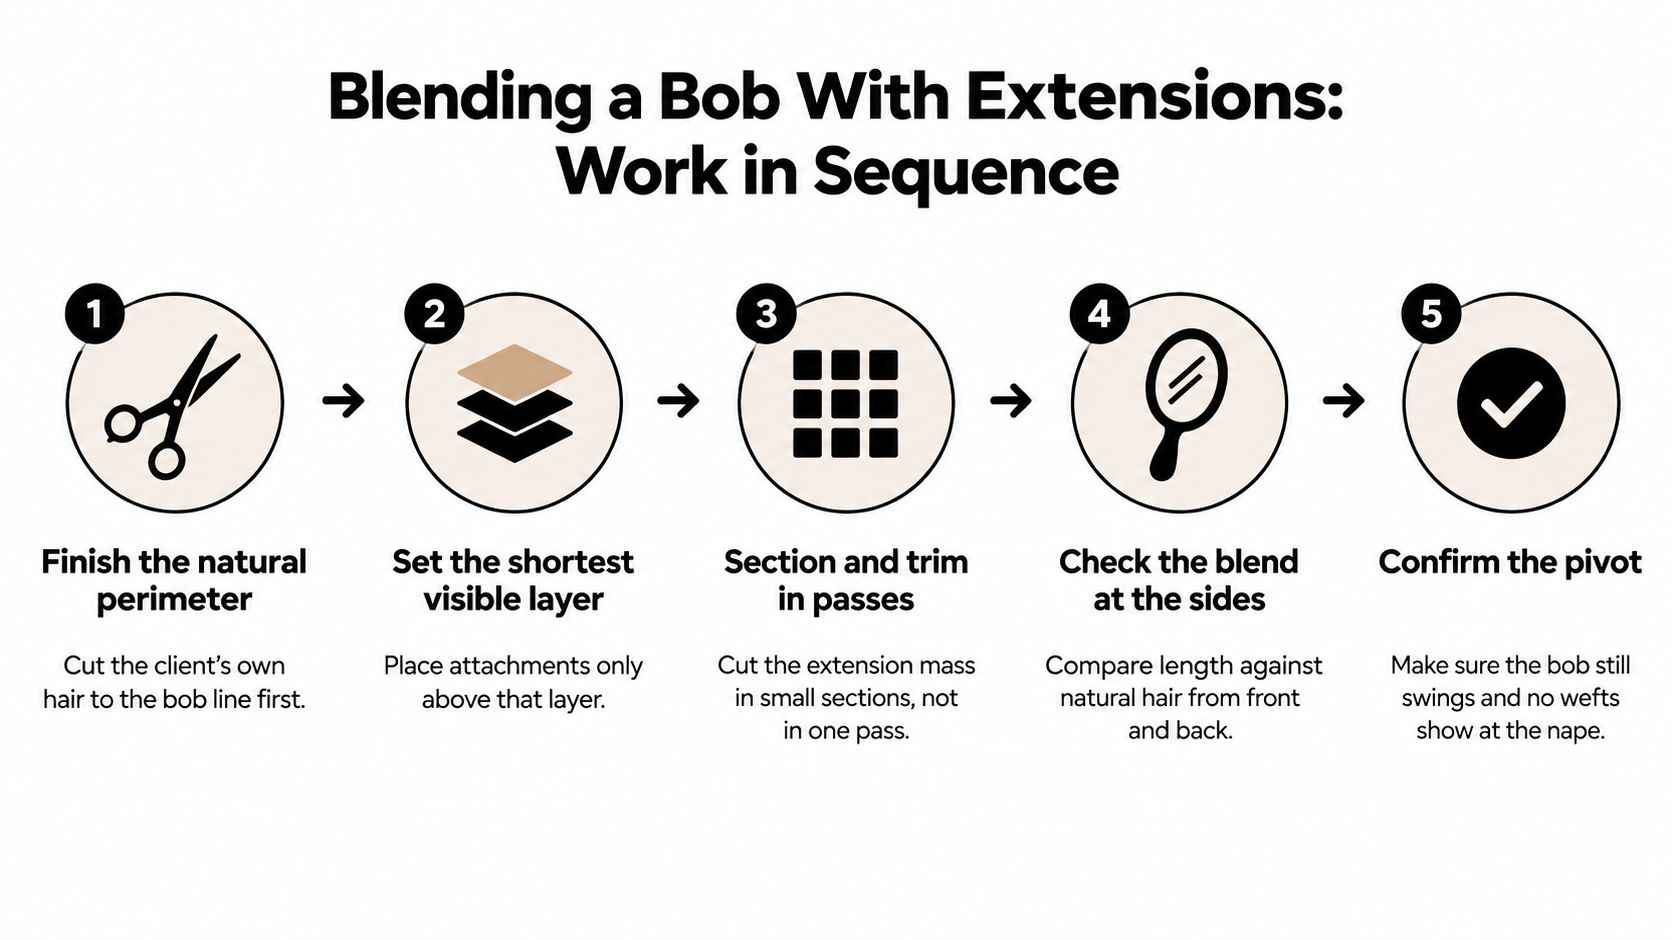
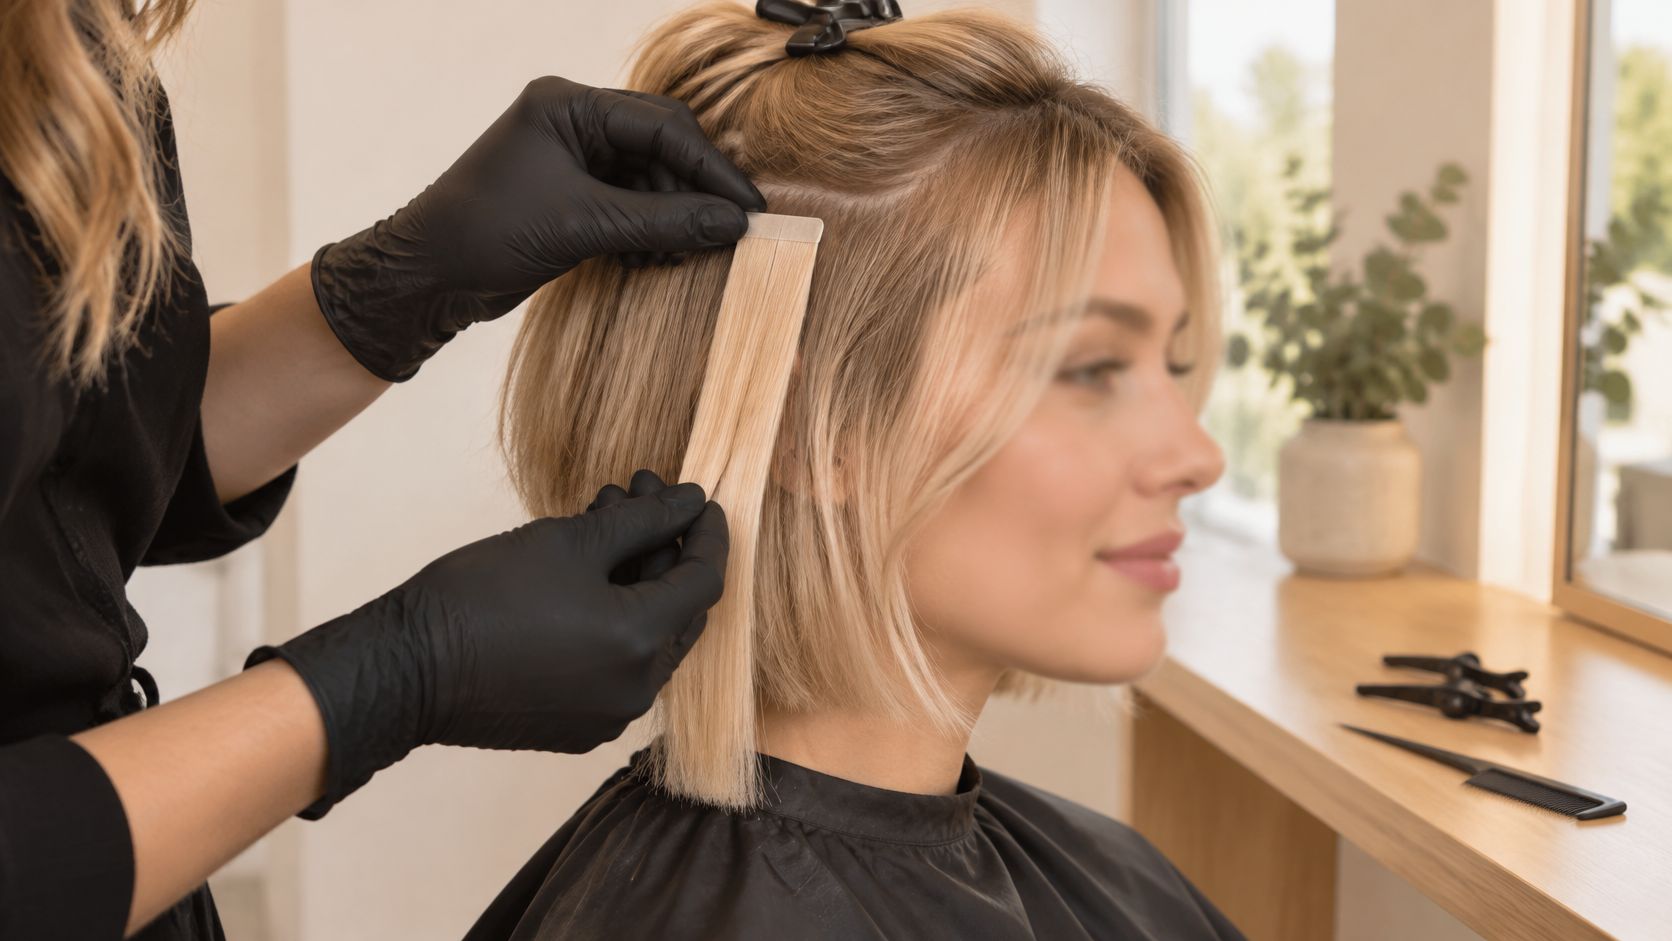
With a graduated bob and very short crown layers, the visual connection may need to start higher through the mid-shaft. That does not mean attachments should move higher. Cutting transition and attachment position are separate decisions, and short visible layers can expose both an abrupt blend and an unsuitable attachment.
For consultation language around cosmetic fullness, understanding volume loss and hair thinning offers context. Keep the service discussion focused on silhouette and coverage, without promising a treatment outcome.
The pass-or-fail point is simple: the natural bob and added hair must move as one shape.
Match the shortest visible natural layer and the ends remaining after the haircut. Root matching alone can leave the bob's exposed edge disconnected from the added hair, especially when the cut removes previously lightened tips.
Check the color ring against the finished natural perimeter before selecting the extension shade. Compare warmth, depth, and the position of dimension, not just the overall impression of a swatch held beside the client's face.
| Shade Family | Best Use on a Bob |
|---|---|
| Solid | Uniform single-tone bob |
| Balayage and Highlights | Dimension that must carry through the perimeter, where seams are readily exposed |
| Bronde | Warm mid-tone clients |
| Superblend | Natural base sitting between tones |
| Rooted | Softening the visual transition around natural growth at the nape |
| Fantasy | Statement color with an agreed maintenance commitment |
Confirm each family's shade description on its collection page before ordering. Family names help narrow the selection, but they don't establish the exact placement of depth or lightness within an individual piece.
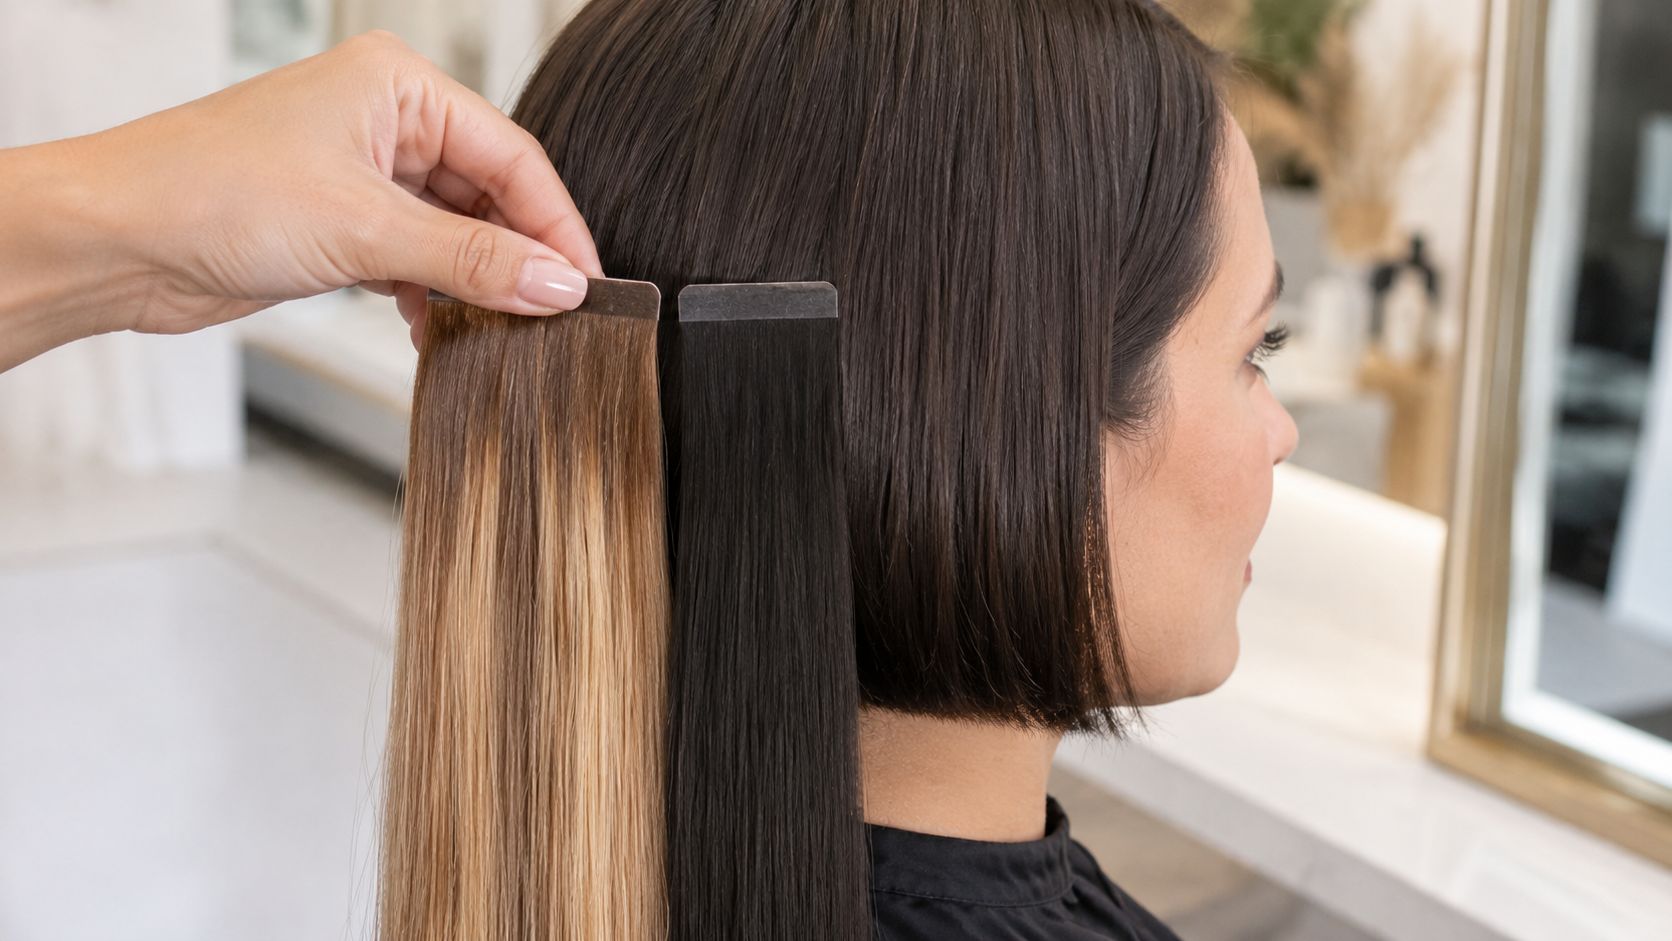
Use the color ring in the lighting the client regularly occupies, not exclusively beneath salon lighting. Hold the candidate shade beside the nape, then compare it against the sides with the hair released.
A high-contrast natural bob paired with a uniform solid extension shade can expose every transition. A dimensional selection or a less dense placement may connect better than adding another solid piece.
Where the finished cut reveals more natural base, carefully placed lowlights in the natural layer may improve continuity. Agree on that color service before installation, and assess chemical suitability independently rather than treating color as a guaranteed correction.
A correct shade in the wrong vertical position still reads as a mismatch.
Use the color-matching guide to structure the consultation. Record the chosen shade, lighting checks, and where its dimension should fall after the extension cut so the next appointment starts with a reproducible reference.
Set the maintenance plan on install day, before the client leaves. A bob needs attachment assessment and shape assessment together, because a secure attachment can still sit beneath an outgrown, disconnected perimeter.
The timeline should distinguish a post-install review, a condition-led check, method-appropriate maintenance, and eventual removal. Don't use move-up as a blanket term for every system. Some installations require removal and reapplication or replacement rather than repositioning existing attachments.
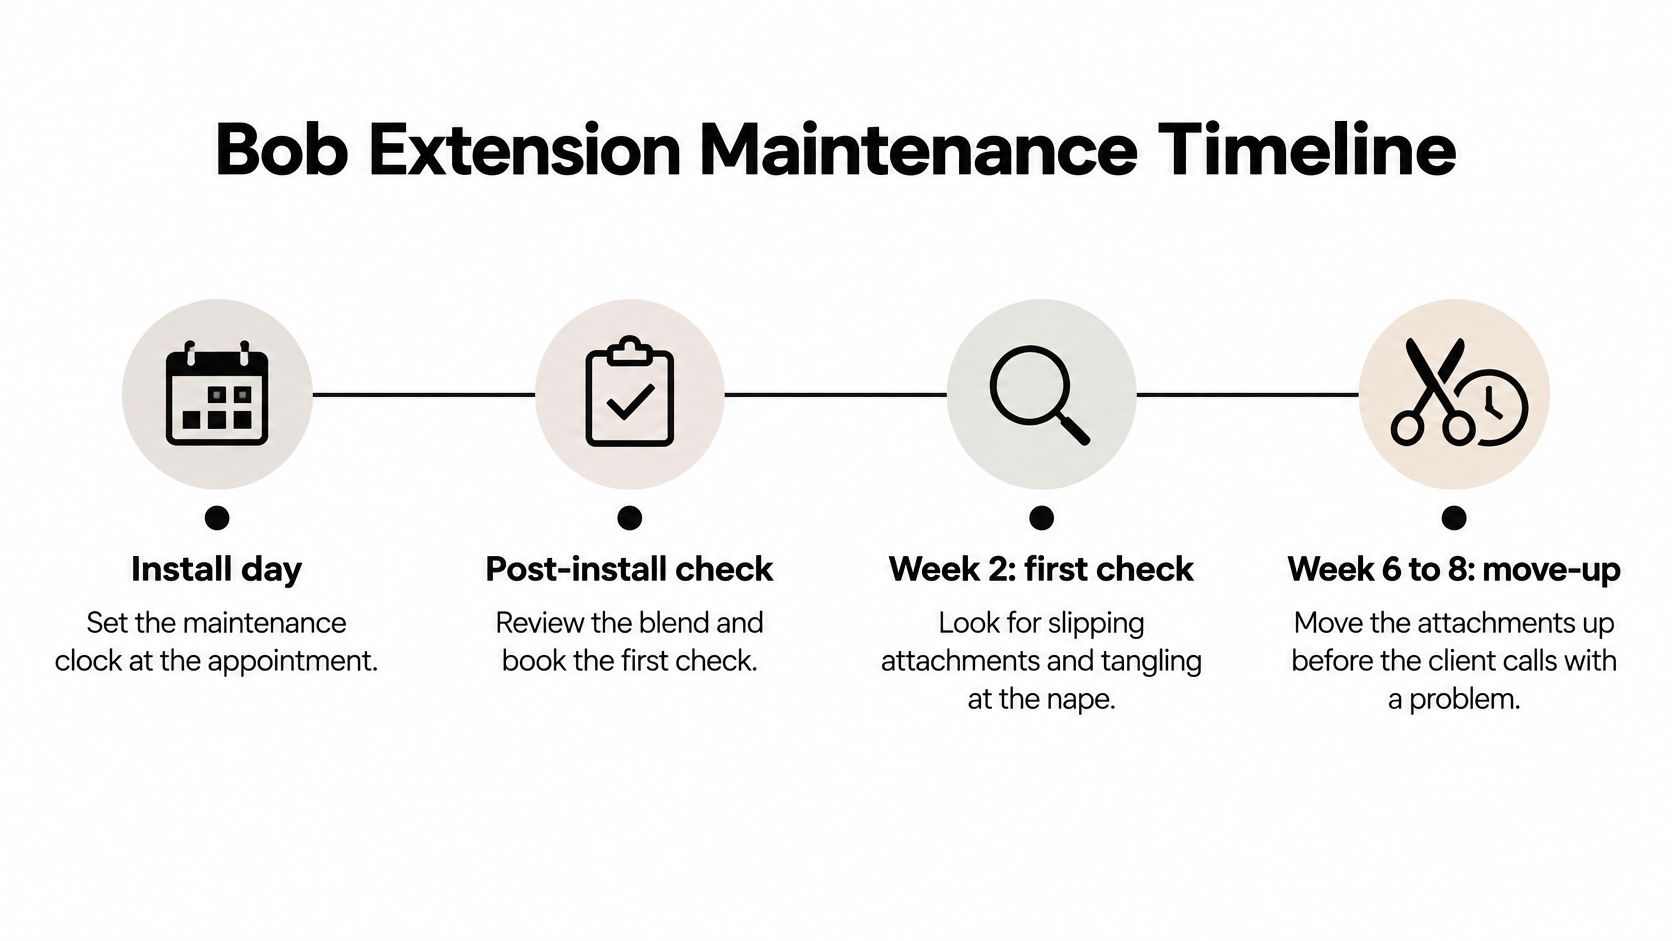
The graphic's dates aren't a universal service schedule. Johns Hopkins' summary of a published hairstyling review cites removal of weaves and extensions for a recovery interval after approximately 6–8 weeks, and a limit of roughly 2–3 months for braided styles; those are clinical recommendations, not a manufacturer-specific move-up protocol.
Demonstrate brushing from the ends while supporting the attachment area. Have the client repeat the technique, particularly around the occipital sections where short natural hair and added length can separate.
For a practical cleansing discussion, Ella & Eden's scalp cleansing guide offers a useful companion resource. Pair any general cleansing advice with the installed method's attachment-care requirements.
Keep removed pieces organized and away from heat-exposed work surfaces. The Conde Hair Professional Hair Extensions Stand is an acrylic stand that detaches for transport; confirm capacity and heat tolerance on its product page rather than assuming either.
The extension longevity guide can support service planning. Book the next assessment in the chair, since skipped maintenance can turn a manageable re-blend into a larger correction.
Complete the assessment before opening the hair. The useful consultation record is a placement decision another qualified stylist could understand, not merely a target-length photograph.
Keep these notes with the placement photographs and shade record. A documented bob service is easier to reproduce without defaulting to more density or longer hair.
Conde Professional offers wholesale extension methods, shade options, education, and product-selection support for licensed professionals planning bob services. Visit Conde Professional to open a professional account, then use the team's text, phone, or email support to confirm method and shade options before the next consultation.


