Your cart is empty
Tax included and shipping calculated at checkout

Drawer menu
Tax included and shipping calculated at checkout
A professional account gives you stylist pricing, priority support, early access to new releases, and education developed by working stylists.


A client arrives with a grown-out pixie, a clear request for length, and a reference photo showing a tape-in install. The service can work, but short hair gives very little margin for error. The natural hair must be long and dense enough to seal the sandwich, the perimeter must stay clear, and the haircut must provide internal length for the upper rows.
Tape ins on short hair should be treated as an install constraint, not an automatic yes. A discreet result depends less on how quickly the panels can be applied and more on whether the client's length, density, haircut shape, and maintenance schedule support concealment through the wear cycle.
A short-hair tape-in appointment can look clean at checkout and become difficult to conceal weeks later. Yes, but only when the natural hair can support and hide the attachment. Tape-ins place two adhesive strips around a thin veil of natural hair, creating a flat bond instead of a bulky bead or fusion point. That profile helped establish the method in the early 2000s. An history of tape-in extensions source dates modern tape-ins to around 2004, describing pre-taped wefts that applied quickly, sat close to the scalp, and suited fine hair needing added volume. It also describes a typical repositioning cycle of 6 to 8 weeks, with reusable hair lasting 6 to 12 months.
Those timeframes behave differently on short cuts. Longer hair can bury modest root movement. On a short bob, pixie grow-out, or cropped perimeter, the same movement can push a tab outward at the nape or temple. The bond may remain secure while becoming visible when the client wears the hair up, changes the part, or spends time in wind. The install must therefore be judged across the full wear window, not only on how flat it looks immediately after application.
Check these constraints before choosing a panel:
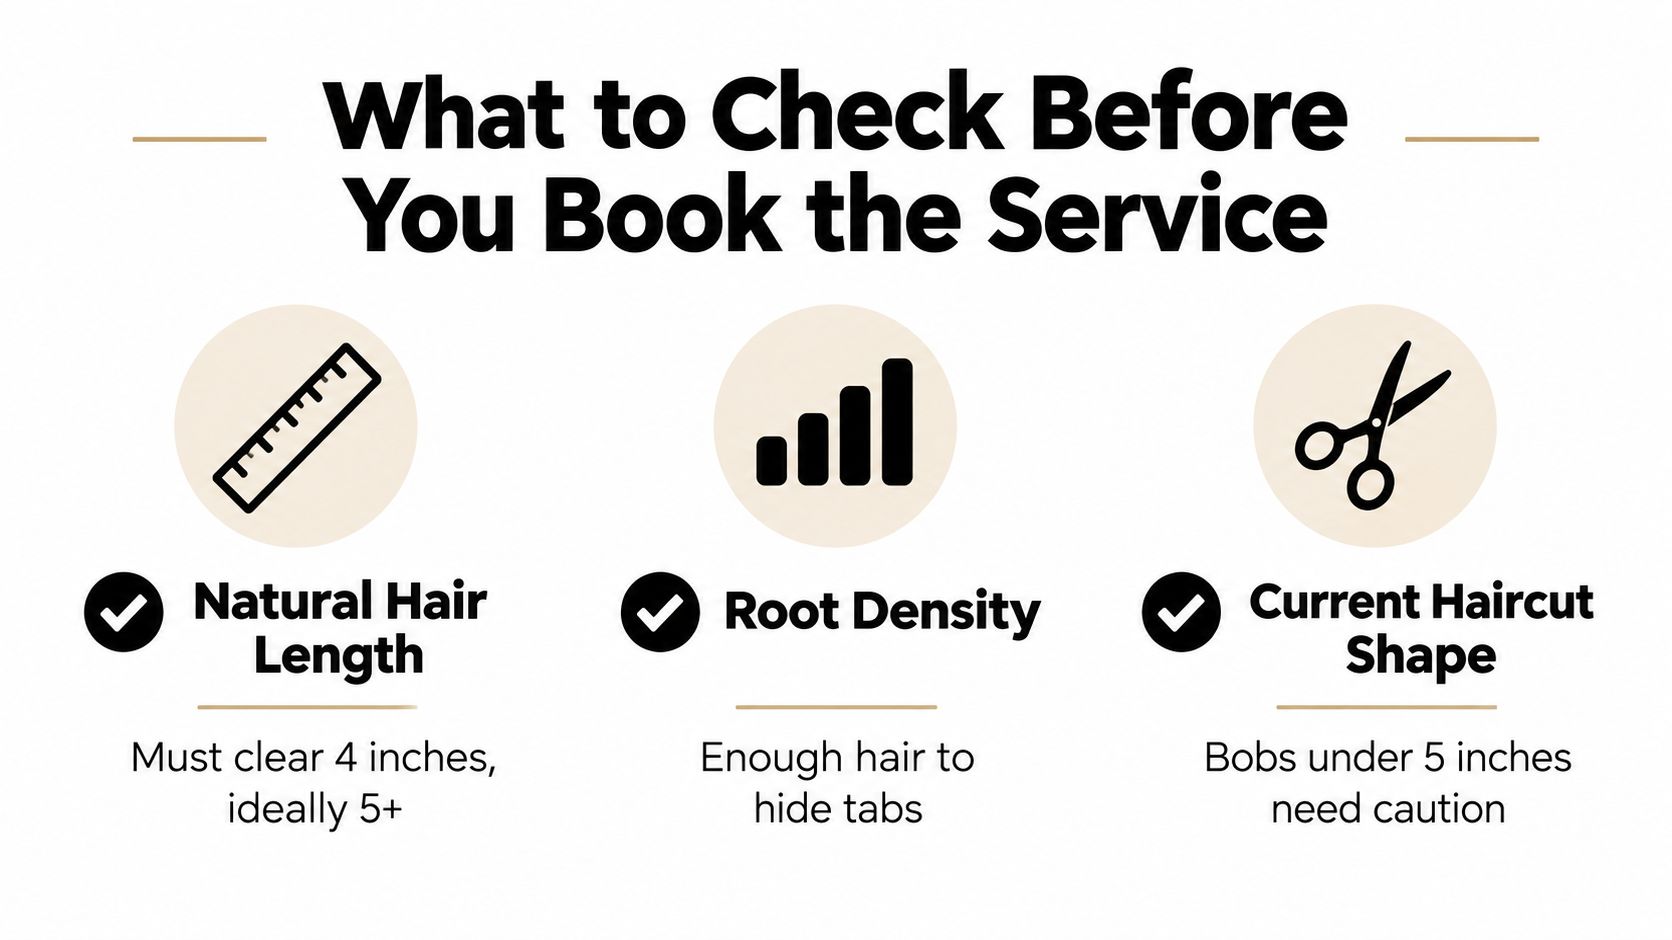
A practical lower threshold is about 3 inches of natural hair, with 3 to 4 inches generally giving the stylist a more workable range. This remains a judgment call, not a guarantee. Density, texture, and the haircut shape determine whether that length can form a complete veil over the adhesive. Fine or sparse hair may reveal the attachment even when the measurement is sufficient, while stronger density improves coverage and weight distribution.
Below the workable range, the adhesive may remain exposed from the start, and the extension ends can sit beyond the natural perimeter. As the hair grows, the bonds become harder to disguise. A different method or a planned cut transition may give the client a more honest result.
For further planning considerations, consult this guide on putting hair extensions on short hair.
A client may arrive with 3 inches at the crown and still be a poor tape-in candidate. The measurement only becomes useful alongside root density, internal length, and haircut structure. A compact bob can provide a stable base, while a layered pixie with the same visible crown length may lack enough connected hair to conceal the attachment as the client moves.
Around 3 inches can be workable when the hair has strong density and the cut remains connected. The stylist still needs enough surrounding coverage to hide the panel during normal movement. Fine hair, disconnected layers, and a short perimeter reduce that margin quickly.
Below the workable range, tape-ins are usually a poor choice. The adhesive may remain visible from the first day, and the extension ends can sit beyond the natural shape. Near the lower threshold, the install calls for smaller panels, conservative placement, and a client who accepts closer monitoring during the 4 to 8 week wear window. Short hair can look acceptable immediately after installation, then expose the bond as growth, separation, and daily movement alter the coverage.
At the upper end, a blunt or softly layered shape gives the stylist more usable hair for anchoring and blending. Density changes the risk as well. Fine or sparse hair may reveal the attachment even when the length is technically sufficient, while medium or fuller density offers more coverage and distributes the panel weight more evenly.
| Natural Length | Minimum Density | Haircut Type | Recommendation |
|---|---|---|---|
| Below 3 inches | Any density | Cropped, disconnected, or heavily undercut | Redirect to another method or recommend growing the base |
| About 3 to 4 inches | Medium or fuller | Compact bob or controlled layers | Proceed cautiously with smaller panels and conservative perimeter placement |
| 4 inches and above | Medium or fuller | Blunt bob or long, connected layers | Tape-in may be workable when the sandwich seals completely |
| 5 inches and above (internal) | Medium or fuller | Connected shape with a stable crown | Usually the cleanest short-hair setup for tape-in concealment |
The range in the table reflects professional guidance for extensions on short hair, not a universal guarantee. A long top layer over a short undercut can create a weak foundation, even when the visible crown measurement looks promising. Inspect the internal sections and perimeter before approving the service.
A heavy panel does not create fullness without a cost. On fine hair, it can collapse the root, pull the natural section downward, and make the bond easier to see. Matching the extension density to the client's own density usually produces a steadier visual result than choosing a panel for maximum volume.
Use a dry-hair coverage test during consultation. Ask: Can the natural hair cover the bond when it is dry, smooth, parted naturally, and viewed from behind? If the answer is no, the service is not ready, regardless of how attractive the reference image appears. The extension length guide can support the consultation when discussing length, density, and method selection.
Short-hair placement needs a map before the first panel is opened. A clean horseshoe or U-shaped parting keeps the top section reserved for the final blend, while the lower foundation rows follow the head's curvature instead of forming one conspicuous horizontal band.
Begin with the perimeter. The first row should sit clear of the nape hairline, and the side sections should avoid the shortest temple and sideburn hair. One independent placement guide recommends starting tape-ins about a quarter inch from the scalp, while another short-hair installation guide uses a first row roughly two fingers from the hairline and finishes rows about two inches above the ears. Those references are summarized in this short-hair tape-in placement tutorial. The exact distance still depends on the haircut and the amount of hair available to cover the attachment.
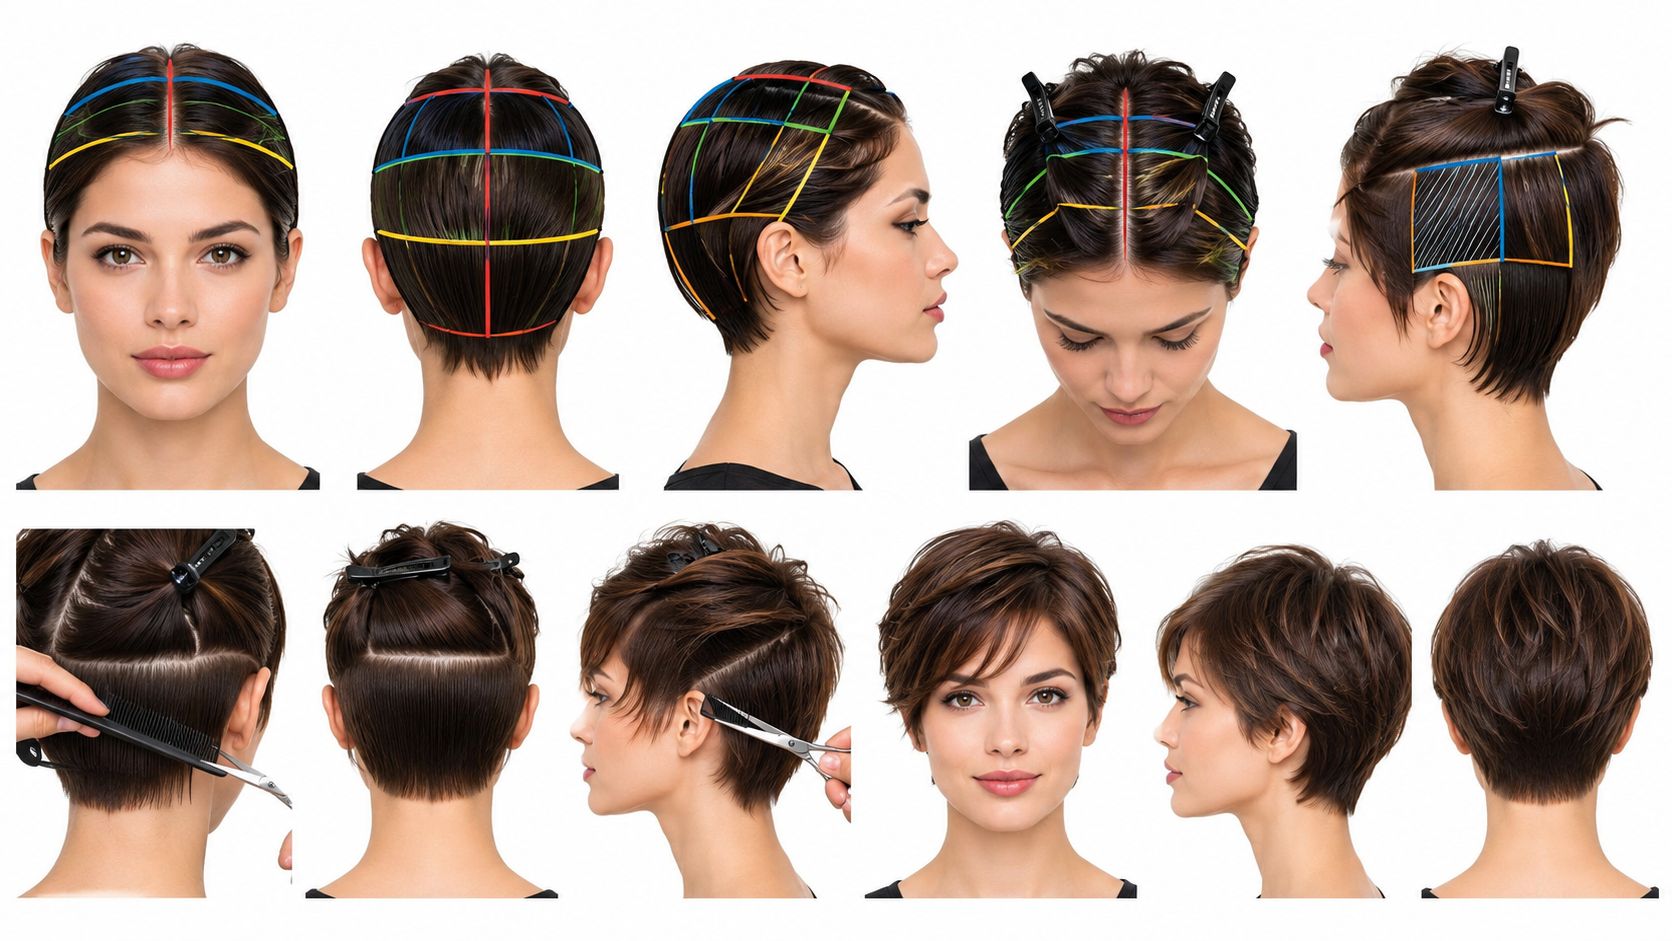
A curved or staggered pattern helps the bonds follow the head shape. A row pattern can use a wider central panel followed by narrower placements toward the sides, similar to professional tutorials that use a three-tape row followed by a two-tape row and finish above the ears. The purpose isn't to force a fixed pattern. It is to distribute weight while preserving a veil of natural hair over every bond.
The sandwich itself remains straightforward, but short hair makes section thickness critical. The natural veil must be thin enough for the adhesive strips to close firmly, yet long and wide enough to cover the extension panel. If the top section only reaches partway across the tape, the bond is incomplete and can slip quickly.
Practical rule: Short hair needs more careful sectioning, not more adhesive. A thicker natural section may hide the tape temporarily, but it can prevent the strips from closing evenly and create early slippage.
Keep bonds away from short, lifted layers near the part line. A short-layered cut can expose the attachment as soon as the client moves the hair or applies heat. Side panels should be scaled to the available coverage rather than forced into a standard width. Larger panels can work through the center of a stable bob, while narrower sections are more appropriate through the temples.
Stylists can use a dedicated tape-in extension placement board to plan the rows before installation. The board should support the haircut, not dictate it. Every parting needs to be checked with the client's natural part, cowlicks, and preferred styling direction in mind.
The install isn't finished when the last panel is pressed. On short hair, the cut determines whether the extensions read as integrated length or as a separate layer attached beneath the haircut.
The hair should be dry and blown smooth in the direction the client normally wears it. Cutting wet hair can hide the way short natural layers lift around the bonds. A dry check also reveals whether the extension density is creating a shelf at the crown or an obvious drop at the perimeter.
Work in narrow vertical sections and move from the temples across the back. Point-cutting into the extension ends softens a hard line, while controlled slide-cutting can connect the nape and sides to an existing bob or pixie shape. A blunt cut directly across a bond creates a shelf, and that shelf often exposes the tape when the hair moves.
The stylist should remove bulk where the natural hair is finer, but restraint matters. Over-texturizing the extension hair can leave short, separated fibers that stand away from the natural cut. Light internal refinement is usually more useful than aggressive thinning through the surface.
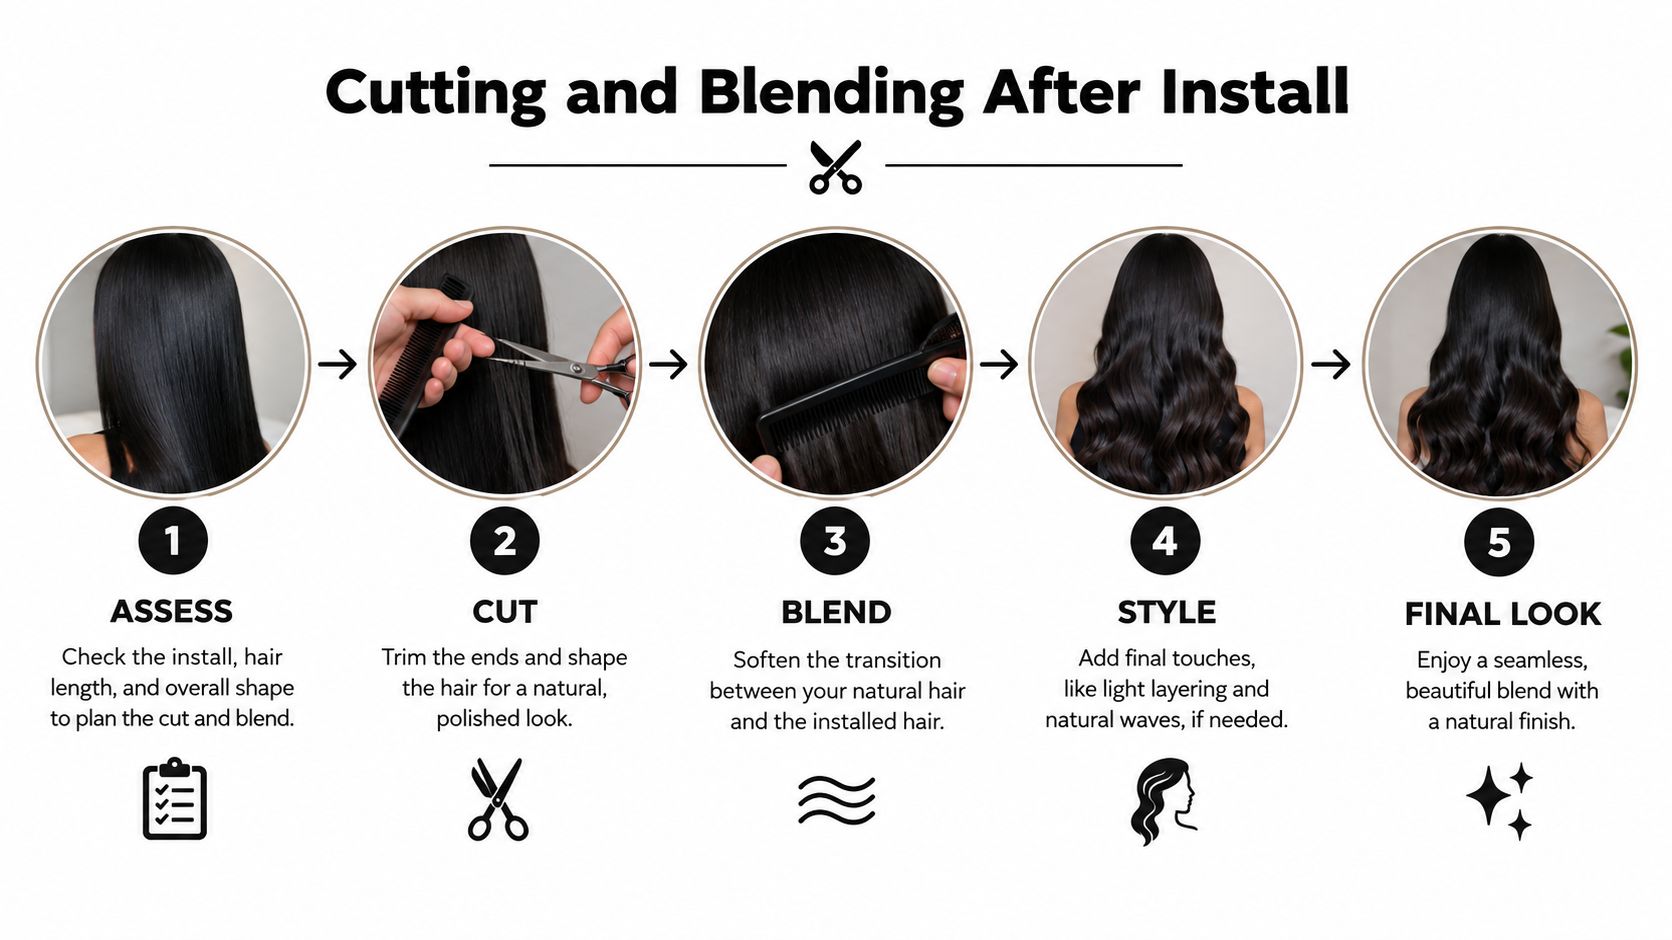
Face-framing pieces come last. Match the client's part and cowlicks rather than cutting a generic frame that only works in the salon chair. The front perimeter is often where short-hair installs fail first because the hair separates naturally and gives the bond nowhere to hide.
A final check should include more than a stationary mirror view:
The best blend isn't necessarily the shortest possible extension cut. It is the shape that follows the client's existing silhouette while preserving enough surface hair to conceal the attachment. If the extension hair needs excessive thinning to disappear, the panel or method may be too heavy for the base.
Short hair keeps the perimeter in view, so product selection starts with surface appearance and bond control, not shade or length alone. Cuticle-intact Remy human hair with aligned fibers gives the stylist a more predictable surface for blending. Double-drawn hair can also limit stray short fibers that show around a bob or cropped perimeter.
Adhesive performance matters just as much. Tape should close evenly, leave minimal residue, and come with clear technical information for professional use. The supplier should explain the adhesive system and replacement tape process. If those details are vague, removal and reinstallation become harder to control.
| Spec | Acceptable | Avoid on Short Hair |
|---|---|---|
| Hair construction | Cuticle-intact Remy hair with aligned fibers | Hair with inconsistent fiber direction or visible short ends |
| Density | Matched to the client's natural density | Heavy panels on fine or sparse hair |
| Adhesive | Consistent professional tape with documented use | Mystery adhesive or tape with no technical information |
| Color | Shade assessed under the client's actual lighting | A match chosen only from a swatch ring |
| Color placement | Pre-colored hair for balayage or ombré effects | Lifting the extension hair aggressively after purchase |
| Panel selection | Width appropriate to the section and perimeter | Oversized panels forced into short side sections |
Panel width deserves particular attention on short hair. A wide panel may cover too much of a narrow side section, while a smaller panel can sit within the available surface hair without forcing the perimeter outward. Match density to the client's base, since a heavy panel can separate from fine hair and expose the bond as the style moves.
Conde Professional supplies Tape-In panels in cuticle-intact Remy hair, with width options that let the stylist scale panels to short perimeter sections. Their guide to what tape-in extensions are provides background on the method.
Supplier grades such as 6A, 7A, 8A, 9A, and 10A are not governed industry standards. Check cuticle integrity, fiber alignment, shedding, combability, wash durability, color consistency, and the hair's behavior after cutting and styling. Short-hair work exposes weak fiber quality quickly.
Short hair usually makes maintenance more visible because every stage of growth changes the silhouette. A tape-in can remain attached while the client's haircut begins to expose it at the nape, temples, or upper layers. The wear window commonly cited for tape-ins is 4 to 8 weeks, while professional supplier guidance recommends moving the method up every 4 to 6 weeks, as noted in this professional tape-in maintenance tutorial.
That distinction matters for short-hair scheduling. A client with a stable, longer bob may tolerate the later end of the range. A fine-haired client with a short perimeter may need an earlier appointment because the attachment becomes visible before the hair itself becomes uncomfortable.
The client needs clear home instructions, but the stylist should also explain why each step protects the install:
The client should leave with a scheduled move-up rather than an open-ended return date. Short hair rarely benefits from waiting until the tabs are fully visible. Early booking gives the stylist a chance to inspect the root, assess matting, and decide whether every panel should be reinstalled.
Removal should use the appropriate bond-release solvent rather than oil. Oil can leave a film that interferes with fresh tape adhesion. Once the panel is released, the stylist should remove residue carefully, inspect the natural hair, and avoid reapplying over compromised or matted sections.
The weft should be cleaned according to the supplier's professional process before fresh adhesive is applied. A reinstallation can sit slightly higher if the haircut and growth pattern allow it, but it shouldn't be placed so close to the scalp that the natural hair can't move freely or the new sandwich becomes too thick.
Some short-hair clients need partial removal instead of a full reinstall. That decision depends on root condition, slippage, matting, and whether the current haircut still provides enough coverage. The complete removal process is outlined in this tape-in extension removal guide.
The consultation should decide the method before the appointment is confirmed. A short-hair tape-in service is a poor candidate if the client has insufficient length, sparse root coverage, a disconnected haircut, or an expectation of long wear with minimal maintenance.
Start with a dry assessment under the client's normal part. Check the crown, nape, temples, sideburns, and internal layers separately. The infographic's 4-inch minimum and 5-plus preference are useful screening prompts, but the verified workable range begins around 3 inches, so the final decision still depends on density, haircut shape, and whether the bond can be fully concealed.

A stylist should be willing to redirect the client. Tape-ins aren't the right answer for every short cut, and a clear recommendation protects the client's natural hair, the salon's reputation, and the quality of the finished work.
Conde Professional supplies professional extension methods and education for licensed stylists, including Tape-In options suited to careful short-hair consultations and method matching. Review the collection and open a professional account through Conde Professional before the next short-hair consultation.


