Your cart is empty
Tax included and shipping calculated at checkout

Drawer menu
Tax included and shipping calculated at checkout
A professional account gives you stylist pricing, priority support, early access to new releases, and education developed by working stylists.


A client is sitting in the chair with a familiar request: more length, fuller ends, and the freedom to wear a ponytail without exposing the attachment. Invisible bead hair extensions can solve that brief, but only when the row is engineered correctly. Bead choice, sectioning, thread tension, and move-up discipline determine the result far more than the word “invisible” on the consultation form.
Invisible bead extensions are a row-based sew-in method built around a concealed bead foundation. The bead anchors the weft, while the client's surrounding hair covers the hardware. It sits slightly away from the scalp, and the weft is sewn into a pocket around the foundation instead of leaving separate attachment points visible along the row.
The engineering goal is distributed load. A single strand should not carry the full pull of an extension connection. A properly built row shares that tension across a wider foundation, which can make it less detectable and more comfortable than exposed-bead systems. Comfort still depends on execution. A section that is too small, an oversized bead, or thread pulled too tightly can create pressure, slippage, and visible stress at the foundation. The continuous track works because row-based load distribution spreads force across the support hair, rather than concentrating it at isolated points. A practical explanation appears in the engineering guide to invisible beaded rows.
Invisible bead extensions belong to the broader family of bead-based and semi-permanent extension systems. They refine earlier discreet attachment approaches by concealing the foundation and combining it with a sewn weft. Industry history places micro-link technology in 2007, tape-in extensions in 2012, and the branded Invisible Bead Extensions method in 2019. These milestones describe a gradual move toward lower-profile installations, not the arrival of an unrelated technique. Broader background is available in this guide to invisible bead extensions.
The branded method had reached more than 5,000 certified stylists worldwide, with over 20,000 documented installs and grow-outs and an estimate of 100,000 Invisible Bead Extension rows globally at the time of the referenced industry profile. That profile presents the method as focused on invisibility, comfort, and durability, and reports that brand polls linked stylist enrollment with over 300% annual revenue growth for participating stylists. These figures are brand-reported. Treat them as program context, not independent clinical or financial evidence. The historical account appears in Beauty Launchpad's industry profile.
For a working stylist, the relevant test is mechanical: does the foundation remain flat, concealed, and stable through wear and the next move-up? If the answer changes as the row grows out, the installation needs a correction rather than a stronger marketing claim.
A clean invisible bead row starts with a controlled horizontal section and a foundation that doesn't rely on a bulky braid. A small silicone-lined or aluminum bead is loaded with a paired strand of natural hair. The weft passes through the bead, then a thread and curved needle secure the weft so the hardware sits inside a fabric pocket.
The bead itself should remain off the scalp rather than pressing directly against it. That spacing gives the row room to flex as the client moves and reduces the concentrated pressure that can make exposed bead systems feel tight. The advantage isn't magic comfort. It's mechanical. A continuous row shares the pull across the foundation, while a conventional visible beaded row leaves each attachment more apparent and more individually loaded.
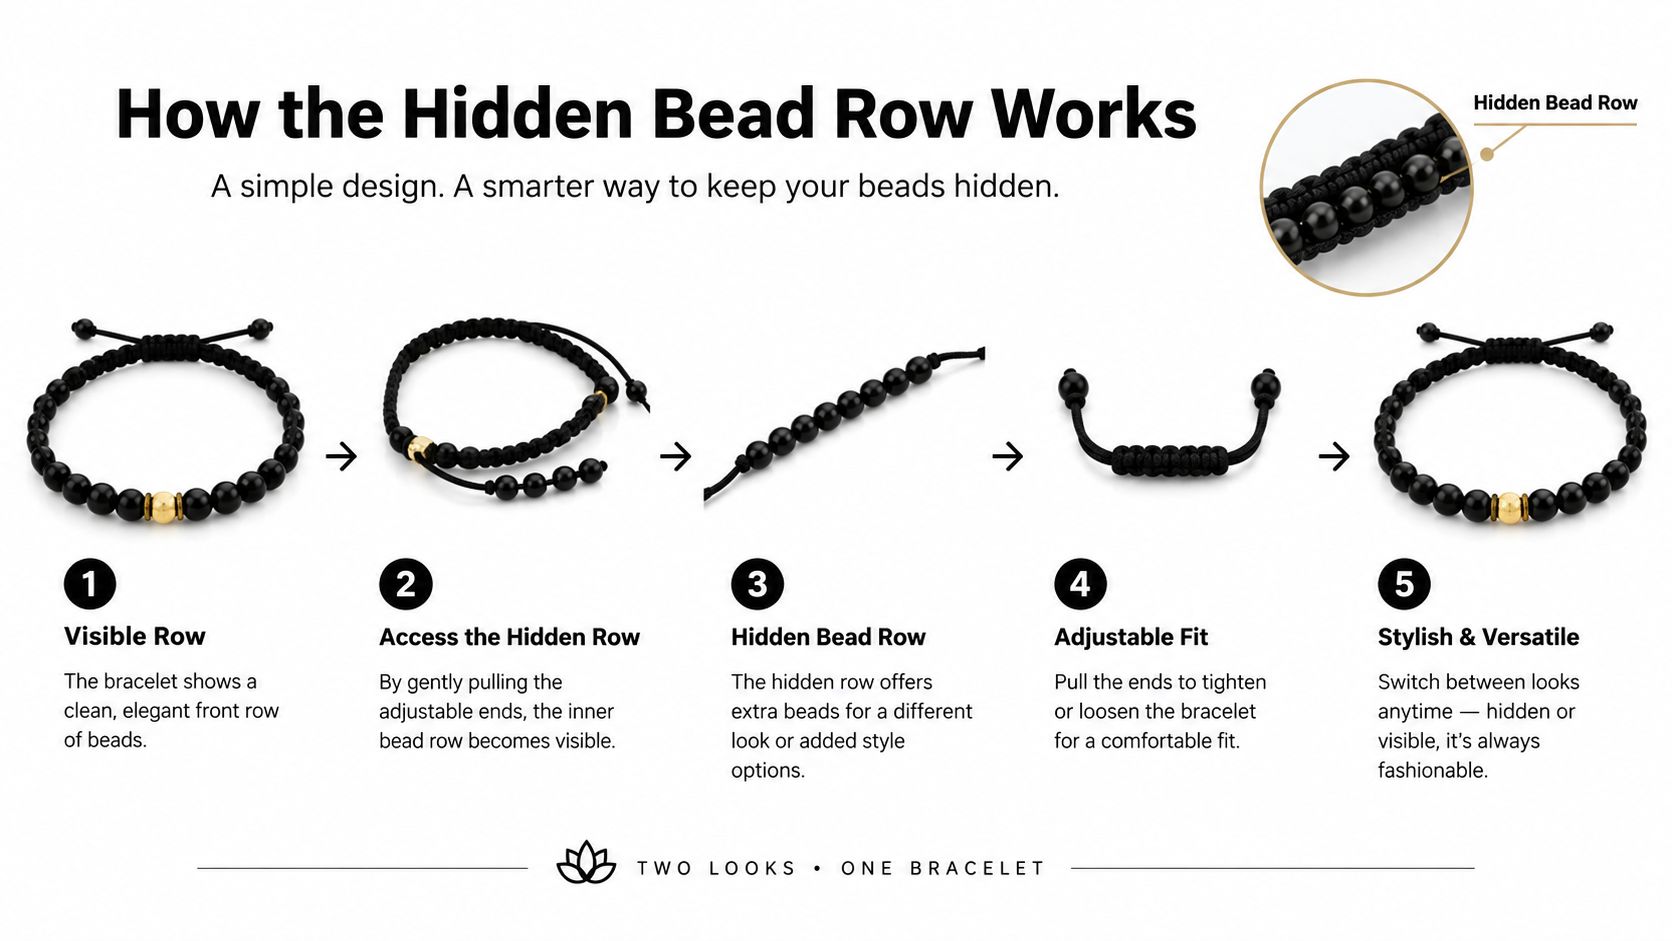
Row curvature has to follow the head rather than run as a rigid straight line. A row that ignores the occipital curve can lift at the corners, telegraph through the natural hair, or create uneven tension as the client turns the head.
Bead spacing affects both stability and concealment. Excessive spacing leaves unsupported portions of the weft, while crowded beads create unnecessary bulk. The section should be evaluated by the smallest workable bundle, not by an average taken across the entire row.
Thread pattern controls how the weft sits against the foundation. A consistent blanket stitch through the weft, without catching natural hair, keeps the row serviceable at removal and prevents the weft from twisting.
Thread tension should secure the track without compressing the foundation. If the thread is loose, beads rotate and the row slips. If it's pulled like a drawstring, the row can feel tight immediately and place avoidable stress on the natural hair.
Stylists should also distinguish hidden-bead work from a traditional beaded row at the consultation stage. The objective isn't merely to hide a bead after installation. The objective is to build a pocket that keeps the hardware concealed during parting, movement, and updo styling. A practical reference for selecting and handling bead systems appears in this professional overview of beads for hair extensions.
Invisible bead extensions suit clients with enough stable hair to support a row, but the method shouldn't be sold as a universal answer for fine or fragile density. Medium-density, fine-to-medium hair is often the most workable range because it can conceal the foundation without forcing the stylist to overload a narrow section.
The client's objective matters just as much as density. A client seeking length and volume without adhesive or heat may be a strong candidate, provided the appointment format and maintenance commitment are acceptable. A client who won't brush beneath the row, regularly sleeps with wet hair, or exercises heavily without a realistic drying routine is a poor candidate for any concealed weft method.
Very dense or coarse hair can create a different problem. The bead may migrate or slip if the sectioning and bundle size don't give the hardware a stable grip. Very fine hair also requires caution, particularly where the available density is extremely low. The supplied plan identifies hair under 100 grams per square inch as a cautious profile, because thread can saw through the available strands. That figure should be used as a consultation threshold, not as a universal diagnosis.
Clients with active scalp conditions or chemical sensitivity near the attachment zone shouldn't be placed into this method without appropriate professional assessment and clearance. A stylist should never frame invisible bead extensions as medical-safe or damage-proof. Installation tension, maintenance, and hair density remain the relevant service variables.
| Hair Profile | Fit Rating | Watch-Out |
|---|---|---|
| Medium-density fine-to-medium hair | Strong fit | Keep the row light and match the bead to the smallest bundle |
| Client avoiding adhesive or heat | Strong fit | Confirm tolerance for a sew-in appointment and scheduled move-ups |
| Very dense or coarse hair | Cautious | Migration and slippage can occur if the bead lacks a stable grip |
| Extremely fine hair | Cautious to poor | Thread may stress a narrow section, especially below the supplied density threshold |
| Frequent swimmer or heavy exerciser | Cautious | Moisture, sweat, and incomplete drying can accelerate tangling |
| Client who skips brushing | Poor fit | Matting beneath the row is a predictable maintenance failure |
| Scalp sensitivity or active scalp concern | Do not proceed casually | Refer for appropriate assessment before selecting an attachment method |
A different failure mode may point toward a hand-tied row, Tape-In, or K-Tip service instead. The right decision is the one that removes the identified risk, not the one that preserves the original consultation request.
Hardware selection determines whether the row behaves predictably. A small bead that matches the client's bundle creates a more stable interface than a larger bead chosen for convenience. Aluminum provides a firm clamp, while silicone-lined beads add internal grip and can reduce movement and noise in finer, more slippery textures.
The product must fit the section, not the other way around. A bead that's too large for the smallest bundle allows the hair to slide inside the cylinder before the thread has any chance to stabilize the row. A bead that's too small forces the hair through under compression and makes clean loading difficult.
The plan calls for bead diameters in the roughly 3mm to 5mm range for much fine-to-medium work. That range is a working reference, not a promise that one diameter suits every head. The correct choice depends on the bundle size, texture, weft construction, and the amount of grip required.
| Hair Profile | Bead Type | Bead Diameter | Thread Choice | Key Tool Note |
|---|---|---|---|---|
| Fine, slippery texture | Silicone-lined aluminum | Smaller suitable diameter | Conditioned nylon or coated polyester | Use a cushioned jaw and test the clamp |
| Fine-to-medium texture | Aluminum | Small matched diameter | Tonal conditioned nylon | Confirm the bead doesn't rotate after loading |
| Medium texture | Aluminum or silicone-lined | Matched to the section | Coated polyester in a disappearing tone | Keep the row template consistent |
| Light blonde hair | Silicone-lined or aluminum | Small matched diameter | Clear monofilament may be used | Watch for faster fraying with monofilament |
| Dense local section | Aluminum | Never oversized for convenience | Strong, conditioned thread | Recheck the smallest bundle, not the average |
Thread should disappear against the natural hair and remain stable through handling. Conditioned nylon or coated polyester is a practical choice. Clear monofilament can work in blonde applications, but it frays faster, so the spool should be inspected before the appointment and again before sewing the final section.
A loop tool or pull-through hook, cushioned micro-ring pliers, sectioning comb, spare silicone micro-rings, curved needles, and a tension-tested row template belong in the setup. The professional hair extension installation tools guide is useful for reviewing the accessory categories before standardizing a salon station.
Before loading the first bead, verify the inner diameter, inspect the thread spool for weak or split areas, and confirm that the plier jaw closes evenly. Conde Professional offers aluminum beads with a silicone-lined interior, listed at 5mm x 3mm x 3mm, in assorted colors and a package of 1,000 pieces, according to the supplied product information. That product can be considered where its dimensions suit the selected section. The stylist still owns the fit decision.
The installation should be quiet and deliberate. Rushing the first row usually creates the defects that become visible during the move-up, especially uneven elevation, rotating beads, and a track that sits too close to the part.
Start with clean, fully detangled hair. Create a horizontal parting just below the occipital ridge and leave a clean 1/4-inch shelf for the row. The shelf needs enough hair to support the foundation without stealing too much coverage from the layer above.
Section the natural hair into a thin, even curtain approximately the width of the weft, leaving 1/2 inch on each side. Those off-center margins help keep the ends of the track hidden once the hair falls. The row should follow the head's curvature rather than forcing the weft into a straight line.
Thread a micro-ring or pre-loaded bead onto the loop tool, catch the end of the weft, and pull it through cleanly. Load the selected natural hair into the bead, then seat the bead flat against the underside of the parting, slightly away from the scalp.
Clamp once, firmly, with cushioned pliers. Re-clamping crushes aluminum and is the most common training error because the stylist is trying to correct a bead that was not seated correctly before the first compression. If the bead is misplaced, release it and replace it rather than repeatedly squeezing the same cylinder.
Continue across the row with consistent spacing and bundle size. If the weft is pre-finished, skip the final bead. Otherwise, cut the weft at the final bead, seal the end appropriately for the construction, and check that the track lies flat before sewing.
Use a blanket stitch through the weft only, not through the natural hair. Maintain consistent tension so the beads don't rotate and the weft doesn't buckle. The thread should secure the pocket, not cinch the foundation against the scalp.
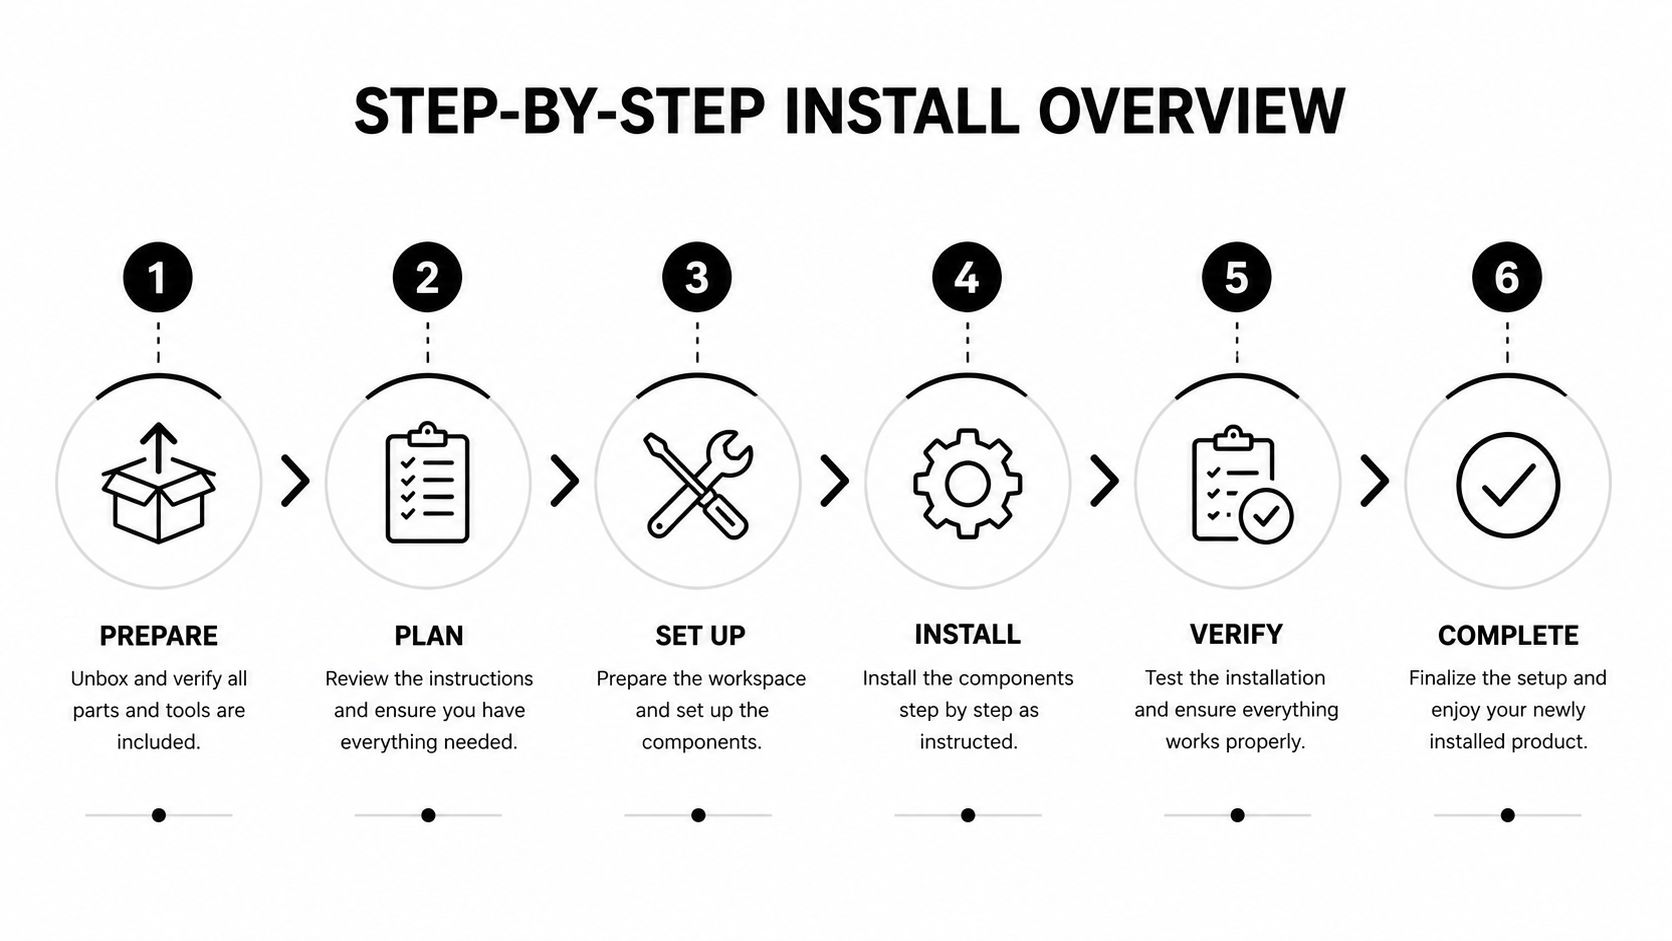
A final inspection should include a flip-up check, a side-angle check, and a gentle tension test across the row. The professional attachment overview can support a salon's written procedure, but it doesn't replace hands-on training or observation of the client's actual density.
A row that looks secure at installation can become unstable as the natural hair grows. Beaded-row and hand-tied installs are commonly scheduled for a move-up every 6 to 8 weeks, adjusted for growth rate, density, tension history, and the client's home routine. The appointment resets the bead and thread system. It should not involve dragging a loose row upward while keeping hardware that has already lost its shape or grip.
Release each bead, reposition the row to the current growth line, and replace the thread. Replace any bead that is crushed, distorted, or no longer holding securely. Inspect the natural hair beneath the row before reinstalling. A developing mat or weak section must be addressed before the track is put back in place.
Clients should brush from mid-shaft toward the ends and support the base when working near the row. A silk pillowcase may reduce friction during sleep. Keep heavy oils and silicone-heavy products away from the attachment. Product migration can interfere with the bead interface and contribute to slippage.
Ponytails are workable when they sit below the row line. A high, tight style places direct load over the foundation and defeats the row's shared tension distribution.
Early appointment rule: Visible beads with the hair down, snapping sounds during brushing, matting directly under the bead, or a bead rotating under tension are service signals, not cosmetic annoyances.
Dry the roots and bead area promptly after washing. Keep the foundation dry before hot-tool use, and do not sleep with damp hair. Prolonged moisture at the base can contribute to swelling, tangling, and a shorter wear period. The beaded-row home-care guidance also supports prompt drying around the foundation.
Stylists should photograph the row at every visit. Comparing a baseline image with the current view helps the client judge growth and lets the salon identify gradual changes before they become a removal issue. For a client-facing handout, adapt this extension care guide to the salon's product and brushing recommendations. Track bead rotation, thread slack, matting, and tenderness at each appointment, because those findings determine whether the next move-up should be adjusted or the row removed.
Invisible bead should be selected by the client's constraints, not by the promise of concealment alone. Mechanically, it remains a beaded row, so its strengths and failure modes overlap with hand-tied rows. Its distinction is the concealed foundation and the way the pocket keeps the hardware out of direct view.
| Method | Install Time | Scalp Visibility | Tension Distribution | Move-Up Interval | Best For |
|---|---|---|---|---|---|
| Invisible bead | Longer, row-focused appointment | Low when correctly sectioned | Shared across the row | Commonly 6 to 8 weeks | Clients needing concealed rows and updo flexibility |
| Hand-tied | Row-focused appointment | Depends on foundation and placement | Shared across the row | Commonly 6 to 8 weeks | Clients suited to a traditional lightweight weft foundation |
| Tape-in | Relatively fast adhesive install | Can show in lifted styling | Distributed through the tape panel | Method and growth dependent | Clients prioritizing installation speed and a flat adhesive panel |
| K-Tip | Strand-by-strand service | Low when correctly placed | Distributed across many small bonds | Method and growth dependent | Fine hair needing natural movement and individualized placement |
| Microlink | Strand-by-strand service | Attachment points may be detectable | More concentrated at individual links | Method and growth dependent | Clients needing strand placement without adhesive or heat |
Tape-in systems can be efficient to install, but heat and oil tolerance become important service considerations. Adhesive panels also require careful placement if the client wears lifted styles. Invisible bead offers a cleaner concealment strategy for updos, but the appointment and move-up demand more row engineering.
K-Tip can produce a natural fall on fine hair because the stylist can distribute small bonds precisely. The trade-off is a more involved removal and reapplication service, with higher move-up complexity than a row reset. Microlinks offer flexible strand placement, but they don't automatically receive the load sharing of a continuous row, so slippage risk rises when the individual link, bundle, or tension is poorly matched.
A simple decision rule helps. Choose invisible bead when concealed row styling and shared load matter most. Choose hand-tied when the client suits a conventional row and doesn't need the hidden-bead construction. Choose Tape-In for speed and a flat panel when the client accepts adhesive limitations. Choose K-Tip for fine hair requiring precise strand movement. Choose microlinks when strand-by-strand placement is the priority and the client can maintain the attachment points properly.
Color matching has two jobs. The weft needs to match the client's natural mid-shaft, but it also needs to respect the root-to-end gradient so the row doesn't telegraph when the hair lifts. Pre-blending lowlights into the extension hair can prevent a solid band from showing beneath a dimensional natural formula. This professional color-matching guide supports a more disciplined consultation.
Slippage usually points to an oversized bead, insufficient bundle control, under-tensioned thread, or a bead that wasn't seated flat. Remove the unstable attachment when necessary, select a smaller matched bead, and re-tension the thread without compressing the replacement bead repeatedly.
Matting directly above the bead often reflects product buildup, incomplete drying, or skipped detangling beneath the row. Separate the hair with a loop tool, work through the mat carefully, and use slip-joist scissors only when the compacted section can't be safely released. A dense, compromised mat should be removed rather than forced apart.
Visible tracks are frequently a placement problem, not a color problem. If the row sits too close to the part line, reset its elevation by 1/2 inch and rebuild the coverage above it. Recoloring the weft won't correct a track that has been placed where the client can expose it.
A row should be fully removed when the foundation is severely matted, the natural hair has been compromised by tension, multiple beads have lost their shape, or the weft has been cut and repaired beyond a stable finish. Repair is appropriate only when the underlying structure remains sound.
Conde Professional supplies professional extension options including Volume Weft, Thin Weft, Tape Weft, K-Tip, Tape-In, Clip-In, and Bulk, along with tools and shade support for licensed professionals. Open a professional account, review the collection against the row requirements above, and visit Conde Professional to select the hair and hardware for the next consultation.


