Your cart is empty
Tax included and shipping calculated at checkout

Drawer menu
Tax included and shipping calculated at checkout
A professional account gives you stylist pricing, priority support, early access to new releases, and education developed by working stylists.


I-tip extensions are strand-by-strand, bead-secured extensions threaded through a microbead and clamped without heat or adhesive. They suit clients who need precise placement, natural movement, and a no-fusion-heat method, provided their density, tension tolerance, lifestyle, and maintenance habits support the system.
A stylist may be facing the familiar consultation: a client wants discreet volume, wears the hair up, dislikes adhesive, and expects the extensions to feel weightless. I-tips can answer part of that brief, but “versatile” doesn't mean universally suitable. The attachment is small, the work is modular, and the load still lands on the client's natural hair.
That distinction matters as the professional category expands. The global hair extension market has been estimated at about USD 3.01 billion in 2025 and projected to reach USD 5.81 billion by 2035, a 6.79% CAGR over 2026–2035, according to market projections for the broader hair extension category. That growth brings more education and inventory choices, but it also makes disciplined client selection more important.
A client may want discreet volume, frequent ponytails, and no adhesive. I-tips can meet that brief when the natural hair can carry their load and the client can maintain them on schedule. They are individual extension strands with a formed tip that passes through a microbead or metal cylinder alongside a small section of natural hair. The bead is then mechanically compressed, securing the extension without glue, keratin fusion, or installation heat.
The clearest working model is a small mechanical clamp. Compression holds the extension and natural hair together, so the result depends on section size, bead position, clamp pressure, and the tension placed on the attachment. A loose bead can slip. A section that is too small may carry excessive load, while an oversized section can sit poorly and become harder to conceal. I-tips are therefore a tension-sensitive system, not a universally low-risk option.
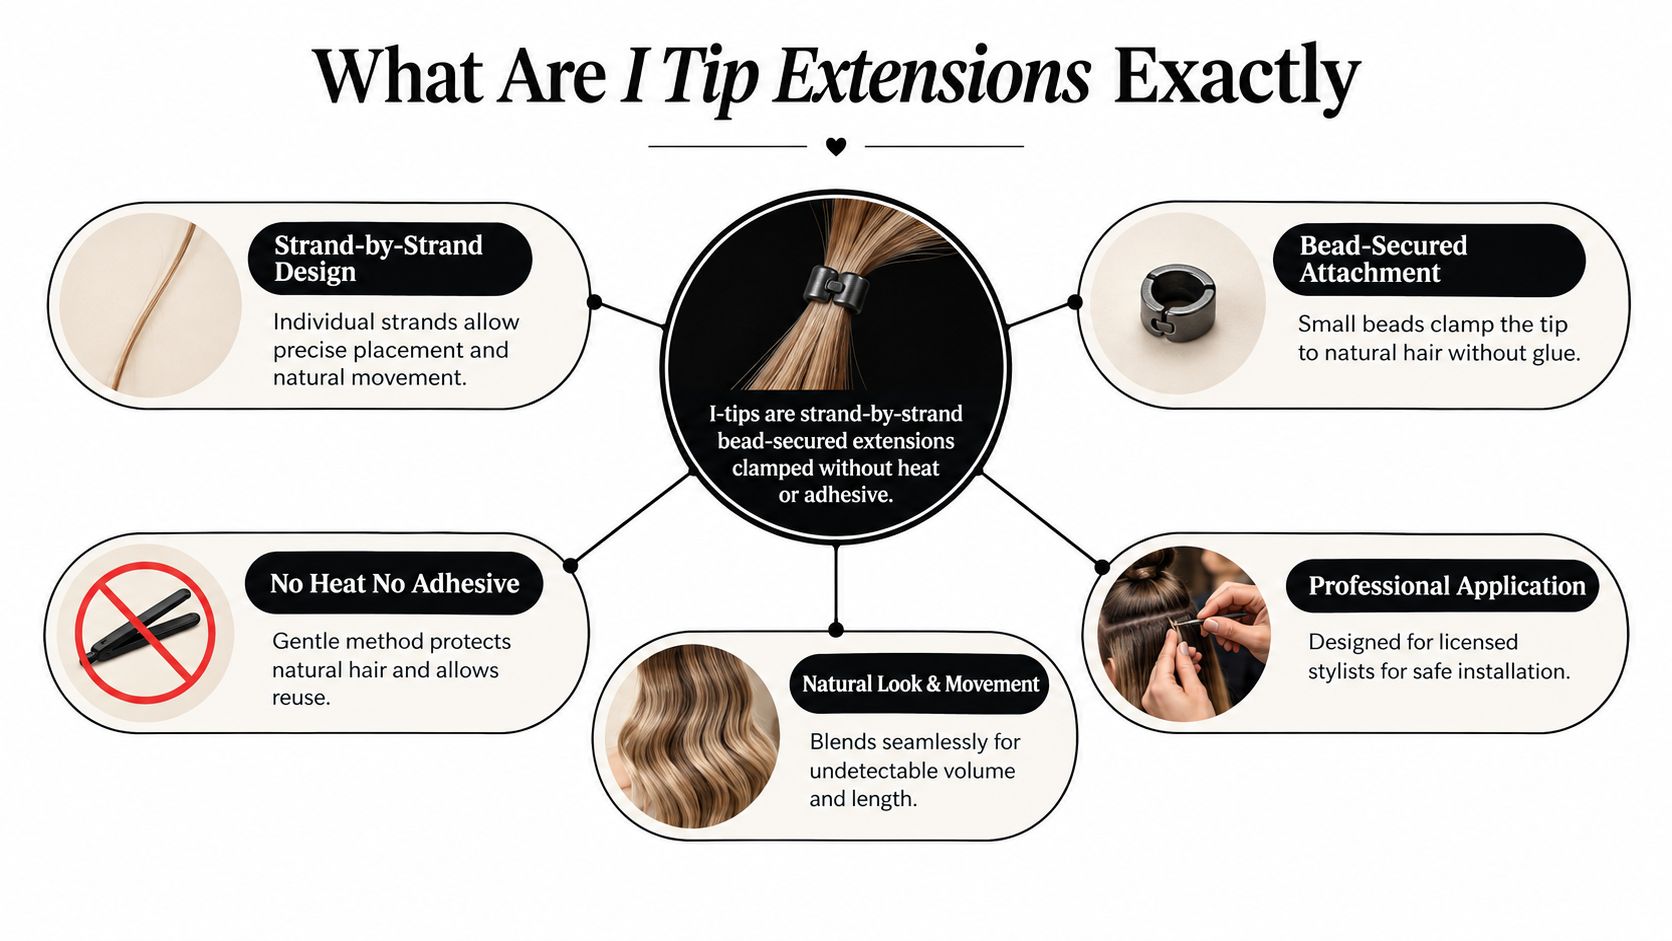
Each I-tip can be placed according to the client's density, parting pattern, haircut, and desired volume map. That control lets a stylist add fullness where it is needed instead of applying identical coverage across the head. It also makes the method useful for targeted density changes and customized movement.
The trade-off is time and decision-making. Professional guidance commonly places I-tips at roughly 1 gram per strand, with a typical range of 0.5 g to 2 g, depending on the density goal and installation plan, as described in technical I-tip guidance. Lower-mass strands can distribute weight more finely, but each one still requires sectioning, threading, seating, clamping, and inspection.
Practical rule: A small bead does not make an overloaded section safe. The natural hair is the load-bearing material, so assess its density, condition, and tension tolerance before placement.
I-tips fit clients who value precise placement, flexible movement, and a non-adhesive attachment. Choose another category when density is very low, the perimeter is fragile, maintenance is unlikely to stay consistent, or an active routine raises tangling and slippage risk. Marketing may present I-tips as broadly versatile. Behind the chair, suitability is narrower and must be earned through assessment.
A client with fine hair may want fuller movement, while a client with dense hair may need targeted volume near the part or perimeter. The I-tip's construction determines whether you can meet that request with controlled, strand-level placement. You are not buying hair with a bead. You are choosing an attachment system that must remain consistent through installation, brushing, washing, styling, removal, and move-up appointments.
Inspect each strand from the tip to the ends:
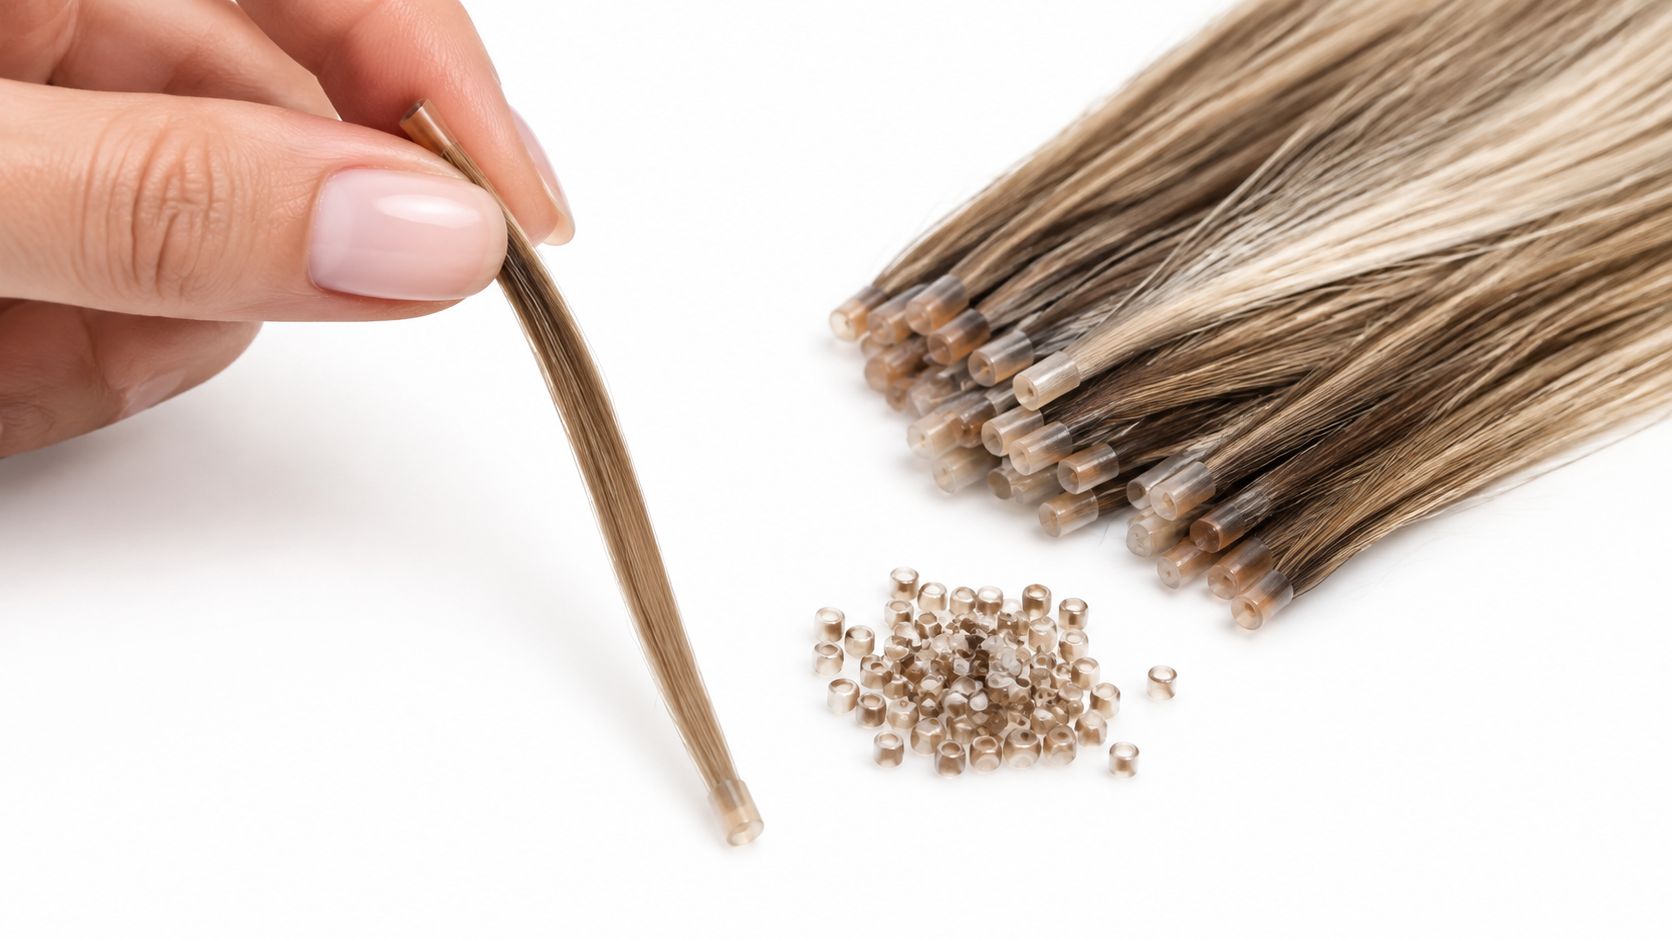
Bead diameter affects concealment, comfort, and how much natural hair can pass through without producing a loose or crowded attachment. The bead must also suit the installation tool and your compression control. Aluminum, silicone-lined, and other constructions may respond differently under pressure, so confirm compatibility before ordering inventory.
The attachment concentrates load over a small area. That makes I-tips adaptable, but less forgiving when sectioning is poor than methods that spread weight across a wider base. Assess the density, condition, and tension tolerance of each mapped zone before selecting a strand. A client with fragile perimeter hair, very low density, or inconsistent maintenance may not have a safe foundation for this method.
Labels such as 7A, 8A, 9A, and 10A are not recognized industry certifications. No governing body gives these grades one consistent technical meaning. A supplier may use the labels to organize its own range, but the letters cannot replace physical inspection.
Ask how the hair behaves instead. Discuss cuticle alignment, expected shedding, wet and dry combability, wash durability, batch-to-batch color consistency, and the supplier's inspection process. These answers help you predict blending, maintenance demands, and reordering consistency more accurately than a letter grade. For a neutral discussion of extension quality grading, see neutral discussion of extension quality grading.
Practical rule: A small bead does not make an overloaded section safe. Natural hair carries the load, so density, condition, and tension tolerance must guide every placement.
Method selection should begin with the client's density, preferred styling, tolerance for maintenance, and need for concealment. I-tips offer granular placement and no installation heat, but the bead remains a mechanical attachment that can become visible, uncomfortable, or prone to slipping if the hair section and lifestyle don't support it.
K-Tip uses a pre-formed keratin bond and controlled heat for fusion. It can provide discreet strand-by-strand placement, but the service requires heat management and professional removal. Tape systems use adhesive panels that distribute hair across a broader surface, which can simplify coverage but limits the same strand-level mapping available with I-tips. Wefts create a larger line of coverage and can be efficient for volume, though row placement and foundation tension become central concerns.
The practical comparison is less about naming a winner and more about matching the attachment to the client's demands.
| Method | Attachment | Best For | Trade Off |
|---|---|---|---|
| I-tip | Microbead or metal cylinder clamped around natural hair and extension | Precise volume mapping, individualized placement, no adhesive or installation heat | More attachment points, tension-sensitive sections, scheduled strand-by-strand move-ups |
| K-Tip | Keratin bond softened and formed with controlled heat | Discreet strand-by-strand placement and clients comfortable with fusion | Heat control and professional removal are essential |
| Tape-In | Adhesive panels sandwiching natural hair | Broad, flat coverage and clients suited to a panel attachment | Adhesive maintenance, panel visibility in very sparse areas, less granular placement |
| Weft | Sewn, beaded, or otherwise secured row across a section | Efficient volume distribution and clients with a stable foundation | Row tension, foundation visibility, and less individualized strand placement |
A client with fine or fragile hair may not be a strong I-tip candidate because the bead is small. The stylist still needs enough natural hair to support each strand without excessive pull. A highly active client who swims, sweats, wears frequent updos, or cannot maintain regular appointments may also face higher slippage and tangling risk.
For a direct technical comparison of the two strand-by-strand systems, stylists can review I-tips versus K-tips. If the consultation reveals that the client needs broader weight distribution, a weft or tape method may be more appropriate. If the client wants temporary wear, a removable Clip-In may reduce ongoing attachment demands.
A client arrives wanting fuller hair and frequent high ponytails. The install can still fail if the stylist begins with bead placement instead of assessing density, growth patterns, perimeter strength, haircut shape, parting preferences, and daily styling positions. I-tips are a strand-by-strand, tension-sensitive system. Each attachment needs enough natural hair to support its weight without pulling.
Mapping should create balanced coverage while keeping attachments away from the hairline and prominent high points of the scalp. Leave about one to two fingers around the hairline so beads stay concealed when the client wears the hair up. Plan rows from the nape upward, with clean partings that support both concealment and comfortable movement. Stylists can review this micro-link installation and placement guide for the broader attachment sequence.
Thread an appropriately sized section of natural hair through the bead, add the I-tip, position the extension at a suitable distance from the scalp, and compress the bead with controlled pressure. Maximum force is not the objective. The attachment should remain secure, comfortable, and able to move with the natural hair.
Check each section before continuing:
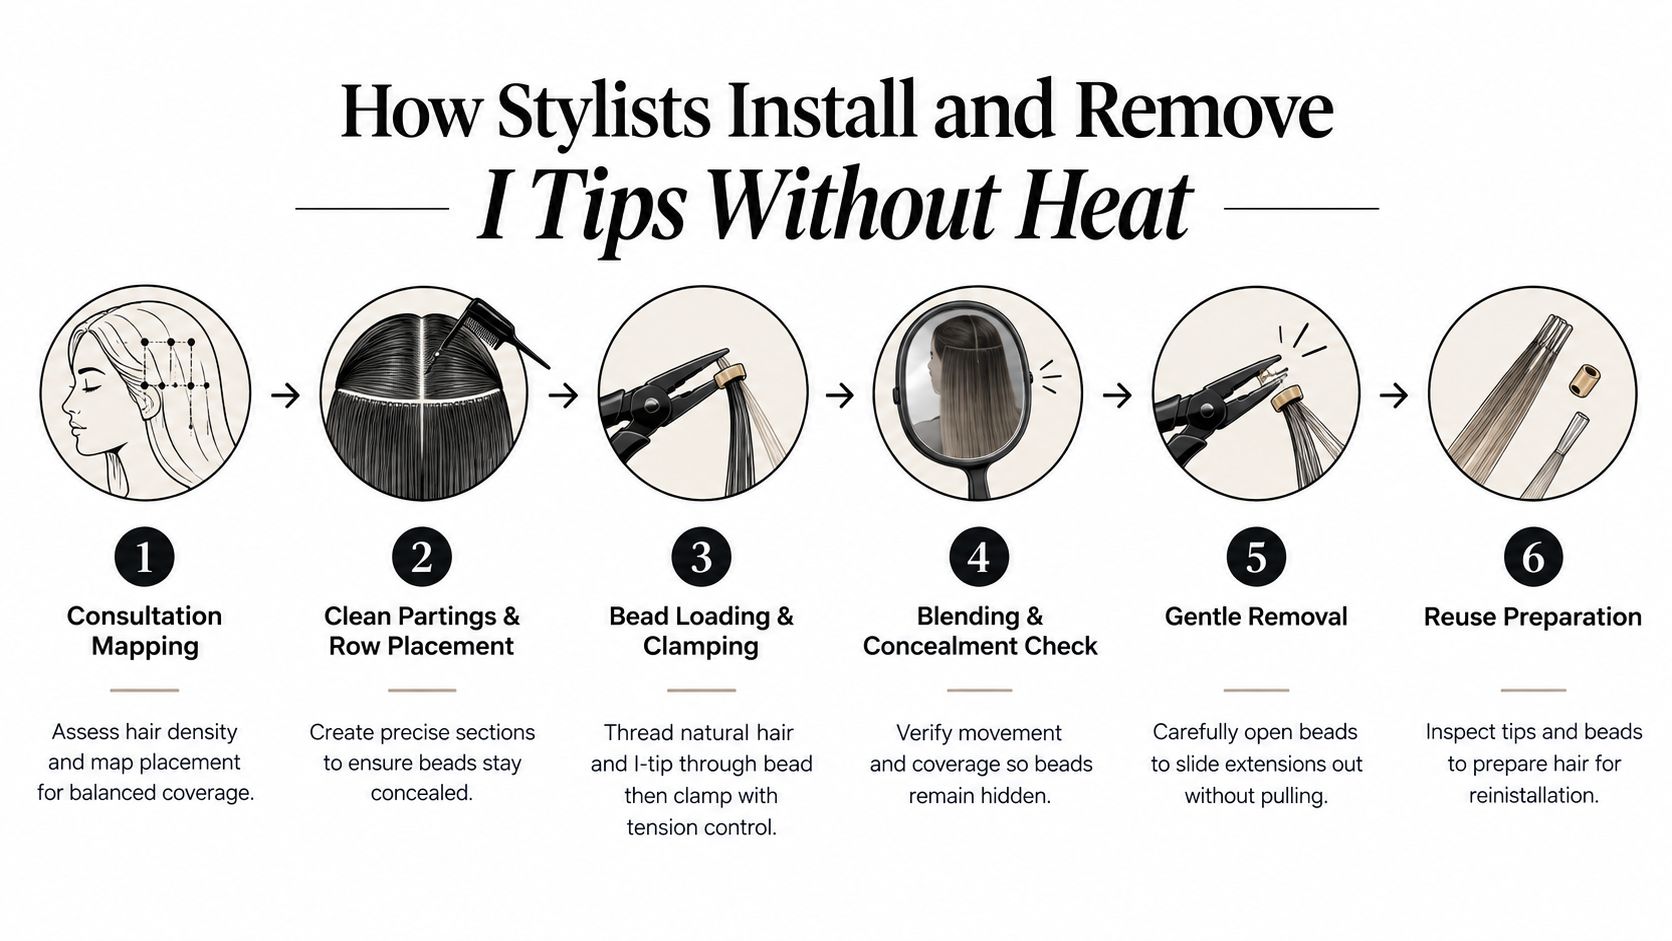
To remove an I-tip, open the bead with the appropriate tool, release its compression, and slide the extension out without pulling the natural hair. Examine the removed strand, tip, bead, shed hair, and any matting before deciding whether the extension is suitable for reinstallation.
I-tips usually receive a move-up rather than a full reinstall. Common schedules range from four to six weeks or six to eight weeks, depending on growth, attachment condition, and salon protocol. During the service, release each strand, clear the area, reposition the bead closer to the scalp, and re-clamp it individually.
Tension remains the deciding factor throughout the service. Pulling, pinching, or ongoing discomfort calls for reassessment, not an assumption that the client is still adjusting. Check section size, placement, strand weight, and the overall density plan. Hands-on education helps stylists build consistent bead loading, compression, removal, and corrective skills. For a practical demonstration of the process, review professional I-tip installation and maintenance guidance and professional I-tip maintenance guidance.
A client returns with beads that have shifted, a tender scalp, or small tangles near the roots. The correct response starts with inspection, not automatic tightening. I-tip maintenance is a tension-sensitive, strand-by-strand system. Natural hair grows, shed hair can collect around attachments, and each bead gradually moves away from the scalp.
Move-up windows of four to eight weeks were covered during installation. What matters now is reading the client's actual growth, attachment condition, and tension signs. A fixed calendar should not override visible slipping, discomfort, or matting.
Give the client a short routine they can repeat accurately:
For a client-facing routine, stylists can adapt this professional extension aftercare guidance to the client's installation, hair density, and daily habits.
Slipping usually indicates insufficient bead compression, an imbalanced section, product buildup, or a strand carrying more movement than its section can support. Inspect the attachment and section size before reclamping. More force can increase stress without correcting the underlying balance.
Discomfort or pulling signals a tension problem until proven otherwise. Remove the affected strand if needed, redistribute density, change placement, or reconsider whether this method suits the client's hair and routine. Pain is a correction signal, not a successful wear milestone.
Visible beads may come from hairline placement, inadequate coverage, growth, or styling that exposes the attachment. Compare the original map with the client's actual partings, ponytails, and updo habits.
Tangling or matting requires prompt separation and close inspection of shed hair around the bead. Delaying service can turn a manageable correction into difficult removal. Clients with low-density, fragile, or highly active hair may need a method that creates less maintenance risk.
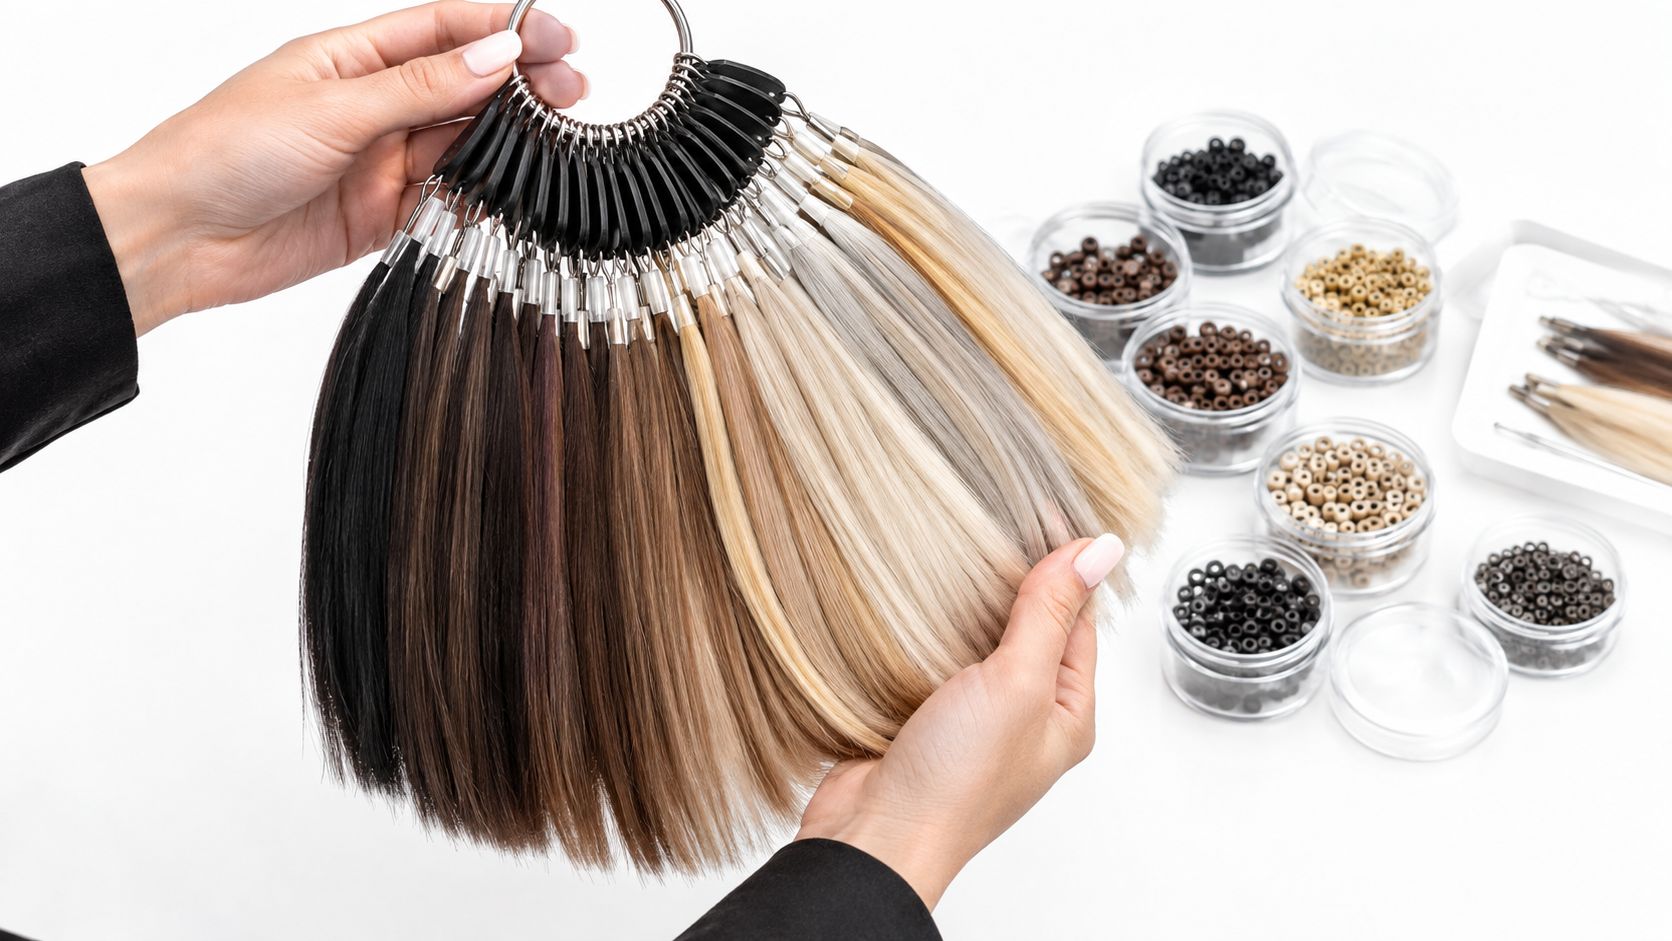
A client arrives for a blend that looks perfect indoors but turns visibly warm near a window. Prevent that mismatch by checking the extension against the client's mid-lengths and ends in more than one lighting condition, including the light where the hair is usually worn. Compare the shade ring beside the hair, then evaluate depth, warmth, root shadow, and the intended blend. Screen images and one swatch photograph cannot show those variables reliably.
Lighting-specific checks should be part of the consultation. View the hair in salon lighting, natural daylight, and the client's usual environment when possible. Separate the extension from the background, compare several nearby shades, and check the ends rather than matching only the root. A blended result may require a different choice from an exact single-color match.
Inventory should follow the services the salon can safely perform. Excess shades and methods create slow-moving stock, while a narrow range encourages substitutions that weaken the blend. Keep the color ring, I-tip shades, compatible beads, threading tools, removal tools, and education materials together, so the salon can plan the complete service before ordering.
As covered in the specifications section, letter grades have no governing standard. Ask for details that affect strand behavior, installation consistency, and maintenance risk.
Use professional color matching guidance to support tone assessment and blending decisions. Stock depth should follow documented client demand, not the assumption that every shade direction belongs in the inventory.
A licensed stylist ready to add I-tips should take one concrete action before ordering a broad range: build a consultation and inventory checklist around the client profiles the salon can safely support. That checklist should include density assessment, lifestyle questions, move-up capacity, bead and tool compatibility, shade matching, and a removal plan.
Conde Professional supplies licensed professionals through a wholesale model, with method collections that include K-Tip, Tape-In, Volume Weft, Thin Weft, Tape Weft, Clip-In, and Bulk. The collection also includes color rings, beads, and installation accessories, so a salon can compare methods instead of forcing every client into I-tips. Education support includes professional hair extension courses, method guides, and shade assistance from working-stylist educators.
For the next consultation, the strongest workflow is simple: assess the client, map the tension risk, compare attachment formats, then request supplier guidance for the exact shade and bead setup. Business intent should go through a professional account rather than consumer checkout.
Conde Professional offers wholesale extension hair, compatible installation tools, color rings, method education, and real-time support for licensed professionals choosing an I-tip system. Visit Conde Professional to open a professional account and prepare the next install around the client's density, lifestyle, and maintenance needs.


