Your cart is empty
Tax included and shipping calculated at checkout

Drawer menu
Tax included and shipping calculated at checkout
A professional account gives you stylist pricing, priority support, early access to new releases, and education developed by working stylists.


A client arrives with medium-length hair, a chosen neckline, and an evening that runs from photographs to dancing. The dependable approach is a structured style with controlled texture, discreet support, and an extension method matched to the silhouette rather than added solely for density.
Medium hair suits formal styling because it can shift into an updo, half-up design, or down style without extreme length. Current coverage favors polished, healthy-looking finishes, with “formal updo hairstyles” projected to reach a Google Trends peak of 23 in January 2026, while “formal ponytail hairstyles” recorded a peak of 11. This suggests intricate styles attract more special-occasion searches than a basic ponytail (formal hairstyle trend coverage).
The techniques ahead prioritize neckline compatibility, controlled fullness, event-day longevity, and discreet extension integration. For medium hair, placement matters: a thin weft can reinforce a bun base, while clip-ins or tape-ins can add targeted width without weighing down the perimeter.
The strongest homecoming hairdos for medium hair are a sleek low bun, a braided half-up, and a textured ponytail. Each can be built on a medium-length foundation, then adjusted with a Thin Weft, Volume Weft, Clip-In, Tape-In, or K-Tip according to density, desired movement, and the dress neckline.
For strapless and off-shoulder dresses, an updo exposes the décolletage and keeps the shoulder line clear. V-necks and halters generally benefit from hair worn down or in a half-up design, allowing the vertical neckline to remain visible rather than competing with a wide bun. Recent homecoming coverage specifically recommends choosing the hairstyle from the neckline outward, with sleek high ponytails, braided half-ups, and soft Hollywood waves prominent in 2026 styling direction (neckline-focused homecoming guidance).
The salon objective isn't maximum density. It's a shape that remains intentional under flash photography, movement, humidity, and repeated touch-ups. Medium hair often needs strategic reinforcement at the back of the head, not a heavy install throughout the entire style.
Practical rule: Structure carries the style. Spray only preserves the structure that sectioning, anchoring, and weight distribution have already created.
A clean consultation should establish the client's natural texture, how quickly the hair becomes oily, the event schedule, and whether the client normally wears extensions. Stylists who want additional visual references can also review this studio for beauty themed content, then compare the selected silhouette with the practical methods in homecoming hairstyle guidance for stylists.
Start with density and behavior, not the Pinterest reference. Fine medium hair may need a small amount of discreet fullness for a braid or ponytail, while dense hair may need removal of bulk rather than added extension hair. Ask how the client's hair behaves after heat styling, whether it slips when freshly washed, and how many hours the finished look must remain presentable.
Dress architecture matters just as much. A strapless or off-shoulder neckline usually supports a low bun or compact updo. A V-neck or halter often works better with a half-up shape, waves, or a controlled ponytail that leaves the center line of the dress visible.
| Method | Best For | Key Considerations |
|---|---|---|
| Thin Weft | Subtle crown lift and low-bun support | Keep placement discreet and avoid creating a visible ridge under sleek sections. |
| Volume Weft | Fuller braids and ponytail bodies | Use selectively on medium hair. Excess density can make a formal shape look padded or unstable. |
| Tape-In | Down styles and soft half-ups | The attachment area needs enough concealment and should not sit where the neckline or strap rubs. |
| Clip-In | One-night volume and flexible placement | Useful for a removable event install, but clips must be positioned away from pressure points. |
| Natural styling | Dense hair or deliberately soft silhouettes | Choose this when added hair would create unnecessary weight, bulk, or removal work. |
For a client who wants a sleek bun with fine hair, a Thin Weft may provide controlled support. For a braid that needs a broader visual body, a small, well-blended Volume Weft can be more appropriate. A Clip-In is often the cleanest choice for a one-night enhancement when the client doesn't want a semi-permanent install.
Supplier questions should be specific: Is the hair cuticle-intact and aligned? How does it behave after washing? Does it shed, tangle, or lose combability? Does the color remain stable, and does the texture retain its intended movement after drying? Remy hair refers to preserved root-to-tip orientation, with cuticles aligned in the same direction across the bundle, a quality-control characteristic rather than a hairstyle label (Remy hair guidance).
Stylists should also avoid treating supplier grades such as 6A through 10A as governing standards. Those labels are marketing language. Cuticle integrity, alignment, shedding, tangling, combability, color stability, and wash durability are more useful criteria.
For additional planning support, review this medium-length hair extension consultation guide before placing an order or switching methods.
A low bun is the most controlled option for a strapless, off-shoulder, or high-neck dress. Medium hair supplies enough length for the foundation, while a restrained extension placement can add the density needed for a smooth coil without producing an oversized silhouette.
Tools: fine-tooth comb, sectioning clips, elastic bands, bobby pins, light texture spray, and flexible-hold spray. A clean, fully dry base is essential. Freshly washed hair can be too slippery for reliable pin and elastic friction, so a lightly textured finish is preferable to a heavily conditioned surface.
The practical evidence supports this order of operations. High hold depends more on structure than spray volume, with clean dry hair, grip from sectioning and light texture product, secure back placement, and flexible spray forming the working foundation (updo structure guidance).
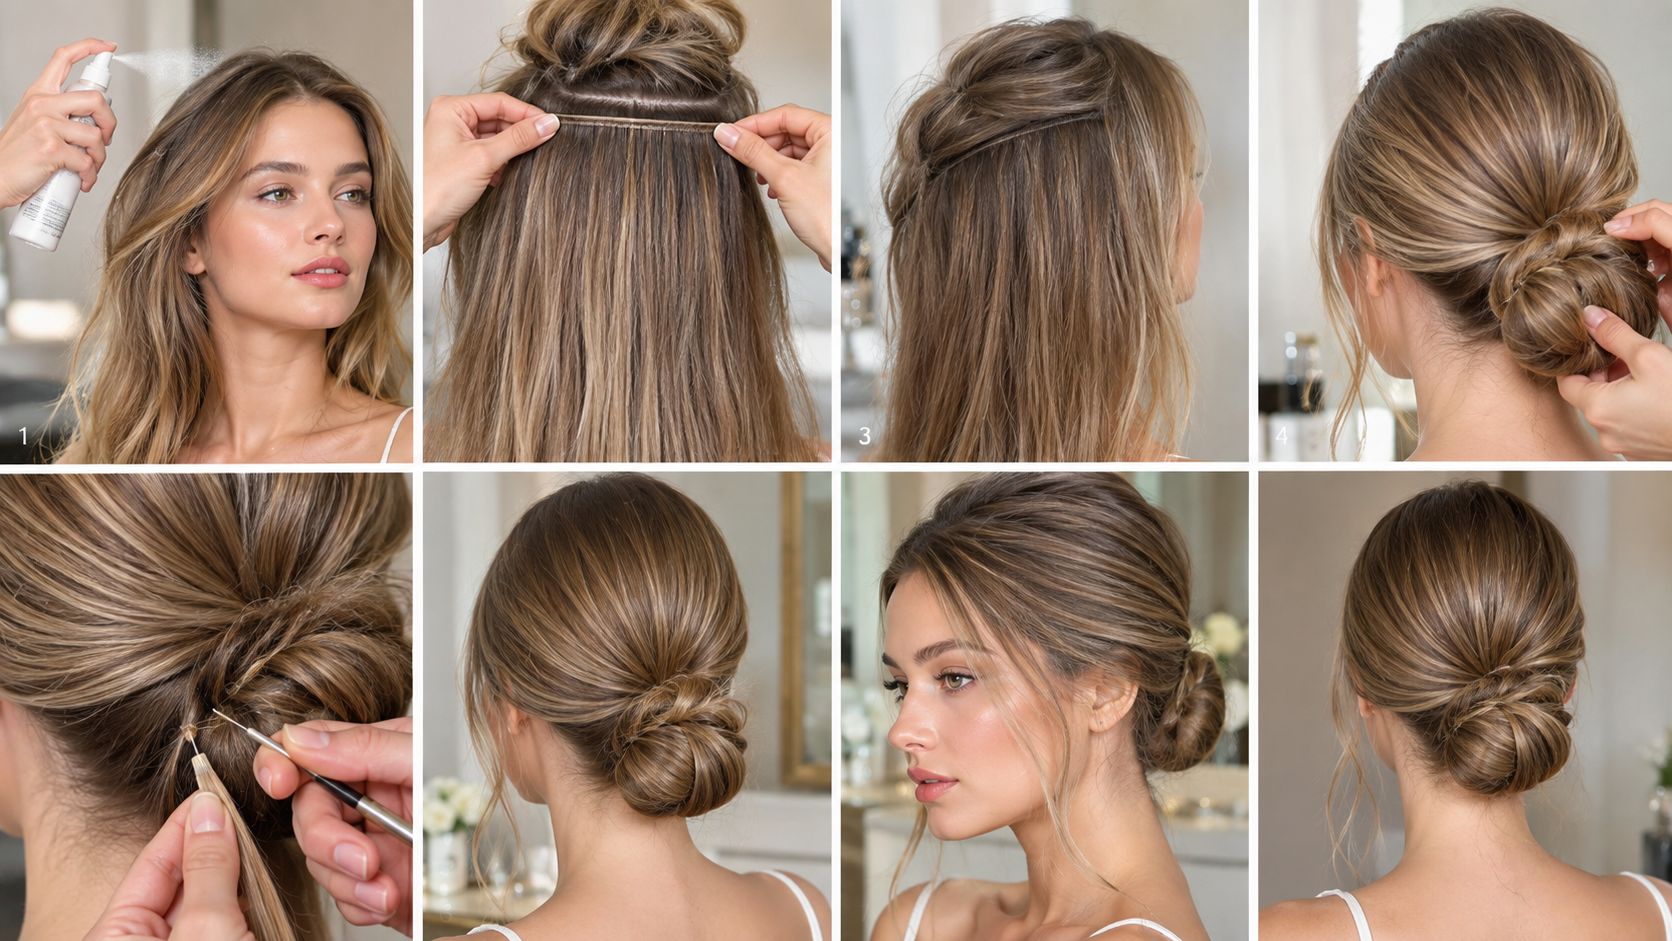
A day-long event requires a stable base, but the stylist shouldn't over-tighten elastics or soften the hair with excess product. Check the bun from the side and back before releasing the client. The profile should be balanced, with no heavy extension mass pulling the shape downward.
A client arriving in a V-neck, halter, sweetheart, or heavily detailed bodice needs the braid placed above the neckline, with enough length left around the shoulders to keep the silhouette balanced. This half-up shape works well for medium hair because it adds detail without hiding the dress. Fine to medium strands need controlled fullness, not aggressive backcombing that creates a rough base.
Tools: sea-salt finishing spray, sectioning clips, micro-link pliers, aluminum beads, a professional extensions stand, tail comb, and medium-tooth brush. A Clip-In can add discreet mid-shaft density without committing the client to a longer-term install. Position the attachment beneath the upper section, where the braid and natural fall will conceal it.
Start with texture preparation, approximately eight minutes. Straight hair benefits from a controlled wave or bend through the mid-lengths before braiding. Wavy hair usually needs less heat and more directional brushing. Preserve its existing movement rather than forcing a uniform surface that may look stiff beside a soft dress.
Install the Clip-In support, approximately twelve minutes, at mid-shaft instead of directly at the crown. The placement gives the braid enough material while keeping the top light. For warmer, dimensional color, Bronde highlight wefts can soften the transition between natural hair and added density. Match the extension blend to the client's existing light and dark pattern. An isolated stripe will show once the braid loosens.
Create the half-up section from the temples toward the crown. Leave sufficient hair around the face for softness, then braid with moderate tension. Keep tension consistent through the first portion of the braid. Loosen selected outer loops only after the structure is secure. Early pulling widens the braid unevenly and can expose the extension edge.
The final braid stage takes approximately six minutes. Pin the end beneath the half-up section, then inspect the design from both sides and from the back. A braid that looks balanced from the front but carries too much weight on one side can shift during dancing and photography.
A polished finish photographs more reliably than loose, unanchored texture. Keep the braid defined, with controlled shine and enough softness around the face to suit the neckline and the client's natural movement.
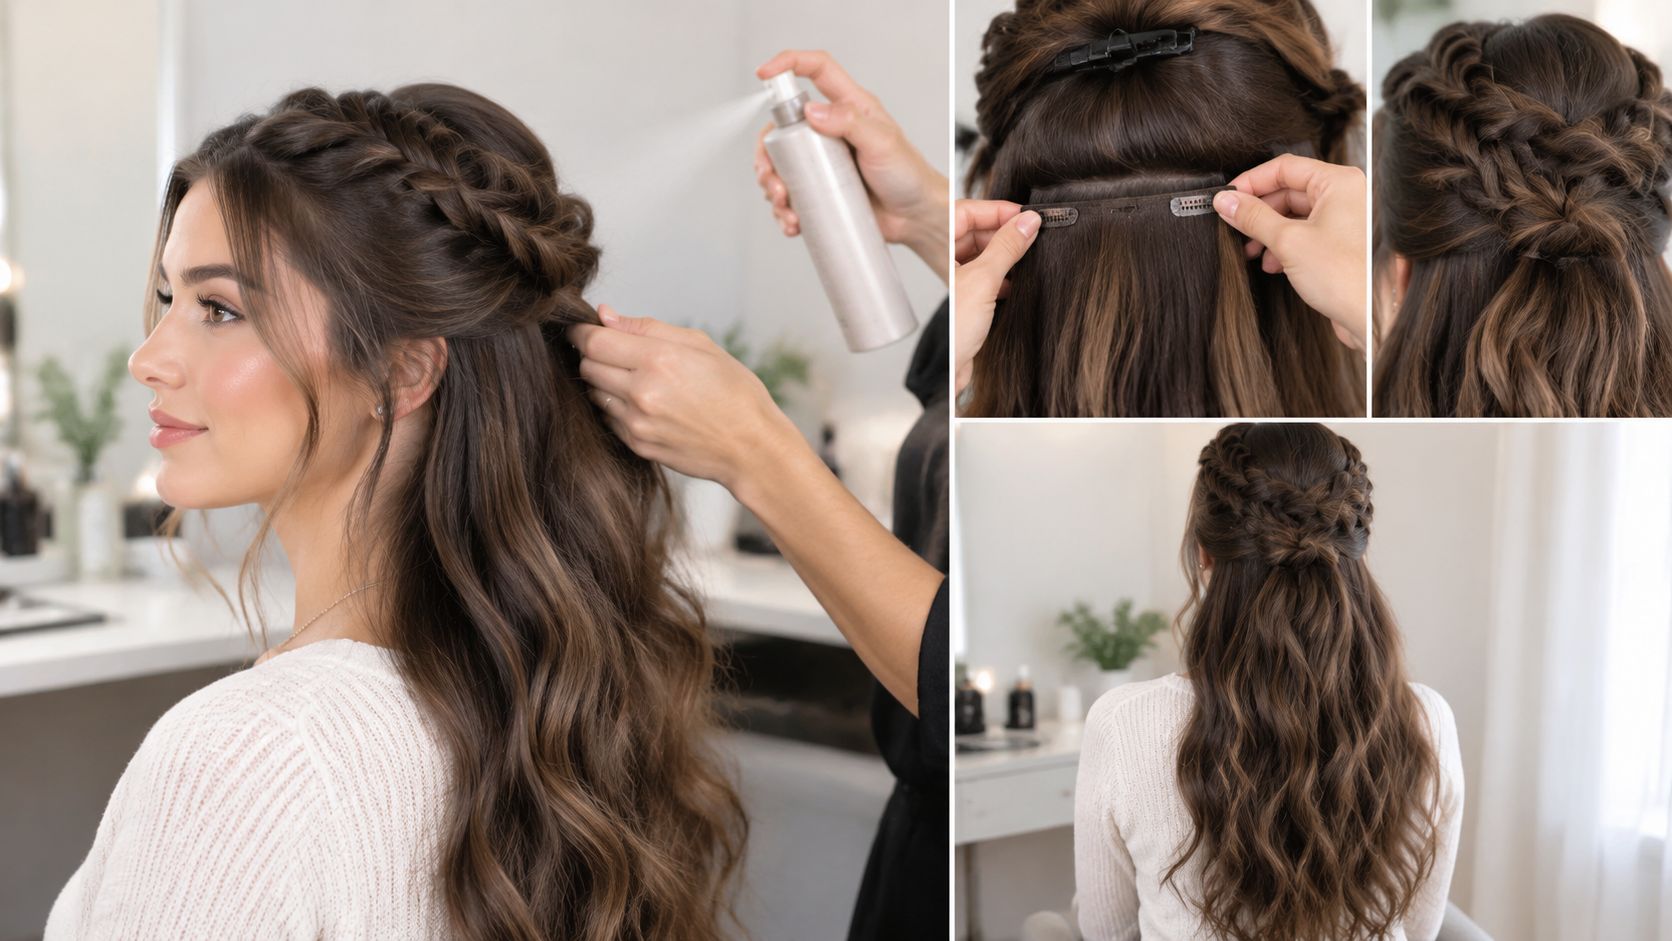
Apply light finishing spray only after the braid is secure. Keep serum on the ends and exposed surface. Excess slip at the braid base reduces friction, which encourages the loops and concealed attachment to loosen during the event.
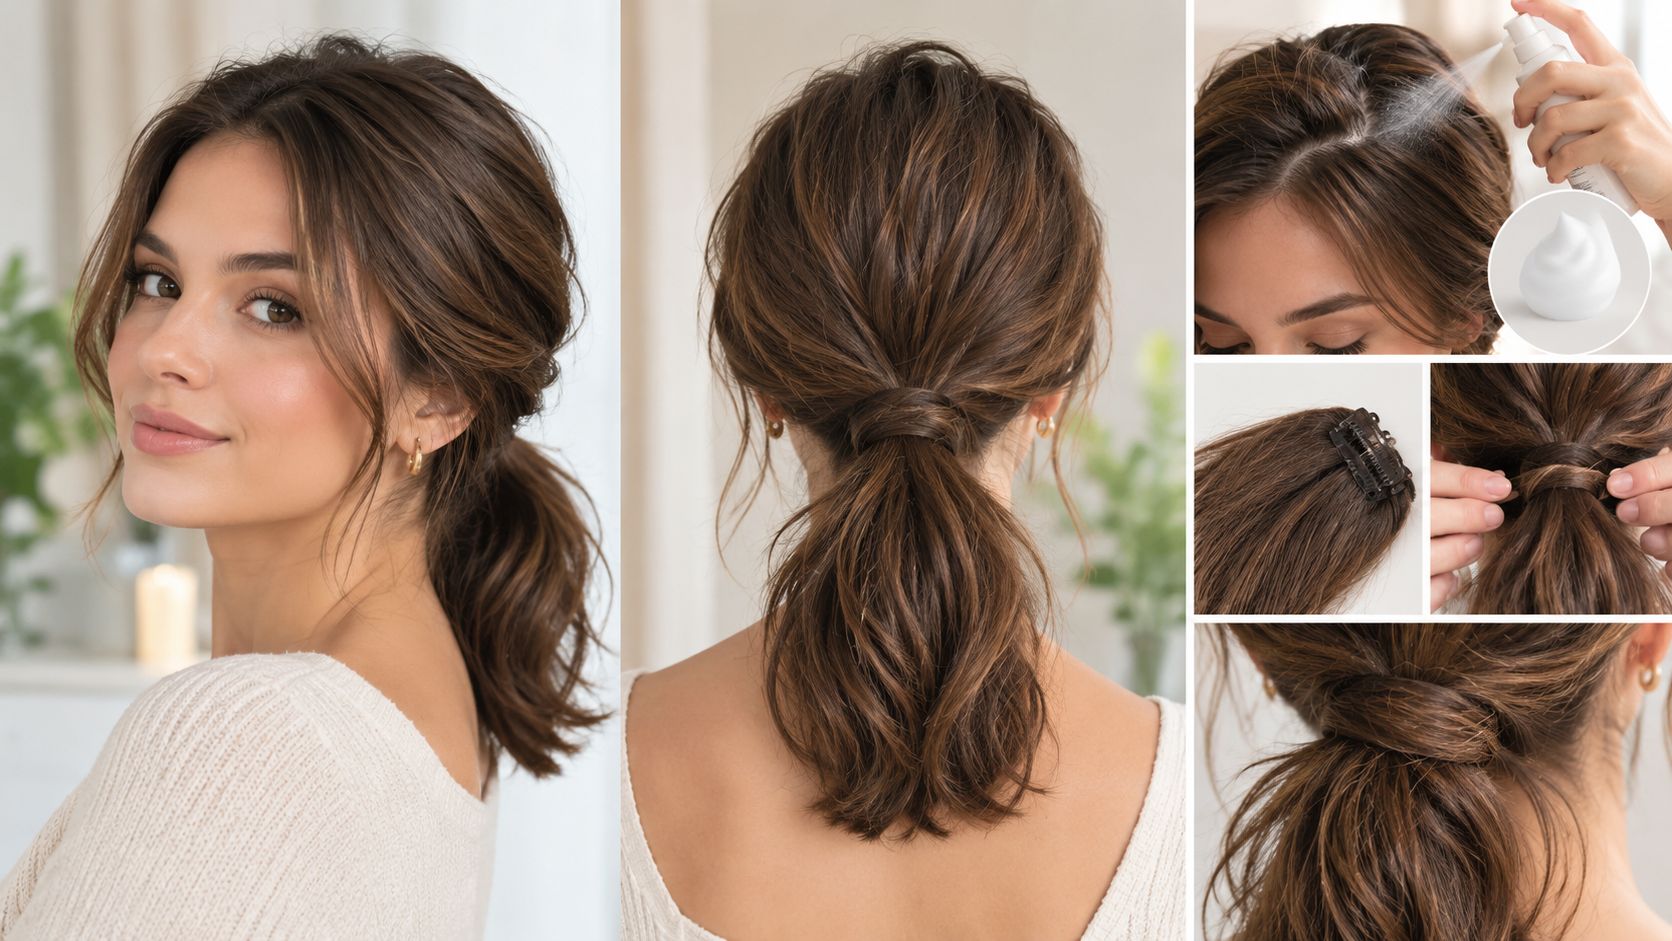
The textured ponytail works for a modern or minimalist dress, especially when the neckline is simple and the client wants movement rather than a compact updo. Medium hair doesn't need a full extension installation for this shape. A low Clip-In wrap or a carefully concealed piece can provide density while the natural hair maintains the visible root and upper structure.
Use a root-lift mousse at the base, then dry the hair in the direction of the ponytail. Keep the root lifted without creating a stiff crown. A tail comb, medium-tooth brush, aluminum silicon-lined beads, and light-hold spray should be available. Anti-frizz serum belongs at the end of the service, and only in a controlled amount.
Texture preparation takes approximately five minutes. Add bend through the mid-lengths and ends, then let the hair cool before brushing. Cooling allows the shape to settle, while brushing distributes the texture into a softer, more expensive-looking movement.
For extension integration, approximately eight minutes is sufficient when the method has been selected during consultation. Secure the natural ponytail first, then place the low Clip-In wrap around the base or use a small concealed support point where the client's density requires it. Aluminum silicon-lined beads can assist with discreet reinforcement when the installation plan calls for a beaded support, but they should never be used to compensate for a poor section or excessive weight.
Tease the shaft lightly, especially beneath the ponytail, then brush the surface smooth. A textured ponytail should have directional movement, not a rough halo of teased hair. Wrap a narrow natural section around the base and pin from underneath so the attachment remains hidden in profile photographs.
The styling stage takes approximately five minutes. Finish with light-hold spray and a small amount of anti-frizz serum on the ends. Heavy serum at the base can create slippage, while strong lacquer can make the texture look rigid.
A correctly prepared formal style has a practical 8 to 16 hour wear window, provided the foundation is anchored, the hair hasn't been over-softened, and the elastics aren't tightened beyond what the natural hair can comfortably support (formal ponytail wear guidance). That isn't a promise for every head of hair. Humidity, density, natural oil, and client handling still affect the result.
For method selection and removable volume planning, stylists can reference Clip-In extensions for volume. A Clip-In is the wrong choice if the client will repeatedly remove and reinstall it without understanding placement, or if the attachment creates pressure at the nape. In those cases, natural styling or a lighter method is safer for the finished silhouette.
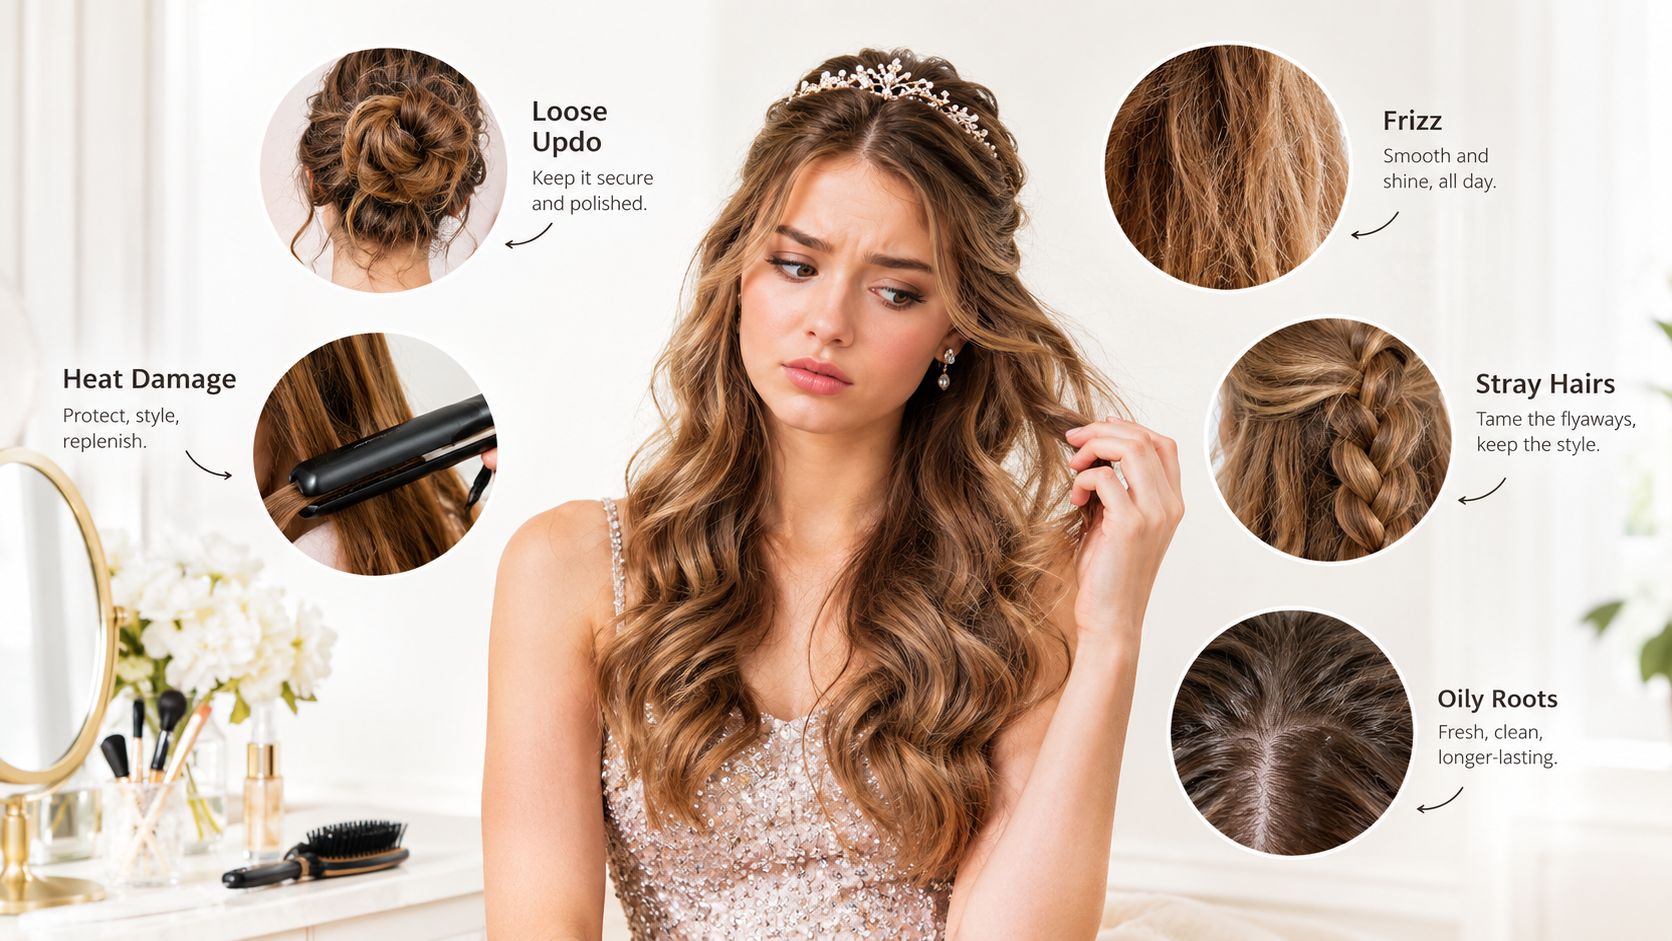
Most failures begin at the foundation. A stylist can often correct the visible symptom quickly, but the lasting solution requires identifying whether the problem is friction, weight, placement, product slip, or extension quality.
A low bun or ponytail that drops at the nape usually lacks a secure back anchor. Re-section the lower back, add texture at the base, and pin into the foundation rather than surface hair. If the extension is carrying too much weight, remove bulk or switch to a lighter support method. Tightening the elastic further often creates discomfort without solving the directional pull.
Visible lines usually come from insufficient overdirection, a parting that is too high, or an extension shade that doesn't follow the natural root pattern. Move the attachment lower, increase the coverage section, and use a rooted or Balayage shade when the client's color changes visibly through the mids. Adding another piece isn't automatically the answer. More density can make the line more obvious.
A loose braid can result from serum, freshly washed hair, inconsistent tension, or a Clip-In placed too close to the working edge. Dry the surface, add a small amount of texture, and rebuild the first anchor points before loosening the outer loops. Micro-link pliers and aluminum beads are useful for controlled support, but only when the bead is placed on a clean, stable section and isn't carrying more weight than the natural hair can manage.
Serum alone won't control humidity-related expansion if the surface wasn't prepared correctly. Smooth the hair directionally, use a medium-hold gel where a sleek area needs control, and reserve serum for the ends. In a softer textured style, don't chase every flyaway. Target the perimeter and the parting, then preserve movement through the body.
Creasing usually indicates a bend formed during sectioning, an over-tight elastic, or a bun assembled before the hair was fully dry. Release the affected section, mist lightly with water or a compatible styling product, and reset the direction before re-anchoring. The back should be secured first because it carries the heaviest weight, while the surface should be finished only after the internal structure is stable.
Extension quality should be diagnosed separately from styling technique. After washing and drying, assess shedding, tangling, retained manageability, color stability, texture retention, and combability. These performance markers are more useful than supplier grade labels, which have no governing industry body (extension quality evaluation guidance). If the hair tangles during a controlled brush-through or sheds excessively during styling, changing the product is more appropriate than adding spray or pins.
A salon can test one of these homecoming hairdos for medium hair during the next suitable appointment, recording the client's density, neckline, texture response, and end-of-service comfort. Conde Professional supplies professional methods including Volume Weft, Thin Weft, Tape Weft, K-Tip, Tape-In, Clip-In, and Bulk, allowing the stylist to match the install to the design instead of forcing one method into every look.
Business access should begin with a professional account rather than consumer checkout. For a more structured consultation workflow, use this hair extension consultation resource, then document the selected method, shade family, anchor points, and maintenance expectations before the event service.
Conde Professional offers licensed pros a wholesale extension collection covering removable, semi-permanent, and integrated methods for polished medium-hair event styling. Open a professional account at Conde Professional, select one neckline-specific technique, and test the placement and wear plan in the next salon session.


