Your cart is empty
Tax included and shipping calculated at checkout

Drawer menu
Tax included and shipping calculated at checkout
A professional account gives you stylist pricing, priority support, early access to new releases, and education developed by working stylists.


A thin-haired client is in the chair asking for fullness, but the usual full-head tape-in plan already looks too heavy on the consultation sheet. The correct approach is to distribute load across carefully sized subsections, not to chase maximum volume. Tape-ins can work beautifully for fine hair when every bond is placed with adequate scalp clearance, consistent sectioning, and a conservative amount of extension hair.
Thin-hair tape-in work is a load-distribution problem. The stylist is not just adding hair. Each bond must share weight across enough natural hair to remain stable without creating constant pull at the root. That means the subsection thickness, bond position, and row pattern matter more than the number of strands visible in the finished blend.
Tape-ins became a notable mainstream method in the early 2000s, with industry history identifying around 2004 as a key breakthrough year. Their flat, pre-taped wefts apply quickly and add volume with less visible bulk, which explains their continuing appeal for fine hair. The same history places repositioning at 6 to 8 weeks, with the hair reusable for 6 to 12 months when maintained correctly, although the stylist still has to decide whether the client's native hair can safely support repeated wear cycles. Read the history of tape-in extensions and their development.
The common salon plan may involve 20 to 40 ultra-thin polyurethane bonds, arranged in brickwork rows with a horizontal offset and deliberate scalp clearance. Each bond should carry only a modest amount of extension hair, roughly 2 to 4 grams, rather than being treated as a miniature full-density panel. Those figures belong to the specific planning framework for this type of install, not a universal manufacturer specification.
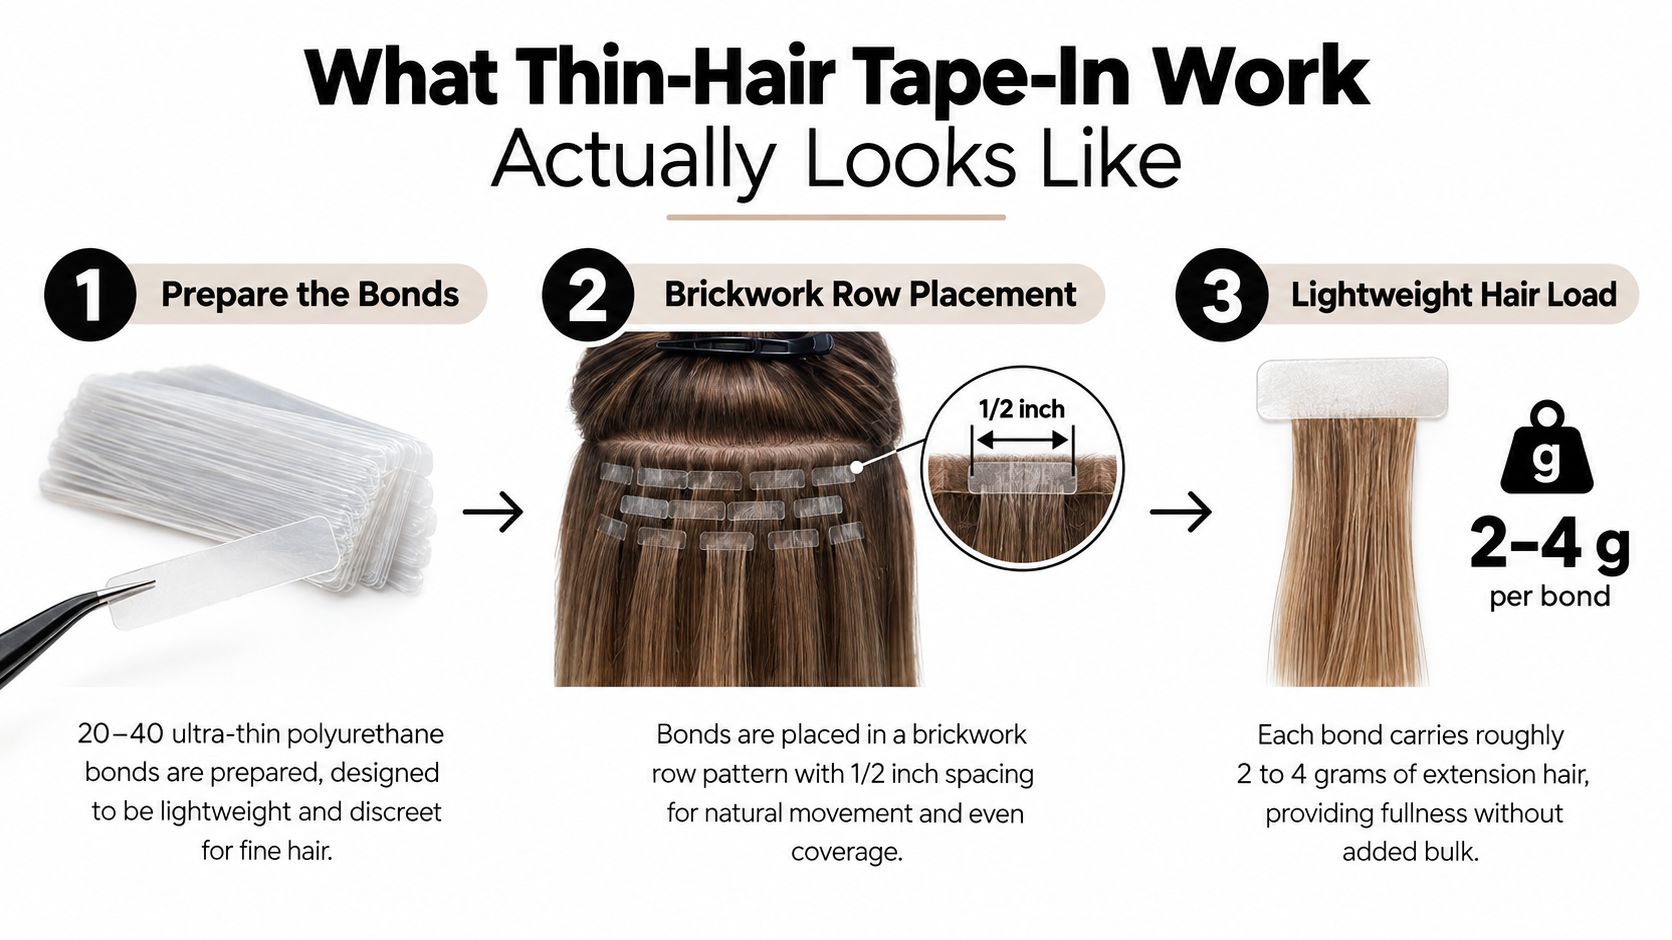
Fine hair changes the usual weight conversation. A classic one-gram-per-strand rule is too simplistic because individual strand count doesn't reveal how much natural hair is supporting a bond. The width and thickness of the subsection are the controlling variables. A wide-looking section can still be too shallow to anchor safely, while a narrow, even slice can support a flatter, more predictable sandwich.
The consultation gate comes before the quote. Density needs checking at the temples, mid-scalp, and occipital ridge. The stylist also needs to assess scalp condition, chemical history, previous extension use, and the client's tolerance for a conservative result.
Practical rule: If the client needs more hair than the natural density can safely support, fewer wefts are the professional answer, not smaller excuses for adding more weight.
Tape-ins suit clients with stable fine hair who want discreet fullness and can follow maintenance instructions. They disqualify clients whose scalp or hair already shows signs of active instability, excessive breakage, or inadequate anchoring density.
The pre-quote assessment should be hands-on, documented, and specific. A client saying “my hair is thin” doesn't tell the stylist whether the issue is evenly distributed fine density, localized thinning, recent shedding, chemical breakage, or a scalp condition that makes adhesive placement inappropriate.
Start with clean partings at the temples, mid-scalp, and occipital ridge. Compare how much scalp shows, how evenly the hair covers the part, and whether the subsection stays intact when gently lifted. A parting-and-count method can help standardize the assessment, but no unsupported numerical threshold should replace professional judgment. The stylist should record the observed density and the location of weak zones in the consultation record.
Screen the following before discussing hair selection:
Visible scalp through the part is a serious warning sign. Miniaturised follicles along the hairline, unexplained active shedding, or a pattern that suggests telogen effluvium should redirect the consultation away from an immediate tape-in install. Extension-related traction can contribute to traction alopecia. A NIH review of traction alopecia and extension-related tension notes that constant tension from extensions can cause the hair shaft to separate from the follicle opening and lead to hair loss.
| Check | Pass Threshold | Red Flag |
|---|---|---|
| Temple density | Stable coverage with a subsection that remains intact | Visible scalp or fragile perimeter hair |
| Mid-scalp density | Even support across the planned row | Sparse, shifting, or highly irregular coverage |
| Occipital ridge | Hair can hold a thin sandwich without excess tension | Snapping, tenderness, or inadequate subsection |
| Shedding history | Stable pattern and clear maintenance expectations | Active shedding or a pattern suggesting telogen effluvium |
| Scalp condition | Calm, intact scalp | Inflammation, psoriasis, seborrheic dermatitis, or soreness |
| Chemical history | Hair has sufficient structural integrity | Recent aggressive bleaching or severe breakage |
| Adhesive history | No known sensitivity or a verified professional alternative | Previous adhesive reaction |
The stylist should document why tape-ins were approved, limited, or refused. The professional hair extension consultation guide can support a more consistent intake process, but it doesn't replace visual assessment or informed professional judgment.
Accepting fewer wefts may disappoint a client who expects a dense transformation. It also preserves more of the client's native density over repeated appointments, which is the more responsible trade-off when the support system is limited.
Bond preparation starts before the client sits for the install. The hair needs to be clean, dry, and free from anything that reduces contact between the adhesive and the natural hair. A clarifying wash using a sulfate shampoo is a practical starting point, provided the client's hair and scalp can tolerate that cleansing approach.
The hair should be washed without conditioner, oils, leave-in products, or styling residue near the proposed bond zones. After cleansing, a 24 to 48 hour product-free window can help the scalp return to its normal oil balance without placing fresh product directly under the tape. The stylist should still inspect the hair immediately before installation, because product-free doesn't mean residue-free.
For additional guidance on choosing a cleansing approach, the professional clarification guide for extension preparation is a useful salon reference.
Horizontal partings should remain controlled rather than broad. A working section around 0.5 to 0.75 inches tall gives the stylist visibility and keeps the row manageable. The subsection width must match the tape bond, often around 1.1 to 1.5 centimetres, while the natural hair captured should remain thin enough to avoid a loose or overloaded sandwich.
The proposed section should stay under 1.5 grams of natural hair for this planning framework. That figure isn't a product specification. It functions as a practical control against excess depth, slippage, and uneven pressure on fine hair.
Tape selection should follow the client's density and scalp history:
Before placement, brush the natural hair smooth with a soft tool and remove every tangle from the proposed section. The stylist should be able to isolate a clean, even slice without backcombing or compressing the hair. If the section needs force to stay together, it isn't ready to carry the bond.
Bond control starts with the hair underneath. Conditioner, oil, dampness, and compressed sections create problems that no adhesive choice can reliably correct.
The install should be built around distributed support, not the client's requested amount of volume. Begin with a clean horizontal parting no thicker than 1 to 1.5 inches from ear to ear. The row should sit where the natural hair can conceal the attachment without forcing the stylist into exposed hairline zones.
Take a sub-row only as wide as the tape tab, usually about 1 to 1.25 inches, and keep its depth no thicker than a credit card. The natural slice should be even from side to side. If one end is thicker, the bond will load unevenly and the thinner side will usually reveal slippage first.
The first row needs more room from the scalp on fragile fine hair. Maintain approximately 0.5 to 1 inch of clearance so the bond doesn't pull directly against new growth or create visible lift as the hair moves. Later rows can sit closer, around 0.25 to 0.5 inch, when the surrounding density provides enough concealment and the client's hair tolerates the placement.
Other professional guidance places the bond around 2 to 5 millimetres from the scalp, with some fine-hair recommendations moving farther out to approximately 1/4 to 1/2 inch, especially near the hairline and exposed zones. The common principle is more important than pretending one distance suits every head. A small air gap reduces friction and root tension while keeping the panel flat. Review tape-in application and removal guidance for fine hair sectioning.
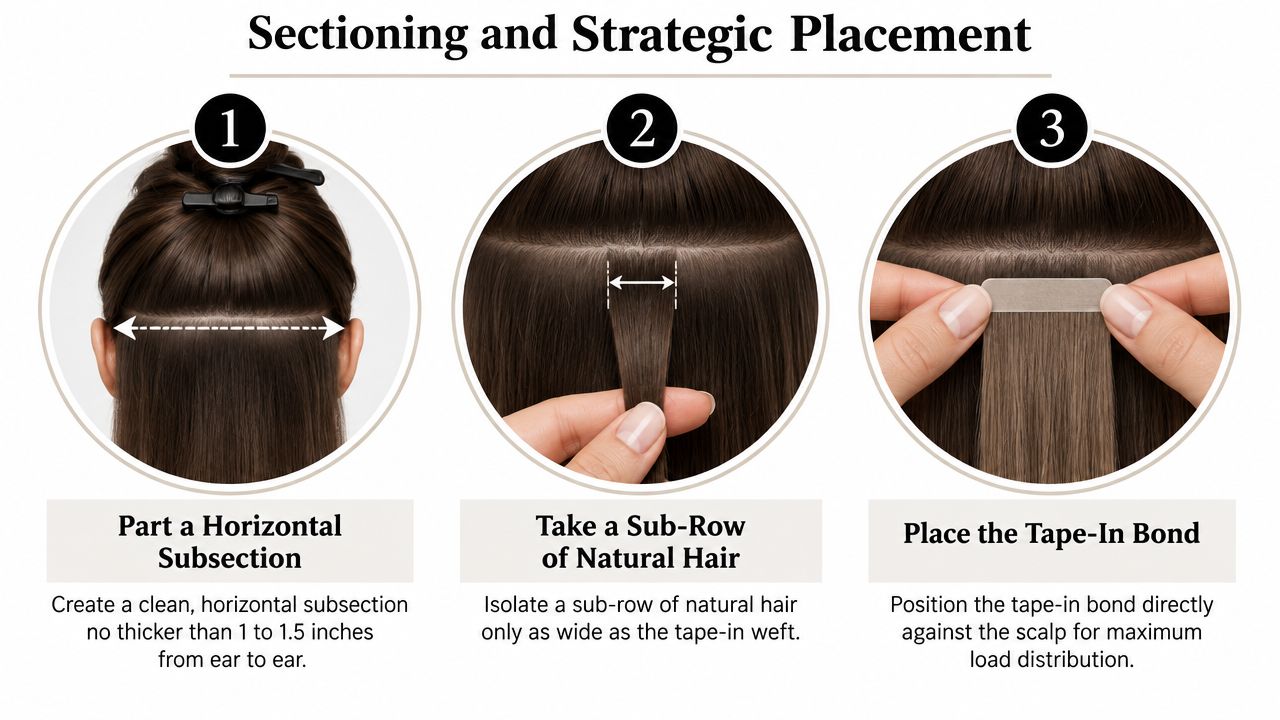
Place the first panel with the tape parallel to the scalp. The extension should sit flat without riding upward, folding, or crossing the parting. Isolate a thin slice of natural hair, check that it matches the panel width, and place the second weft directly over the first to form the sandwich bond. Use a placement board reference for consistent tape-in positioning.
Press the panels together from the ends toward the root without sliding them across the hair. Hold the bond for 3 to 5 seconds, then re-press with pliers only over the adhesive zone. The pressure-sensitive tape should be pressed firmly for 10 seconds according to professional application guidance, and the install shouldn't be washed or heat-styled for roughly 48 hours while the bond sets. Follow the professional tape application guidance for pressure and setting time.
Stagger every subsequent tab in a brickwork pattern. Avoid placing bonds directly above one another, and don't create a vertical seam running through the mid-shaft. A staggered arrangement spreads visual density and mechanical load, making the finished hair look less segmented and keeping move-ups more predictable.
Check every row from the back and side before proceeding. Tabs should be parallel, consistent in depth, and clear of the hairline, crown whorl, and any area where the client reports tenderness. A placement that looks acceptable from one angle can still expose a seam through fine hair when the head turns.
Tape-ins are the wrong choice when the client's hair can't provide a stable anchor. The flat bond distributes load more broadly than a point attachment, but it still sits on natural hair that may already be compromised. A refusal protects the client and the salon's reputation.
Redirect the service if the consultation identifies:
| Method | Best For Thin Hair | Main Trade-Off |
|---|---|---|
| Tape-In | Stable fine hair needing discreet, distributed fullness | Adhesive remains on a potentially fragile support section |
| Hand-Tied or Beaded Row | Clients wanting broader full-head density across a row | Requires careful anchoring and a suitable scalp and density profile |
| K-Tip | Scattered fine zones around the face or crown requiring precise placement | Individual bonds concentrate load and demand exact installation and removal |
| Microlinks | Clients seeking no adhesive on a reactive scalp | Small attachment points can be unsuitable for very fine or low-density hair |
Hand-tied wefts can make more sense for a client who wants full-head density with one row of weight distributed across a broader anchor. K-Tips may suit scattered face-framing or crown zones where a row would be too visible, although individual placement creates its own load concerns. Microlinks remove adhesive from the equation, but they don't automatically solve an anchoring problem in very fine hair.
The fastest install isn't always the safest service. Tape-ins offer a quick application and straightforward move-up, but the stylist still has to refuse the method when every bond would sit on overstressed hair.
For a further professional discussion of situations in which adhesive extensions may be unsuitable, see this guide to tape-extension damage considerations. Method refusal is part of technical service, not a failure to sell.
Fine hair exposes poor blending quickly. The extension hair and the client's natural hair need to be cut as one canvas, with the bonds fully set and the hair brushed smooth before the scissors touch the perimeter.
Start dry. Use a loop brush or a wet brush designed to pass around bonds, and avoid a paddle brush with hard nylon pins that can catch the tape tabs. The brush should move from the ends upward while the stylist supports the attachment area with the free hand.
Slide-cut the perimeter first to remove the blunt extension edge. Fine natural hair rarely disguises a straight artificial line, so the cut needs movement before internal detailing begins. Point-cut through the interior around the face frame and crown to break up any tape seam that shows through the surface.
Keep face-framing pieces longer than the shortest extension row. The shortest row should tuck behind the ear rather than finish at cheek level, where a thin veil of natural hair may not conceal the panel. Check the profile in a hand mirror for a stair-step silhouette between rows, then tilt the head and point-cut again wherever a tape end becomes visible.
A useful haircut reference for clients with sparse-looking lengths is PRP For HairLoss on styling thin hair. The value lies in the shape principles, especially avoiding cuts that make fine areas look more disconnected.
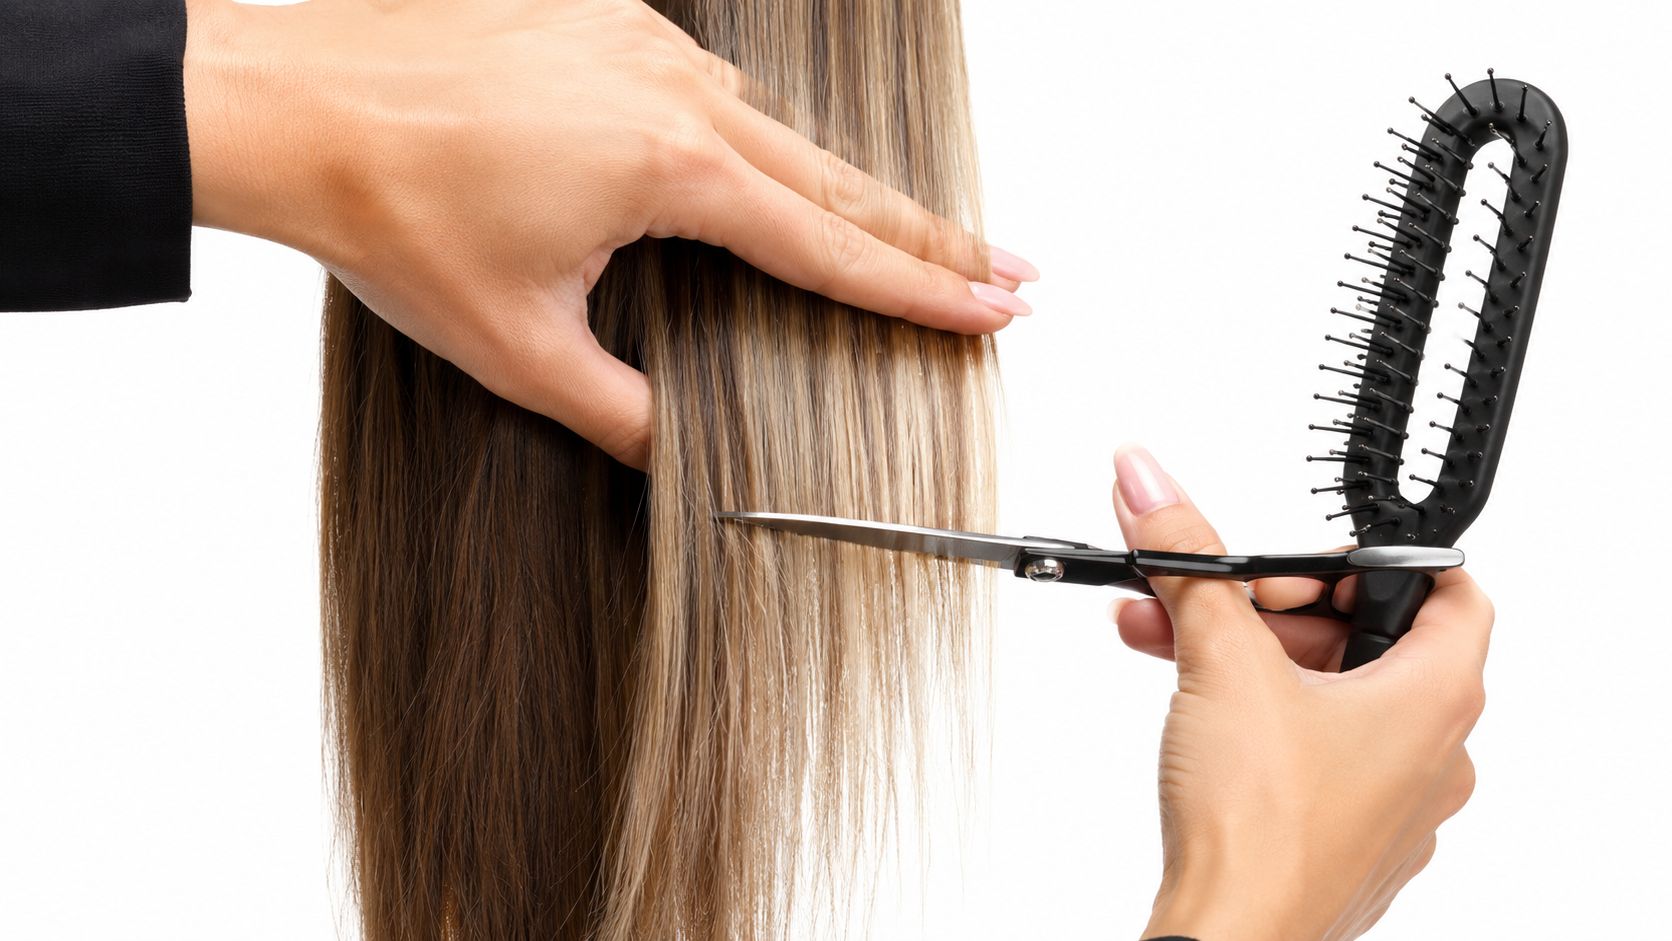
Finish with a cool-shot blow-dry and a dry cut dust only. Wet shears through the bond line can drag the hair and disturb the attachment. The stylist should also review the immediate setting window before the client leaves: no washing or heat styling for roughly 48 hours, as outlined in the professional application guidance.
The final inspection should include movement, profile, and parting checks. Fine hair can look blended while stationary and reveal a seam when brushed forward, tucked behind the ear, or lifted at the crown.
Maintenance protects the bond line and the natural hair supporting it. Schedule move-ups at 6 to 8 weeks, before growth allows the attachment to hang too far below its original clearance. The exact appointment still depends on growth, slippage, tangling, scalp comfort, and the condition of the supporting subsection.
Clients should wash with sulfate-free products and tilt the head back so shampoo doesn't grind into the tape seam. Conditioner belongs on the lengths, not at the roots or over the adhesive. Root-lifting products, oils, bond-line conditioner, and high-heat root irons should remain off the attachment area because they can undermine adhesion or add stress during styling.
A loop-style cushion brush with ball tips or another soft extension brush should be used for detangling. A satin pillowcase helps reduce overnight friction, particularly when the client's hair is fine enough to expose every point of tangling.
For drying, rough-dry the lengths first. Towel-press the bonds last, rather than allowing wet hair to hang from the attachments while the client's head is upright. The stylist should demonstrate gentle brushing and show the client how to support the root area during detangling.
The professional extension care guide can reinforce the salon's written aftercare instructions without replacing a demonstration at the appointment.
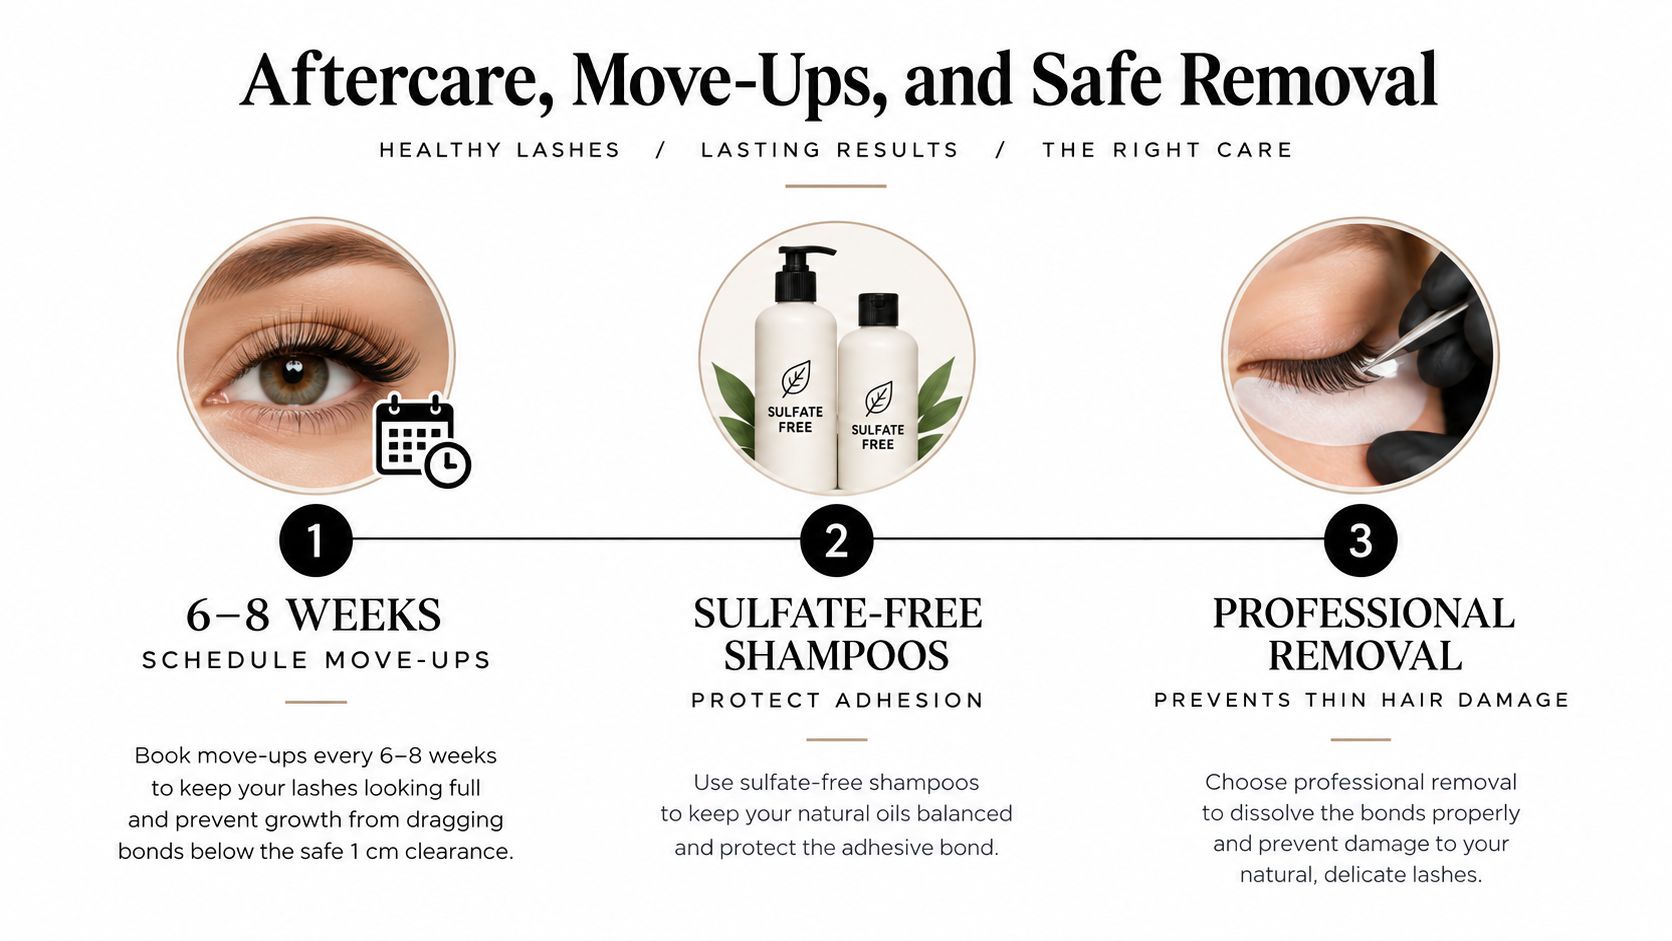
Removal starts by softening each tab with bond-release oil for 10 to 15 minutes. Separate one pair at a time and peel the panels against the direction of hair growth, keeping the natural hair supported rather than pulling the extension away abruptly.
Retained adhesive should be treated tab by tab with medical-grade tape remover. It shouldn't be scraped from the hair or scalp. After the adhesive is removed, cleanse with a clarifying wash and inspect the scalp and released hair before deciding whether to retape or change the method.
Hair snapped above the bond is a meaningful consultation finding. It can indicate prior traction or an overloaded section, so the stylist should record it and reassess the next service rather than automatically reinstalling in the same locations.
For a professional product selection review, Conde Professional offers Tape-In, Tape Weft, Volume Weft, Thin Weft, K-Tip, Clip-In, and Bulk collections for licensed professionals, along with color-matching and installation support. Stylists should compare the available method and shade options against the client's support density before opening a professional account and ordering.
Conde Professional supplies licensed stylists with professional extension methods including Tape-In, Tape Weft, Volume Weft, Thin Weft, K-Tip, Clip-In, and Bulk, plus tools and education for salon installation. Visit Conde Professional to review the professional collections and choose a method that matches your thin-hair client's actual load capacity.


