Your cart is empty
Tax included and shipping calculated at checkout

Drawer menu
Tax included and shipping calculated at checkout
A professional account gives you stylist pricing, priority support, early access to new releases, and education developed by working stylists.


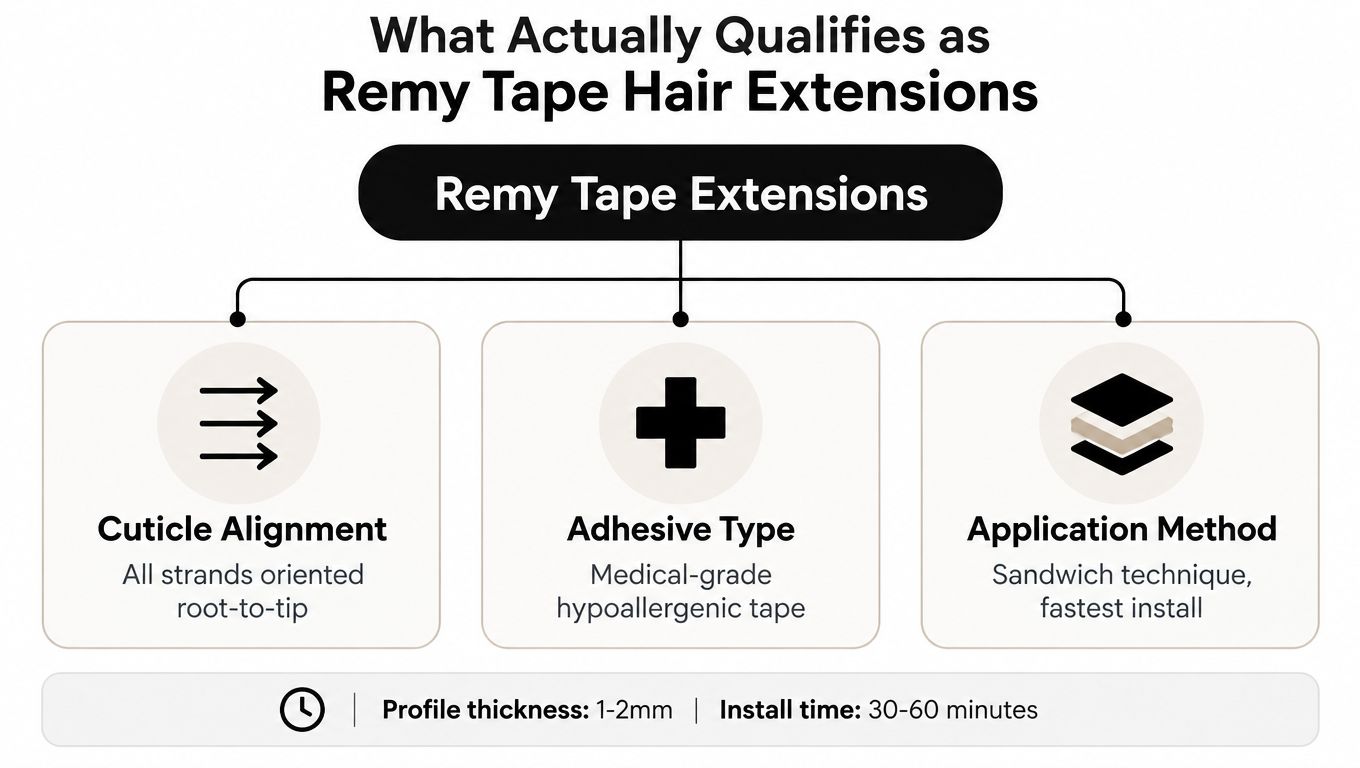
Remy tape hair extensions are cuticle-aligned human hair panels applied via medical-grade adhesive sandwiches, offering the fastest install times and flattest profile for fine-to-medium hair clients. Professional tape-in installation typically takes 60–90 minutes, with repositioning commonly planned around 8–10 weeks, but adhesive performance and client lifestyle usually decide the result before hair quality does.
That distinction matters behind the chair. Remy construction can reduce friction, tangling, and roughness because the cuticles remain aligned, yet sweat, scalp oil, heat, regrowth, and product contamination can still make a premium panel slip. The Remy hair extension market report values the global category at $2.8 billion in 2025, with tape-in extensions holding 32.5% of that market, a useful signal that this method has become a core professional service rather than a niche add-on.
Remy tape hair extensions have two defining hair conditions: the cuticle remains intact, and the strands stay aligned root-to-tip in the same direction. If either condition fails, the hair isn't technically Remy. The adhesive panel is a separate part of the construction. It creates the attachment system, while cuticle integrity determines how the fiber behaves through brushing, washing, styling, and repeated handling.
A tape-in is installed as a sandwich, with the client's hair section positioned between two adhesive-backed panels. The section must carry the extension without excessive tension, and the panels must sit flat rather than fold, buckle, or catch neighboring hair. Thin adhesive strips support a discreet profile, which is why tape-ins are often selected for fine-to-medium density and clients who need softness at the attachment area.
Supplier labels such as 6A, 7A, 8A, 9A, and 10A aren't governed quality standards. They're marketing terms, so the letter or number can't verify the condition of the cuticle, the consistency of the alignment, or how the hair will behave after salon use. A professional assessment should focus on observable performance:
Cuticle alignment reduces friction-driven tangling and matting during repeated washing and brushing, according to technical guidance on Remy tape extensions. It doesn't make the hair immune to dryness, thermal stress, mechanical abrasion, or poor removal. The adhesive tab can fail while the hair remains usable, and the hair can deteriorate if the client receives aggressive brushing even when the bond is secure.
Chair-side rule: A supplier's grade label is not a substitute for a comb test, a visual cuticle inspection, and a realistic discussion about maintenance.
For a deeper professional explanation of the distinction between human-hair quality and extension construction, see Remy human hair extensions. Chemical services also require separation from the adhesive area. Color work should be planned around the installed panels, and lightening services need particular caution because the extension fiber has already undergone its own processing history, which the stylist should verify with the supplier rather than assume.
Conde Professional Tape-In panels are offered in 18 to 28 inches and in straight textures, giving the stylist room to build length without forcing one uniform line through the entire install. Length selection should follow the client's existing perimeter, density, and desired silhouette. A long panel placed uniformly through a short or fine perimeter can produce a triangular result, even when the color match is accurate.
Start with the finished shape, not the longest available option. Shorter lengths can support the upper and mid sections, while longer lengths are reserved for the lower interior and perimeter where the eye reads length most strongly. Layering lengths creates a more believable transition and helps a blunt-cut illusion look intentional rather than overloaded.
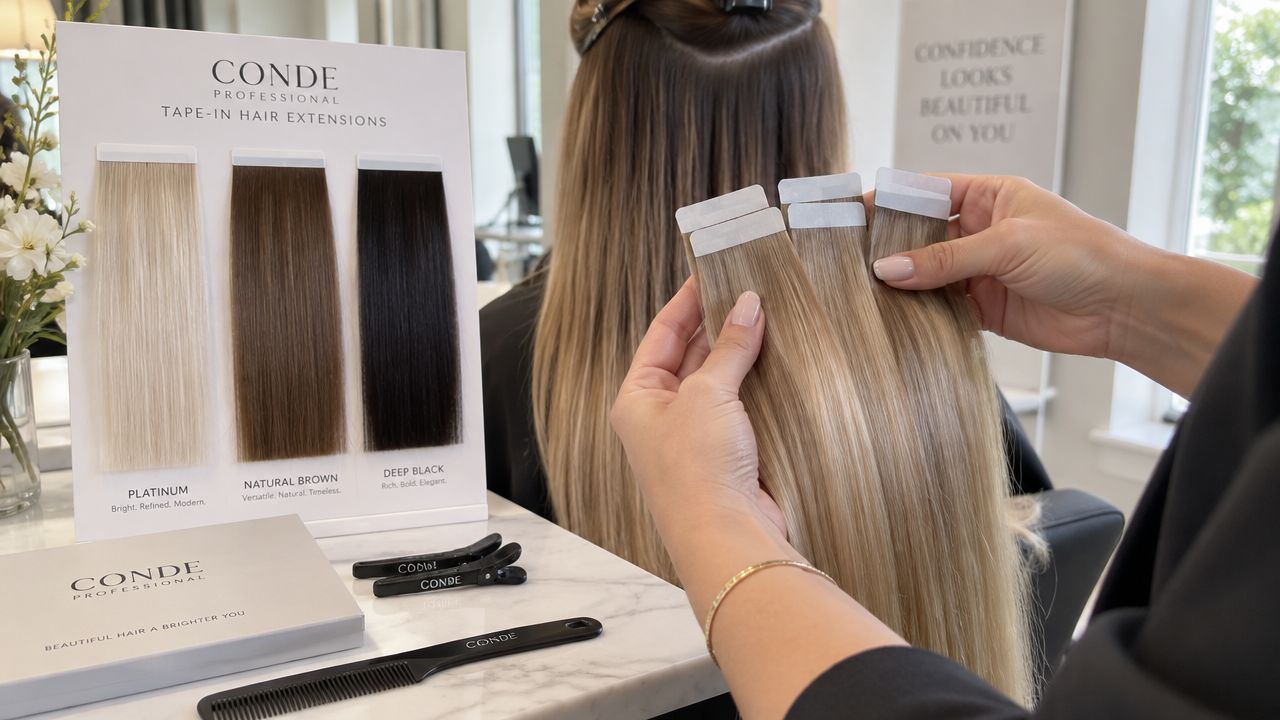
Shade selection works more reliably when the stylist identifies the client's color behavior first. Conde's shade families include:
The root is not always the correct matching point. For a smooth finish, the extension should generally relate to the client's mids and ends, because that is where the panel enters the visible blend. A rooted or dimensional family may outperform a technically close solid shade if the client's natural hair has depth, previous color, or a graduated tonal pattern.
Use a physical color ring whenever possible, viewed in the salon's working light and against the client's hair. The extensions color chart guide is useful for organizing the selection process, but the final decision should account for tone, saturation, brightness, and how the client's hair looks away from the parting.
Core salon shades make sense for recurring services and predictable maintenance appointments. A custom blend is more appropriate when the client has layered color, uneven fading, dimensional balayage, or a tone that sits between stocked families. The panel shouldn't be chosen only because its root appears similar. The stylist should compare the visible mid-length and perimeter blend, then decide whether one family, a layered combination, or custom color work will produce the cleanest result.
Tape-ins suit clients who need a flat, discreet attachment and a relatively efficient install. They distribute the extension across adhesive panels rather than concentrating the attachment into individual bonds or a beaded row, which can make them a practical choice for fine-to-medium density when the sectioning and weight are properly matched.
They aren't automatically the safest option for every head of hair. Extremely dense or coarse hair may visually overpower a light panel, while a client who refuses regular maintenance may be better served by a method whose cadence matches that expectation. Professional extension menus commonly include tape-in, hand-tied weft, keratin bond fusion, beaded row, I-tip, and weft methods because attachment mechanics and maintenance requirements differ, as shown in this salon extension method overview.
| Method | Ideal Hair Density | Install Time | Move-Up Cadence |
|---|---|---|---|
| Tape-In | Fine to medium | Efficient panel installation | About 6–8 weeks |
| Thin Weft or hand-tied weft | Fine to medium, where a continuous row is appropriate | Longer than tape panels | Commonly 8–12 weeks |
| Volume Weft | Medium to thick, especially where substantial density is needed | Longer row-based install | Commonly 8–12 weeks |
| Beaded row or microlinks | Medium to thick, with sufficient support for beads | More time-intensive | Commonly 8–12 weeks |
| K-Tip | Clients needing individualized strand placement | Longer individual-bond service | Method-dependent, often longer than tape maintenance |
| Fusion bonds | Clients suited to individual keratin attachment | Time-intensive | Method-dependent, often longer than tape maintenance |
The matrix is a consultation aid, not a prescription. Tape-In panels can be a strong option for fine hair because they lie close to the head and avoid the concentrated bead or bond placement of other systems. That advantage disappears if the stylist uses too much extension for the client's support hair, leaves insufficient spacing around the perimeter, or places panels where ponytail tension will pull against them.
Tape-ins are a poor fit for a client with a persistently oily scalp, heavy oil-based scalp products, frequent high-sweat activity, or a strict refusal to return for maintenance. Humidity and repeated wetting can also expose weak adhesive preparation. The issue isn't that Remy hair lacks quality. The issue is that the attachment system has a limited tolerance for contamination and delayed repositioning.
For extremely thick, coarse hair requiring substantial density, a Volume Weft may create a more balanced result than stacking tape panels. A Thin Weft can be considered where a lighter row is appropriate, while K-Tip or a beaded method may suit clients who need individualized placement and accept a longer service. The professional salon extension guide can support method education, but the final decision belongs to the consultation, sectioning plan, and maintenance agreement.
Premium Remy hair does not guarantee a long-lasting tape installation. The fiber may stay smooth and manageable while the adhesive loses grip from scalp oil, sweat, heat, regrowth, conditioner, or leave-in products migrating toward the tab. In practice, adhesive performance and client routine often determine the service interval more than cuticle alignment alone.
Professional guidance places a typical tape-in refit around 6–8 weeks, as detailed in how long do tape-in extensions last. The same hair can often be reinstalled with fresh tape after removal. The professional guidance on tape-in longevity links slipping and reduced adhesion to oils, sweat, heat, and regrowth, rather than treating hair quality as the only factor.
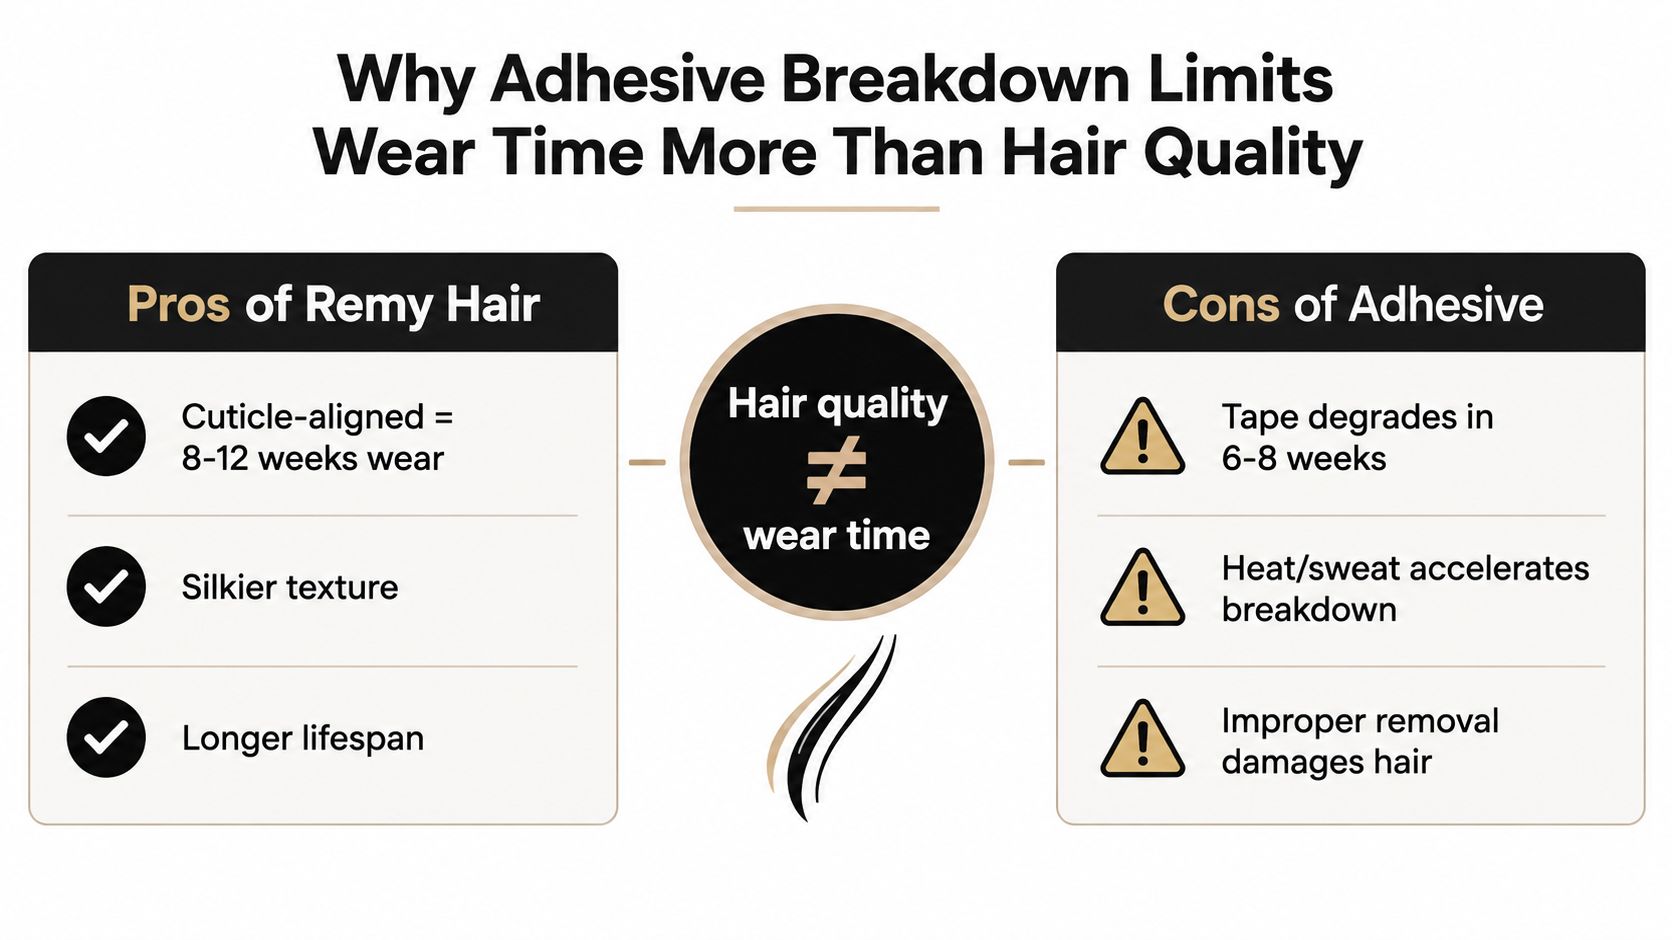
A client who trains frequently, works outdoors, travels through humid climates, or uses a rich leave-in routine creates a different adhesive environment from someone with a dry scalp and limited product use. Ask about washing, workouts, swimming, heat styling, scalp treatments, and how the client wears the hair at night.
Separate two timelines during the consultation:
These timelines overlap, but they measure different risks. Regrowth or slipping may require a move-up while the hair still combs well. Conversely, a secure bond can remain in place while the ends deteriorate through heat, friction, or inadequate conditioning.
Consultation language: “Remy quality supports the hair's feel and manageability. Your routine will decide how the adhesive behaves.”
Keep conditioner, oils, and heavy styling products away from the tape area. Sectioning also affects retention. A panel placed near an oily zone, exposed to repeated tension, or installed with hair trapped unevenly inside the sandwich has a preventable failure point.
Maintenance must be included in the pricing conversation. A market report places professional Remy tape applications within a $250 to $600 range and identifies Remy extensions as 28.4% of the broader hair-extension market, as reported in this tape-in market analysis. Those figures support premium positioning, but they do not remove the need to explain upkeep. The client is paying for the method and its service cycle, not adhesive performance that overrides lifestyle.
Removal should be controlled, deliberate, and fully supported by product instructions. The stylist's objective is to break down the adhesive before separating the sandwich, then release the panel with minimal mechanical stress on both the extension fiber and the client's support hair.
Begin by isolating one panel and protecting the surrounding hair. Apply an appropriate professional adhesive remover to the tab, allow it to work according to the product directions, and test the bond with a gentle sliding motion. If resistance remains, add remover and wait rather than pulling harder.
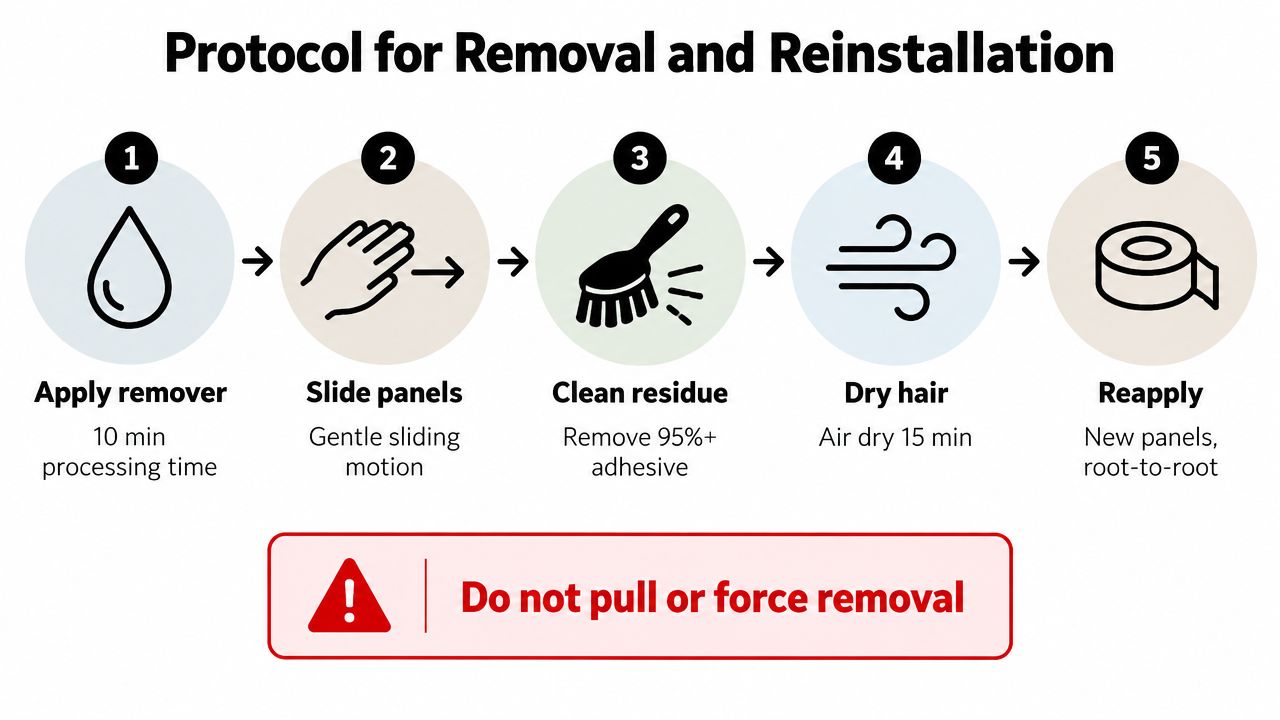
Once the panels release, support the natural hair near the root and slide the extension away. Do not yank, peel rapidly, or use a comb as a lever against the root. Mechanical force can create breakage even when the extension hair itself remains in good condition.
Clean the old adhesive residue from the panel tab before applying fresh tape. Inspect the weft for shedding, matting, roughness, or edge distortion. If the panel no longer lays flat or the hair has become difficult to comb, re-taping alone won't restore its original performance.
A clean prep sequence includes:
The second install shouldn't copy the original placement automatically. Regrowth changes the distance from the scalp, and the client's density may no longer distribute weight in exactly the same way. Re-section so the panel sits flat, the support section matches the panel, and the sandwich closes without loose hairs escaping at the sides.
Removal quality is part of the hair's service life. A stylist who forces a stubborn bond may shorten the useful life of the natural hair and compromise the extension tab. A stylist who removes residue thoroughly, uses fresh tape, and rebuilds the placement can preserve the panel for another service cycle, subject to the hair's actual condition.
A wholesale supplier should make quality measurable. The relevant questions concern cuticle integrity, alignment, color consistency, shedding, combability, and wash durability, not whether a product carries an impressive letter grade. Supplier marketing labels don't replace a repeatable inspection process.
Salon owners should request clear method information for the products being considered. The supplier should be able to explain which panels are intended for tape application, how replacement tape is handled, what education is available, and how color matching support works. The stylist also needs a practical way to compare the physical hair with the color ring before committing to a backbar range.
A professional receiving check can include:
Conde Professional supplies professional methods including Volume Weft, Thin Weft, Tape Weft, K-Tip, Tape-In, Clip-In, and Bulk. Its education and color support can be reviewed through the wholesale human hair extensions resource, while account access is directed toward licensed professionals rather than consumer checkout.
Stocking should follow demand patterns, not an attempt to carry every shade and method immediately. A focused selection of recurring shade families, a physical color ring, replacement tape, and the tools required for the salon's chosen installation systems creates a more manageable starting point. The stylist can then expand into dimensional, rooted, or creative shades as consultations show a consistent need.
Audit the current extension menu today, list the most requested shade families and methods, then order a Conde Professional color ring through a professional account before the next wholesale purchase. That single step gives the salon a physical reference for matching, method planning, and more accurate backbar decisions.
Conde Professional offers licensed professionals a wholesale range spanning Tape-In, Tape Weft, Volume Weft, Thin Weft, K-Tip, Clip-In, and Bulk methods, supported by education and color matching guidance. Visit Conde Professional to review the professional account process and start building a tape extension backbar around real client lifestyles.


