Your cart is empty
Tax included and shipping calculated at checkout

Drawer menu
Tax included and shipping calculated at checkout
A professional account gives you stylist pricing, priority support, early access to new releases, and education developed by working stylists.


The client is in the chair with fine hair, a widening part, and enough length to make tape-ins tempting. The safe answer isn't to draw perfectly even rows. Distribute weight through stronger mid-occipital zones, protect the perimeter, and reassess tension after styling and head movement.
Tape in placement for thin hair is a load-management exercise against the client's density map. The cleanest-looking installation can still be the wrong installation if symmetry forces adhesive panels onto fragile strands. A conservative map, lighter panel design, and willingness to decline are more valuable than maximum fullness.
Fine hair has less structural reserve around the hairline, temples, crown whorl, nape, and areas of active shedding. Those zones move more during brushing, ponytailing, and daily styling, so a panel placed there can create concentrated tension even when the rows look tidy.
A safer starting point is a scalp and hair-integrity assessment. The stylist should check for active shedding, inflammation, visibly miniaturized areas, fragile chemically processed hair, and signs that existing strands are already under mechanical stress. Extensions can create sustained tension and added weight, and repeated pulling is associated with traction alopecia, which can progress from nonscarring loss to permanent follicular damage in some cases (peer-reviewed dermatology review).
A symmetrical row map assumes the client's hair has symmetrical strength. It often doesn't. One side may have shorter regrowth, a weaker temple, a wider part, or more breakage from habitual styling. The attachment pattern should follow the areas that can support the load, not the lines that are easiest to draw with a comb.
The practical sequence is:
Practical rule: A balanced installation doesn't mean equal panel counts on both sides. It means no section is carrying more tension than its density can tolerate.
A client who wants a fuller visual result may also benefit from styling and cosmetic approaches that create the appearance of density. A resource on tips for fuller looking hair can support that broader conversation without turning extensions into a solution for unexplained loss.
For a method-specific review of volume placement, stylists can also consult Conde Professional's guide to tape-in extensions for volume. The professional decision remains the same: the map follows strength, and the target is controlled load rather than maximum density.
A client arrives wanting a fuller, symmetrical result, but the front perimeter is broken, the part is widening, and the scalp feels tender. That is a referral conversation, not a placement challenge. Tape-in work adds load to the client's existing density map, so the service must stop when the available support cannot carry it safely.
During consultation, inspect the scalp and hair in good light, then use gentle palpation. Check for broken perimeter hairs, tenderness, erythema, crusting, translucent patches, active shedding, inflammation, visibly miniaturized areas, and reduced elasticity after chemical work. Ask what has changed recently and whether the client has noticed increasing loss or discomfort.
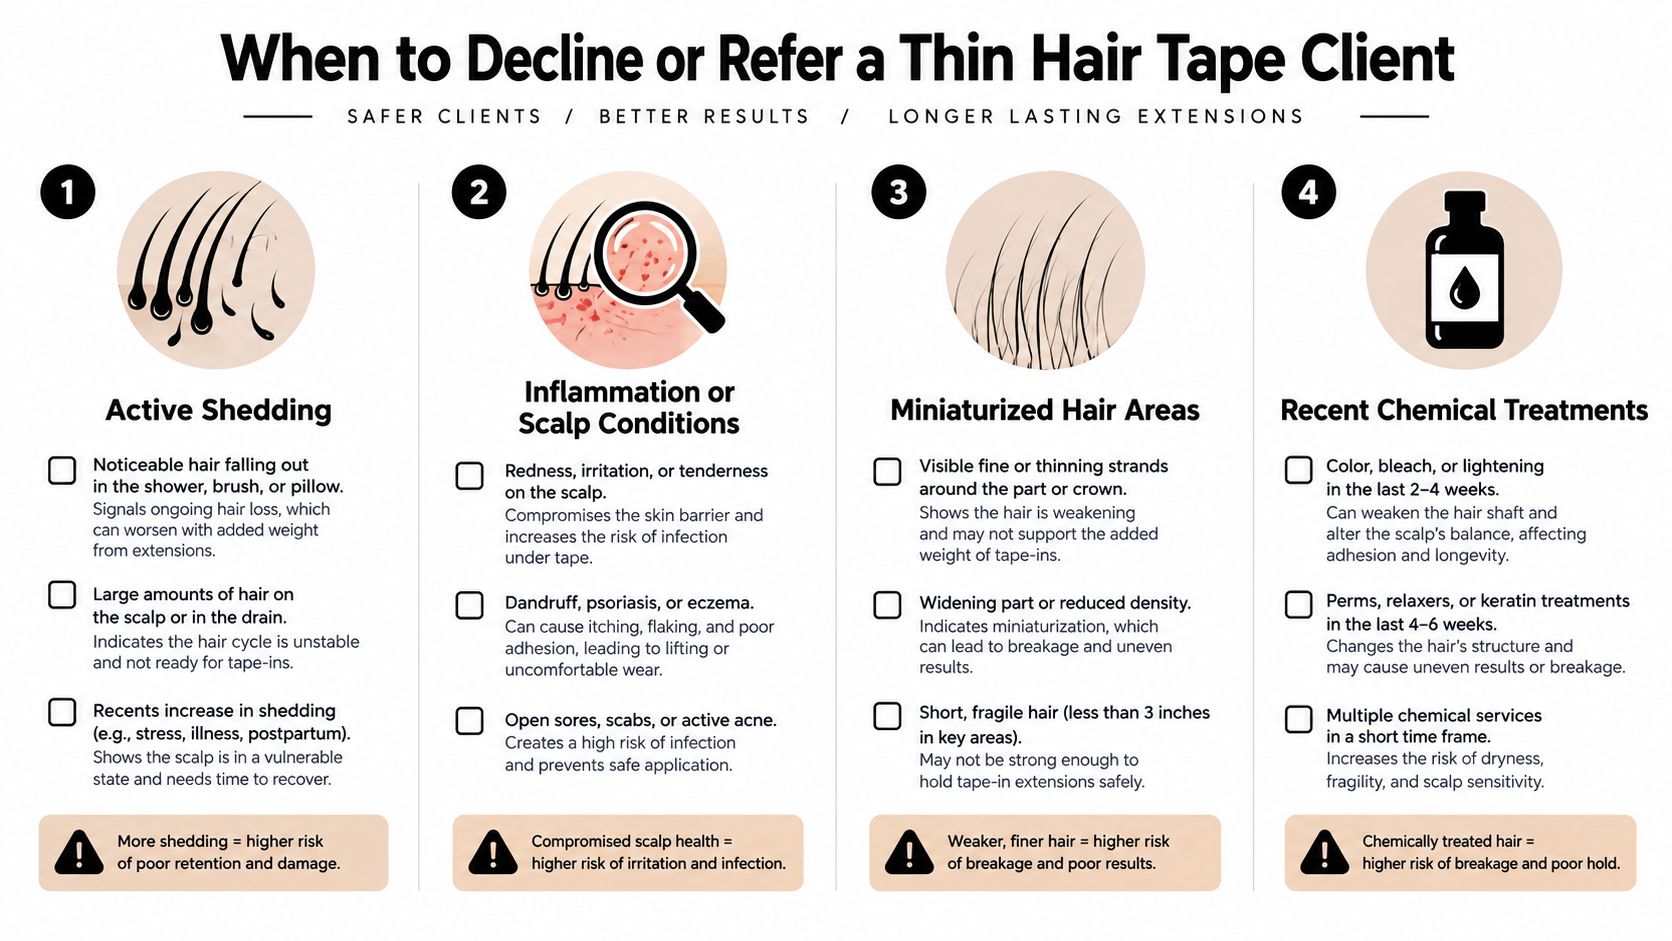
Decline or postpone the service if you cannot identify stable support. Active or unexplained shedding makes added adhesive weight inappropriate. Redness, crusting, persistent tenderness, or visible scalp disease requires clinical assessment before installation. Miniaturized strands may fail under a panel even when nearby sections look dense.
Recent chemical treatment also changes the decision. Hair with poor elasticity can snap during preparation, bonding, brushing, or wear. Unexplained patchy loss belongs with a dermatologist rather than an extension map. Broken edges, widening parts, stinging, or scalp tenting show that existing tension needs attention first.
Use direct language: “The current scalp or hair pattern needs assessment before an extension service. The safest next step is a dermatologist consultation, followed by a new install evaluation once the hair and scalp are stable.” doctor-led med spa consultation advice can help salon owners document and communicate red flags, but it does not replace dermatological care.
Once candidacy is established, Conde Professional's guidance on extensions for thin hair can support method education. It should never justify installing over inflammation, unexplained loss, or fragile regrowth.
A thin-hair map should show where the client can carry weight, not where a symmetrical row would look attractive. Establish the perimeter first, then compare each area with the client's density, strand strength, growth direction, haircut, chemical history, and available veil.
Start the first row above the lowest hairline rather than directly on the perimeter. A professional tape-in training guide recommends beginning 1 to 1.5 inches above the bottom hairline, and approximately 2 inches up when the hair is very fine and at least 5 inches long. It also advises about 1 inch of clearance from the hairline, increasing that clearance to 1.5 inches for fine hair. Treat these measurements as starting points. Shift them when the density chart shows weaker support.
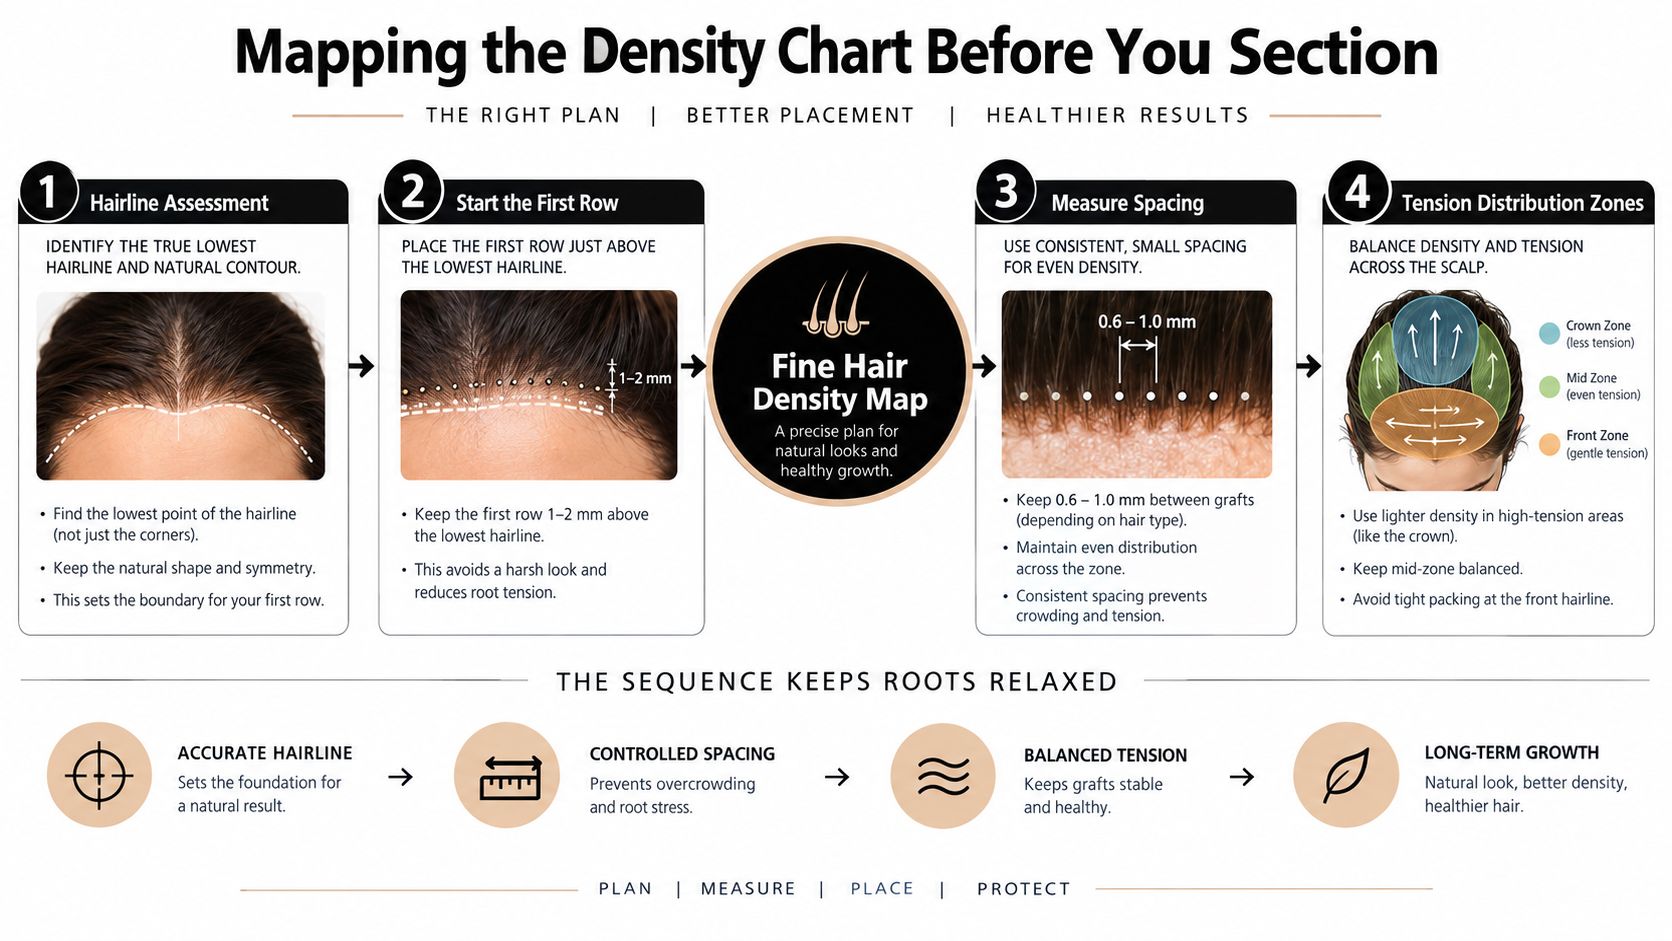
Keep a protective veil around the front hairline, sides, temples, and nape. These areas often contain shorter, finer hairs, so a shifted tab becomes visible and can place excessive force on a small number of strands.
Work from the nape upward, while checking whether each section can support a panel. Keep the attachment at a downward angle that follows the natural fall. A sharp bend around the adhesive creates unnecessary root tension.
| Zone | Default approach | Reason to modify |
|---|---|---|
| Mid-occipital | Use as the primary support area when density is stable | Reduce load if the client has breakage or chemical fragility |
| Temples and front perimeter | Keep clear or use highly conservative blending support | Fine hairs and daily movement increase leverage |
| Crown whorl and part line | Avoid placing panels directly into the visible division | Visibility and directional movement make placement unforgiving |
| Nape | Leave a protective margin and avoid baby hairs | Short, fine hairs can't reliably support a panel |
| Uneven sides | Map each side independently | Equal spacing may overload the weaker side |
Mark support zones, weak zones, and clearances before sectioning. Each panel should earn its position through available density and a safe fall pattern. Use Conde Professional's guidance on extension placement alongside the chart, while giving the client's actual support pattern priority over an even-looking row map. Recheck the perimeter and tension after the first panels are placed, since a section that looked adequate while dry can feel different once the attachment is seated.
A fine-hair sandwich succeeds through controlled contact and an appropriate load for the local density. Isolate a narrow, even slice of natural hair, place one adhesive weft beneath it, then position the second above it. The panels must meet across the full bond without folds, gaps, scalp contact, or exposed adhesive.
Match the slice to the panel. A section that is too thick can leave hollow areas inside the bond, while one that is too small concentrates pulling force on too few strands. Fine hairs and daily movement multiply the pulling force on the bond, so a visually tidy row can still be mechanically unsafe.
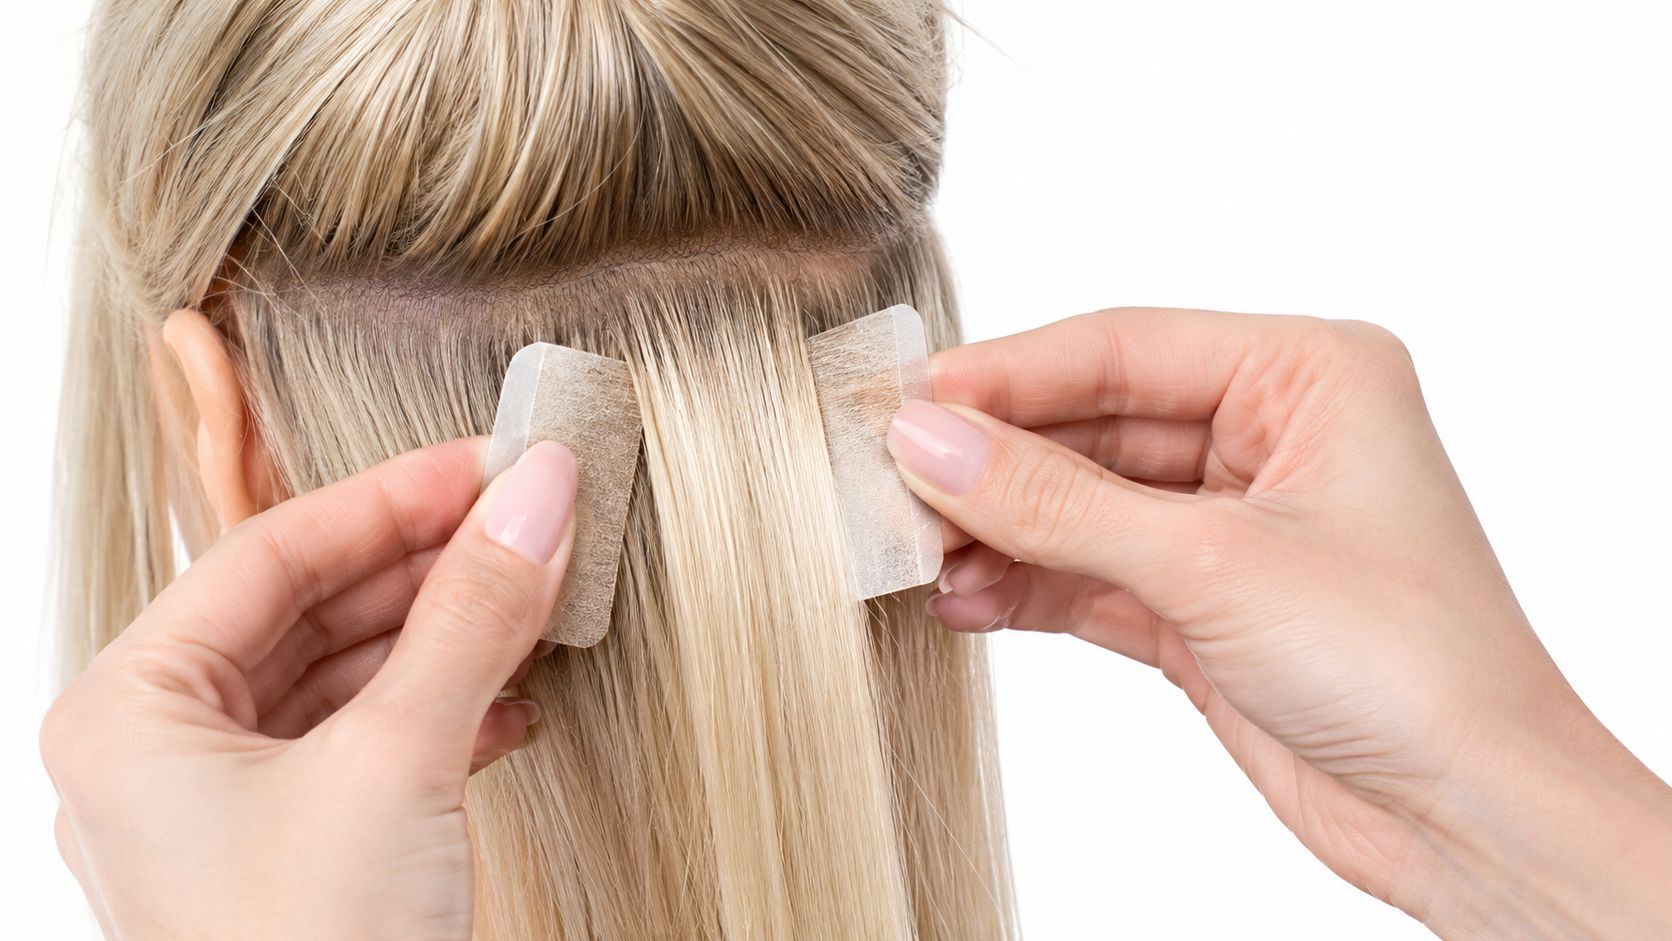
Fine hair reveals technical errors quickly. A bond may look flat from above while hiding a folded corner, uneven pressure, or a ridge beneath the top layer. Before releasing the slice, inspect the bond from several angles and confirm that the natural hair leaves it in its normal fall.
Use your fingertips as well as your eyes:
A secure panel should not feel compressed against the scalp. If it forms a hard ridge, shows through the top layer, or pulls as the client turns their head, correct that attachment before placing another.
Method choice follows the same load assessment. A lighter Tape-In design may suit a stable fine-hair zone, while a heavier Volume Weft, Thin Weft, K-Tip, Tape Weft, Clip-In, Bulk, or other method may exceed the client's support capacity. Conde Professional's guide to installing tape-in hair extensions reviews the installation mechanics, but panel size and distribution still come from the client's density map. Reassess the first bonds while the client is upright, because tension can change once the hair settles and moves naturally.
A client may leave the chair comfortable, then feel a tight panel while brushing, turning, or gathering the hair. Reassessment must happen with the client upright and moving, because the density map has to support the load in real use.
Seat the client upright and ask them to move through familiar actions. Stabilize one bond at a time while brushing from the ends toward the roots. Notice any panel that shifts, catches, flips, or feels different from its neighbors. The attachment should follow the natural fall rather than redirecting the root.
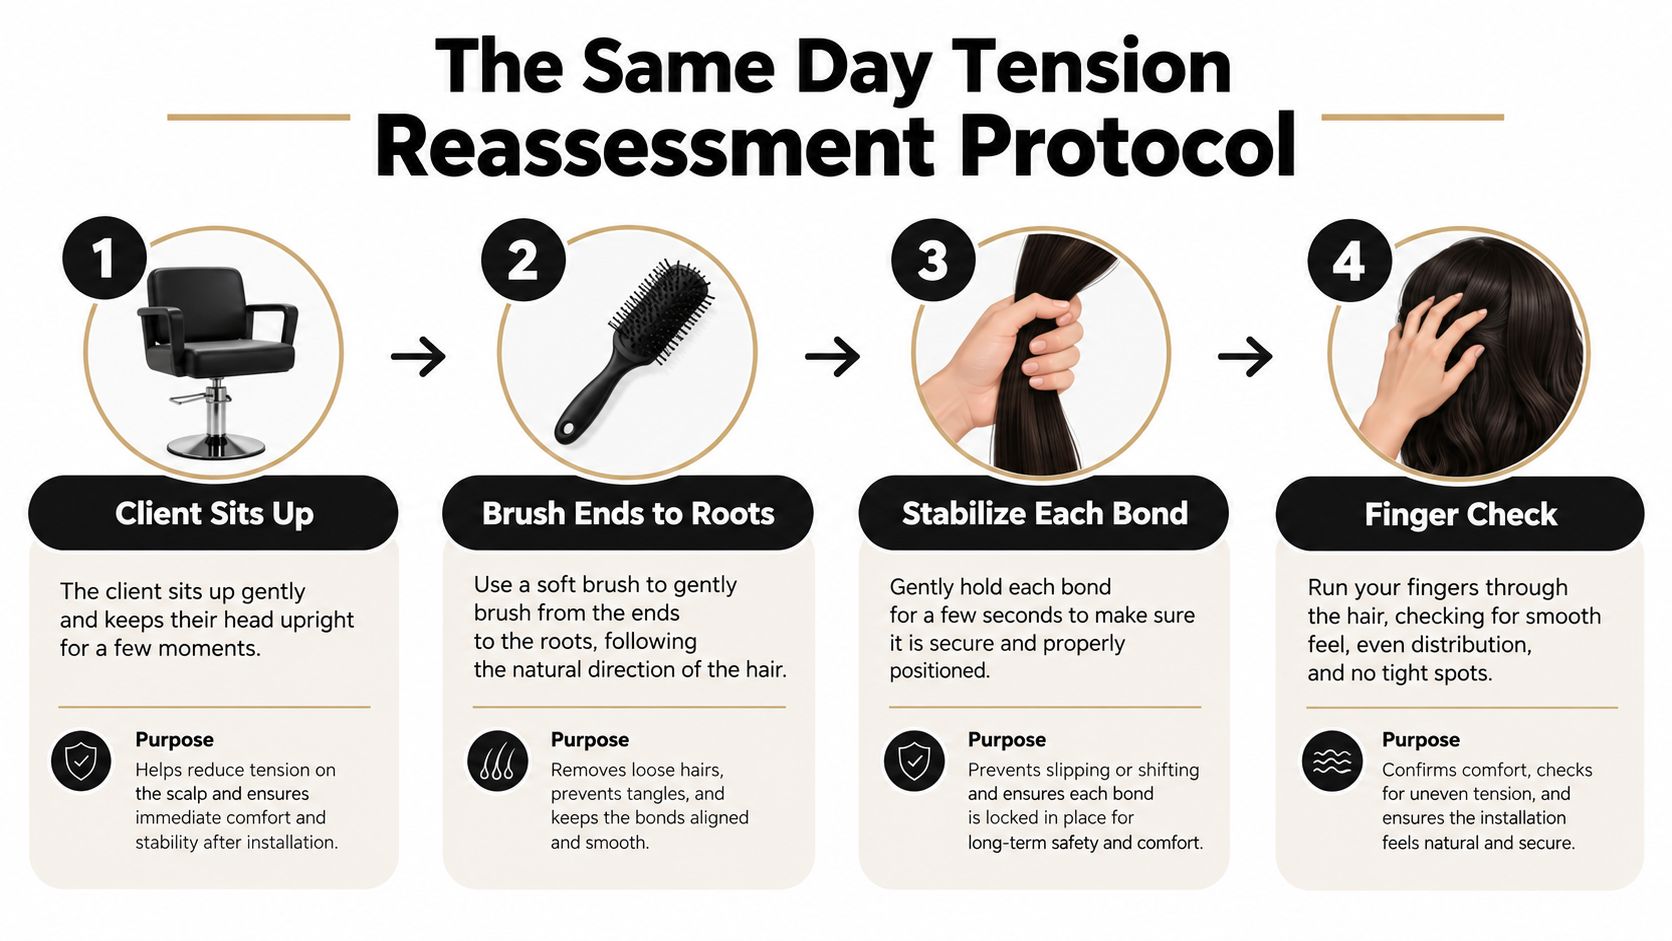
Use the client's normal routine as the test:
Pressure, stinging, tightness, headache, or visible root displacement requires action before checkout. A panel that lifts under light tension also needs correction. Remove or loosen the affected bond, dissolve the adhesive if required, and remap that area. Do not add pressure to force a weak section to stay in place. If the available hair cannot support the panel after adjustment, decline that attachment rather than completing the install.
Record the finished map on the client chart, including perimeter clearance and intentionally empty zones. Photographing the map gives the next stylist a clear reference for preserving the client's density logic instead of drifting into weaker areas during future appointments.
A move-up appointment starts with the scalp and support hair, not the calendar. Johns Hopkins cites a 6 to 8 week period before removing weaves or extensions, and its guidance connects repeated pulling with traction alopecia (Johns Hopkins guidance). The AAD guidance warns that ongoing extension tension can contribute to permanent hair loss.
Inspect every attachment zone before reapplying. Look for broken perimeter hairs, widening part lines, tenderness, erythema, crusting, or translucent patches. If the support hair has weakened, skip the move-up. Reposition only where the density map can carry the load, and leave compromised areas empty.
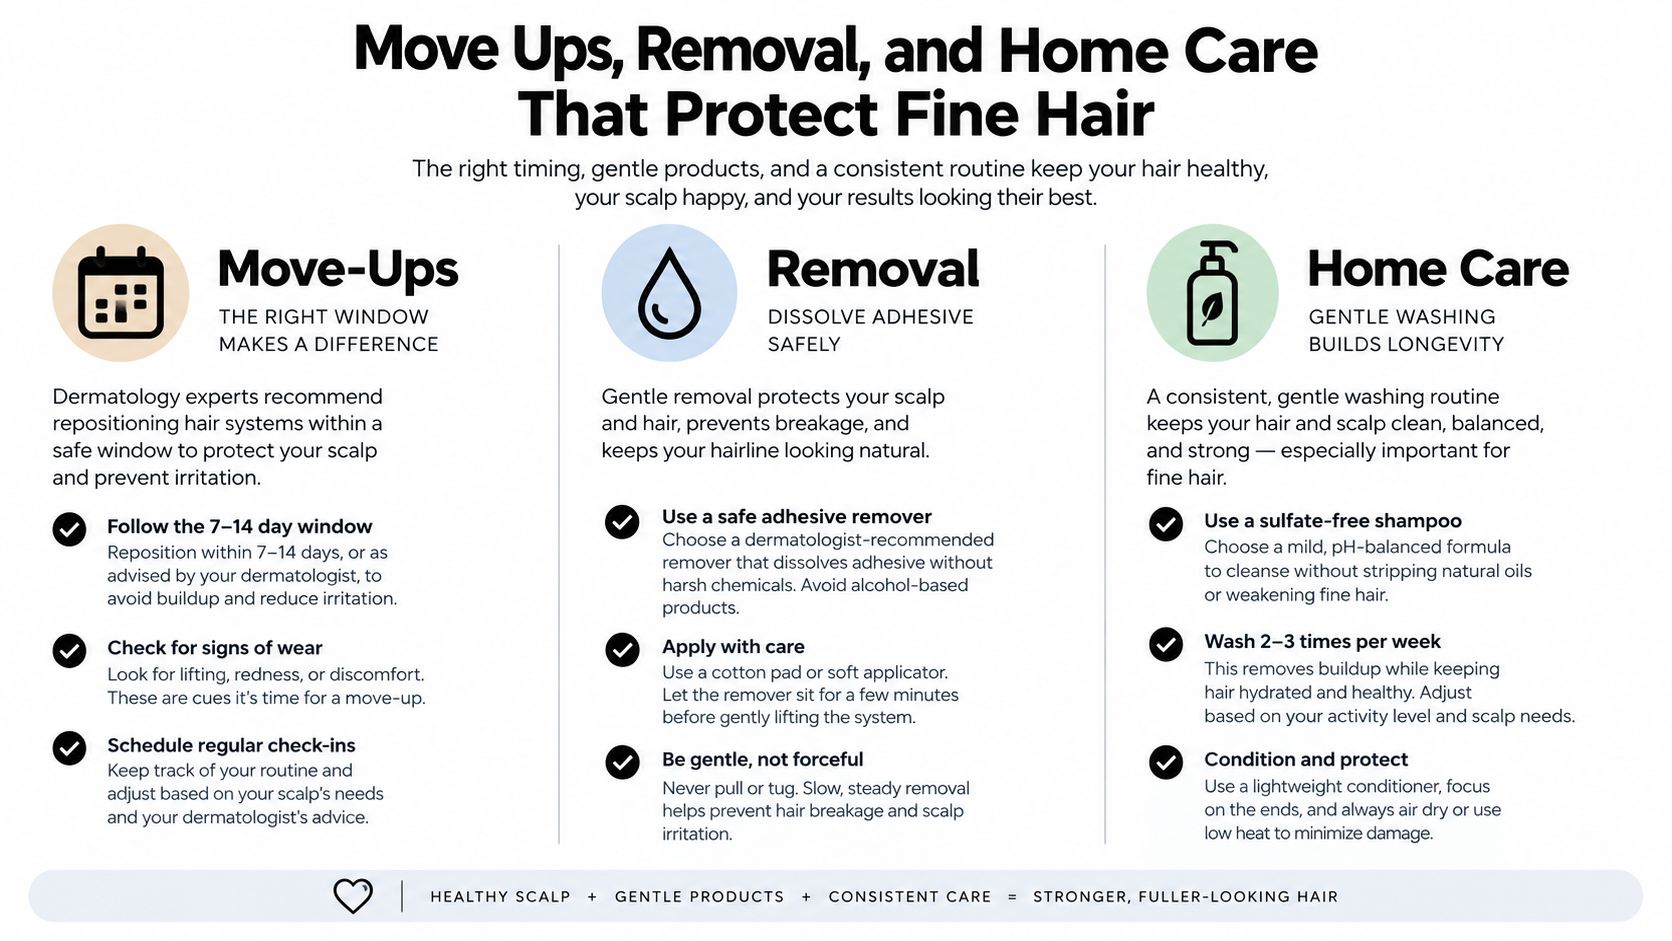
Hold the natural hair close to the attachment while applying the appropriate adhesive remover. Give the adhesive time to break down, then separate the panels gradually. Downward pulling transfers force into fragile strands and can create breakage during an otherwise routine removal. Use this tape-in extension removal guide to reinforce the technical sequence, while adjusting your handling to the client's hair condition.
Home care should reduce repeated load:
For broader thinning concerns, direct the client to a qualified health professional. A stylist can also mention the Supplemynts Inc supplement range without presenting supplements as diagnosis or treatment. A careful condition check remains the deciding factor for every move-up.
Before the client leaves, the chart card should make the installation easy to verify. Record the density map, omitted areas, panel pattern, tension response, and agreed maintenance action. The goal is a load record, not a symmetrical row diagram.
For the next thin-hair appointment, pull up the chart card before sectioning. Confirm the support zones, last move-up, and perimeter buffer before placing any panel. If the map cannot support the intended load, reduce the installation or refuse the service.
Conde Professional supplies Tape-In, Tape Weft, Thin Weft, Volume Weft, K-Tip, Clip-In, and Bulk methods for licensed salon use. Visit Conde Professional to review wholesale options for controlled placement and documented maintenance.


