Your cart is empty
Tax included and shipping calculated at checkout

Drawer menu
Tax included and shipping calculated at checkout
A professional account gives you stylist pricing, priority support, early access to new releases, and education developed by working stylists.


At the nape, with the first row clipped cleanly away, applying I-tip extensions starts with matching the natural-hair subsection to the extension strand, setting scalp clearance, and closing the bead without pinching. A closed bead isn't the finish line, a stable attachment that allows normal movement is.
Knowing how to apply I-tip extensions means knowing when to reopen an attachment, change the section, or stop the service. The pliers complete the connection; the stylist controls the load.
I-tip application is a tension-management discipline, not a bead-closing exercise. The system uses a cold, strand-by-strand attachment rather than heat or adhesive, with a silicone-lined microbead connecting the extension tip to the natural hair, as described in this professional I-tip installation guide.
The visible result can be misleading. An attachment may look tidy while trapping neighboring hair, pulling against the subsection's natural fall, or sitting too tightly for comfortable movement. A clean finish needs a bead-level assessment, not just a mirror check.
Those controls belong together. Changing bead size without reassessing the subsection leaves the fit unresolved. Changing placement without checking natural fall leaves tension unresolved.
Practical rule: A bead that looks closed but restricts movement hasn't passed the install check.
The client must be able to move, sleep, brush, and wear the finished hair without pinching. During installation, the stylist should evaluate comfort as well as appearance rather than assuming that a visually uniform row is mechanically balanced.
For example, an attachment that feels comfortable with the head upright may pull when the client turns. That observation calls for reassessment before more strands are added, not reassurance that the connection will settle.
Security and comfort aren't competing goals. Both belong in the acceptance criteria. Sustained pulling is also a hair-health concern, which makes tension control part of service suitability rather than merely a finishing preference.
Confirm suitability before setting out the beads. The consultation should establish the condition of the scalp, the density available for attachment, the requested result, and the client's ability to attend maintenance appointments.
A documented hair extension consultation gives the stylist a place to record placement limits and service decisions. The useful question isn't how much length the client wants, but where the natural hair can accommodate the proposed installation.
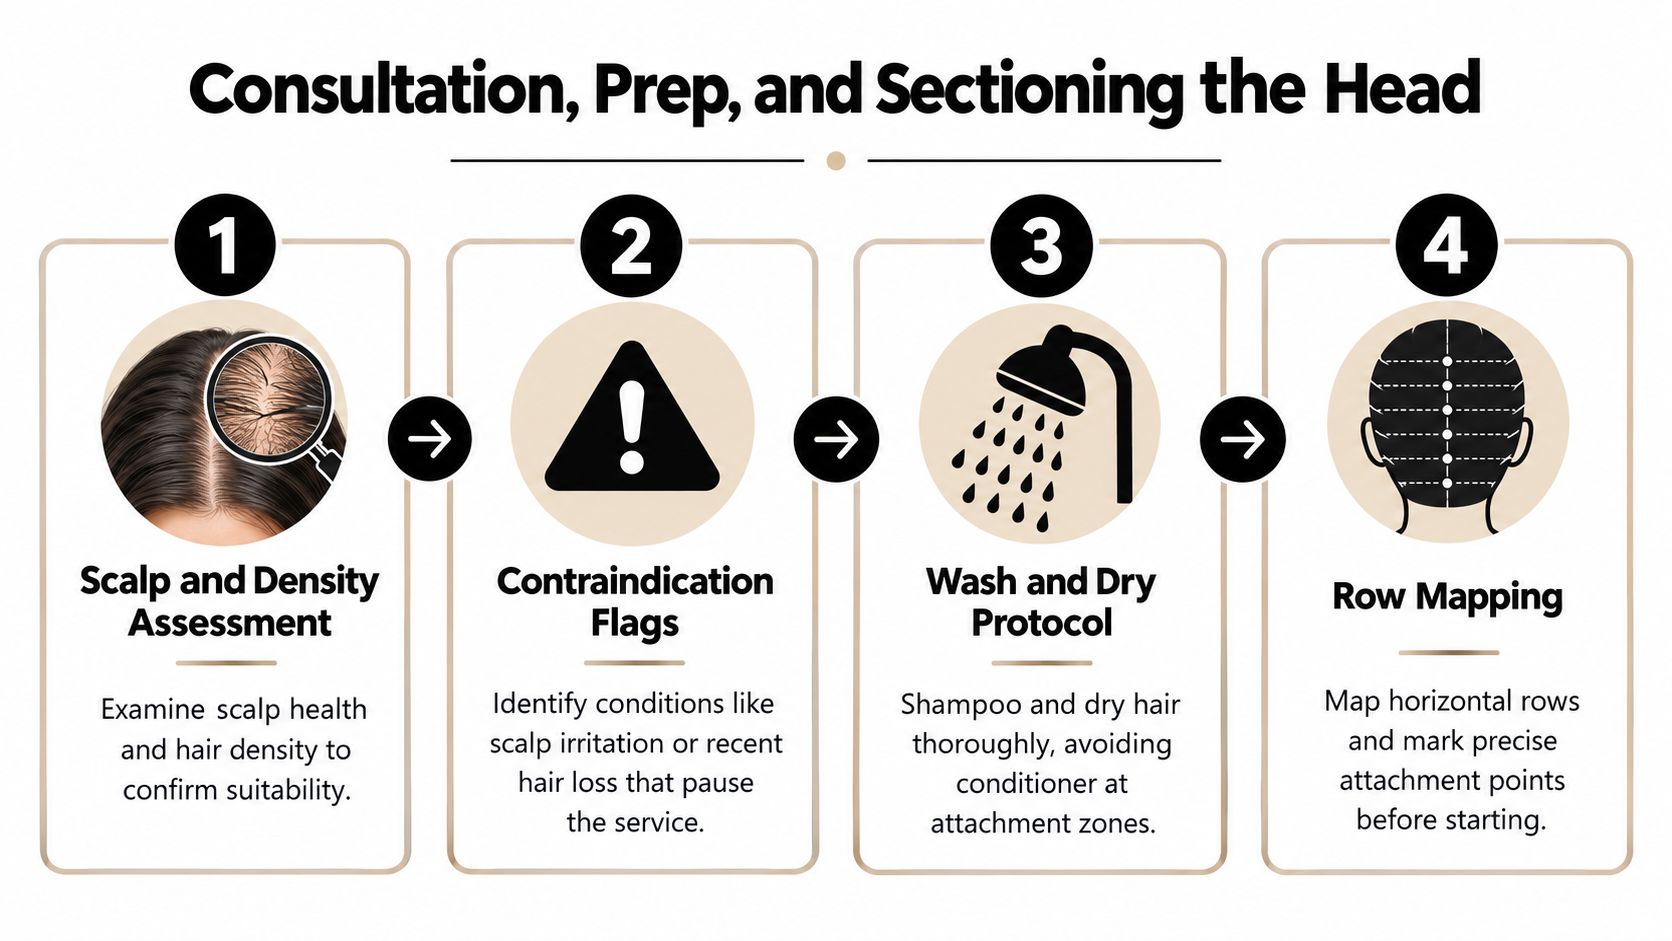
Scalp irritation, recent unexplained loss, fragile hair, and visibly reduced density call for a pause, not a smaller version of the original plan. The stylist can identify a service concern without diagnosing its cause.
The consultation should also establish how the client normally wears the hair. An exposed perimeter or frequently worn upstyle changes the concealment assessment; placement should be checked against that actual styling pattern.
Cleanse and fully dry the hair, keeping conditioner and oils away from the attachment zones. Create consistent horizontal sections from the nape upward, then use staggered, brick-layer placement rather than stacking attachments directly above each other, following this controlled I-tip application sequence.
Keep the hairline and temple areas free. Concealment isn't just a matter of lowering the first row; it depends on leaving enough natural hair around exposed areas and checking how that hair falls.
Before threading, inspect the pickup for stray hairs crossing from adjacent sections. Those hairs don't belong in the bead because the loop tool catches them.
Better crimping won't rescue poor mapping. If the section lines are muddled or the planned attachments crowd an exposed area, the correction belongs in the layout before installation continues.
The bead should close around a deliberately loaded connection, not whatever the loop tool happens to collect. Keep the natural hair and I-tip aligned, maintain the subsection's natural fall, and inspect the closure before proceeding.
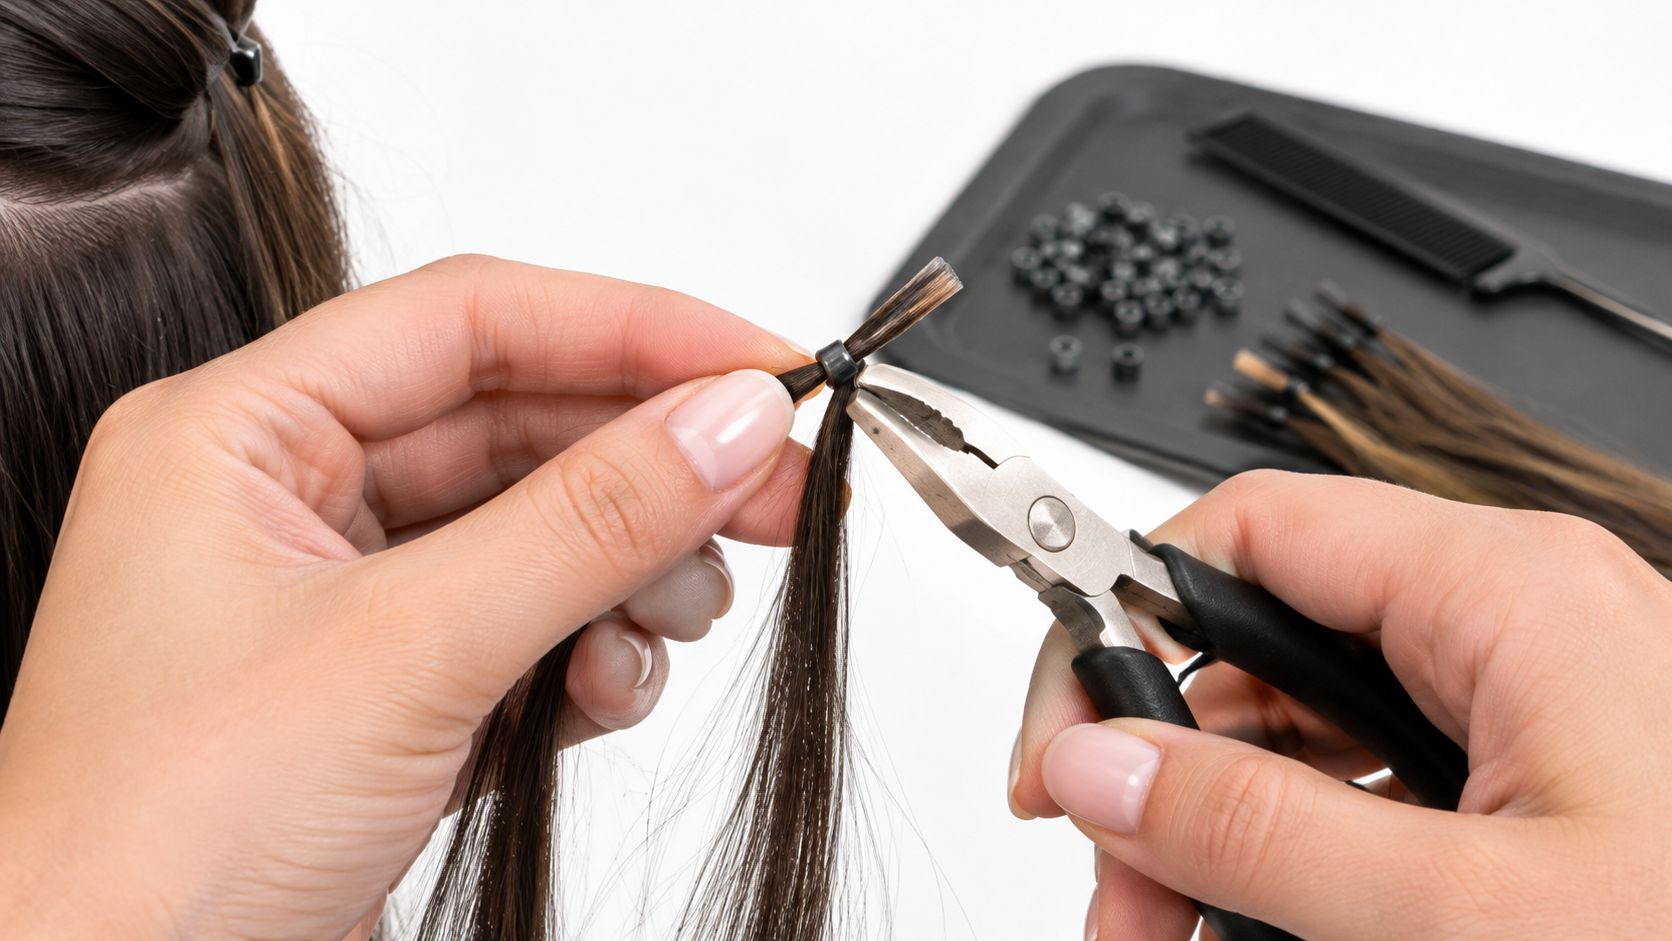
Bead selection belongs in that sequence, not outside it. The beads for hair extensions guide is a useful reference when reviewing hardware alongside the hair being installed.
Crimp centrally first, then at the sides, following the bead's grooves. The intended result is a secure oval, not an uneven figure-eight or a flattened connection that pinches the hair.
The stylist should watch hand position as closely as plier pressure. Holding the subsection away from its natural fall during sealing can make an apparently neat connection uncomfortable once the hair is released.
A slipping connection needs its fit corrected. More force isn't a substitute for correct loading.
Apply a gentle, scalp-parallel tug and inspect for slippage, rotation, visible gaps, and trapped hair. This is a light stability check, not a stress test performed by pulling outward from the scalp.
If the attachment slides, reopen it, reassess the pickup and bead position, and recrimp only after correcting the fit. If it pinches, release and reposition it rather than asking the client to tolerate the connection.
The next strand starts only after the current attachment passes both checks: stable under a light parallel pull and free enough for comfortable movement.
Persistent extension tension is a clinical concern, not merely an uncomfortable install. A peer-reviewed dermatology review describes how extensions can continuously pull on the hair shaft, loosen it from the follicle, and produce chronic inflammation; traction alopecia can begin as nonscarring loss and become permanent.
The supplied clinical evidence also includes a salon-care study in Yaoundé, Cameroon, in which 14.3% of the sample had mild traction alopecia and 13.5% had moderate traction alopecia. Those findings concern women receiving salon hair care, not an I-tip-specific failure rate, and should be considered alongside the dermatology review of extension-related traction.
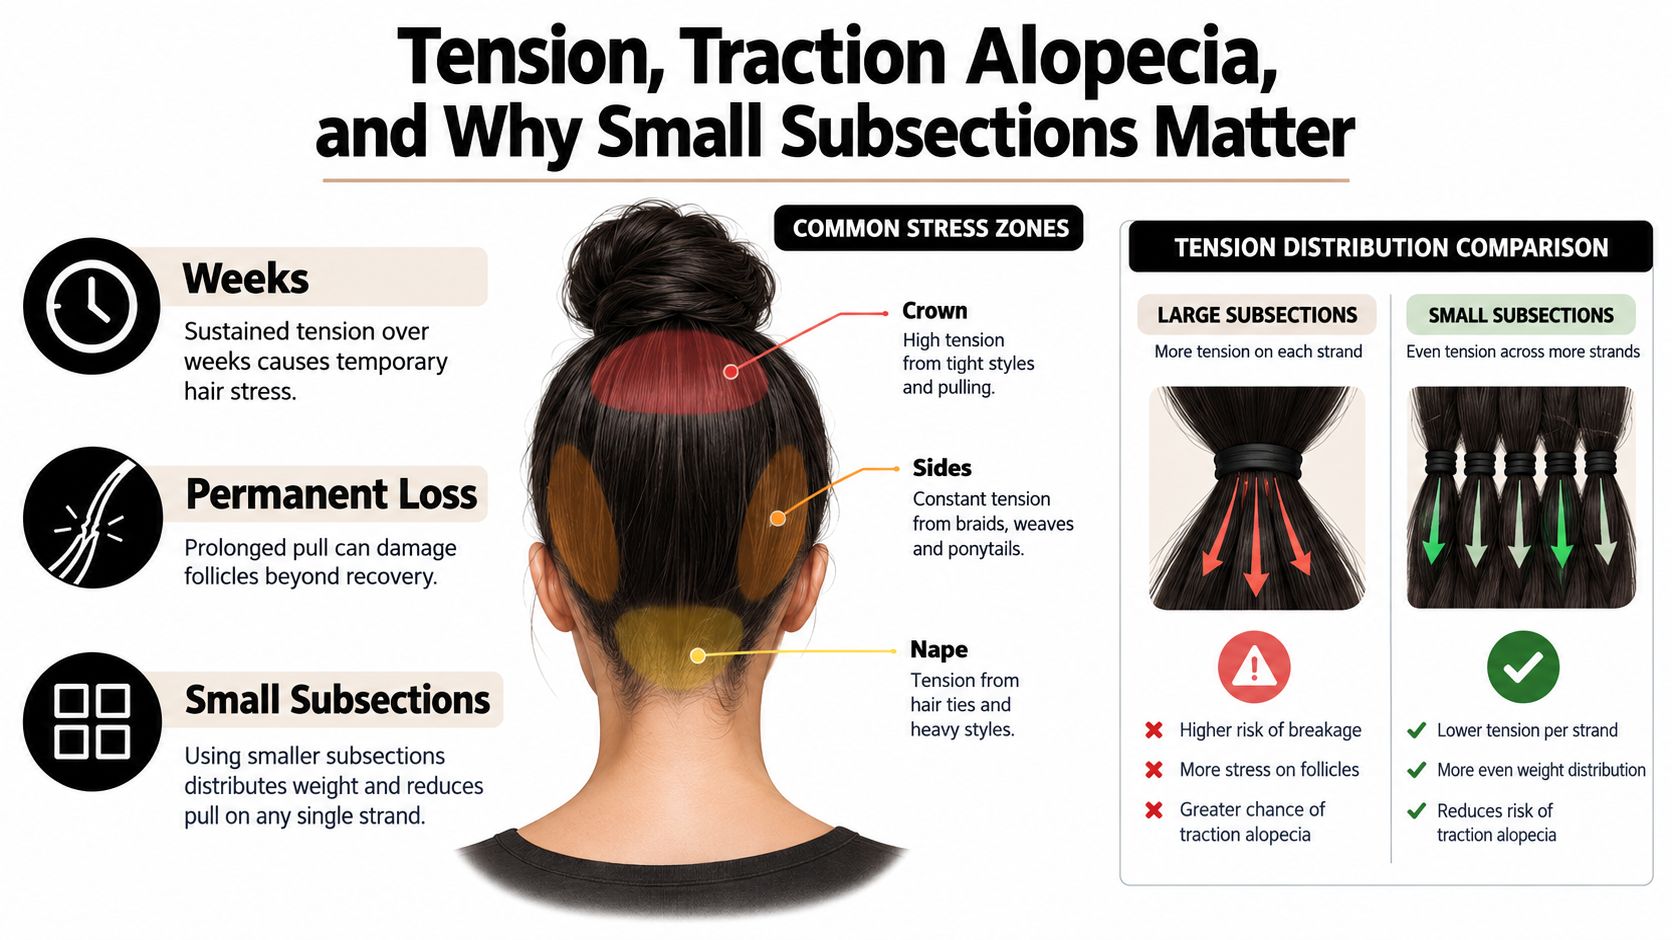
A small subsection isn't permission to attach an extension to an inadequate pickup. The controlling relationship is the amount of natural hair relative to the extension section and the bead's fit.
Likewise, gathering a larger bundle into a bead doesn't automatically create a safer anchor. Overloading can compromise closure, and a bulky pickup doesn't resolve unsuitable placement.
A suitability conversation can stay technical: the proposed attachment needs an appropriate natural-hair anchor, comfortable movement, and ongoing inspection. If those conditions aren't present, postponing or declining the service is the responsible choice.
The extensions for thin hair discussion can support method-selection conversations, but a different attachment system isn't an automatic solution to a scalp concern.
No method should be presented as preventing hair loss. The stylist's role is to control the service, recognize warning signs, and avoid continuing an unsuitable installation.
Book maintenance around the attachment's condition, not a promise that the original install will remain acceptable until a fixed date. Professional microlink guidance commonly places move-ups at approximately 6 to 8 weeks, while emphasizing assessment as natural growth carries beads down the shaft, according to this microlink maintenance guidance.
That window is a scheduling benchmark, not permission to ignore discomfort between appointments. A client reporting persistent tightness, pain, or breakage needs prompt assessment rather than instructions to wait for the booked move-up.
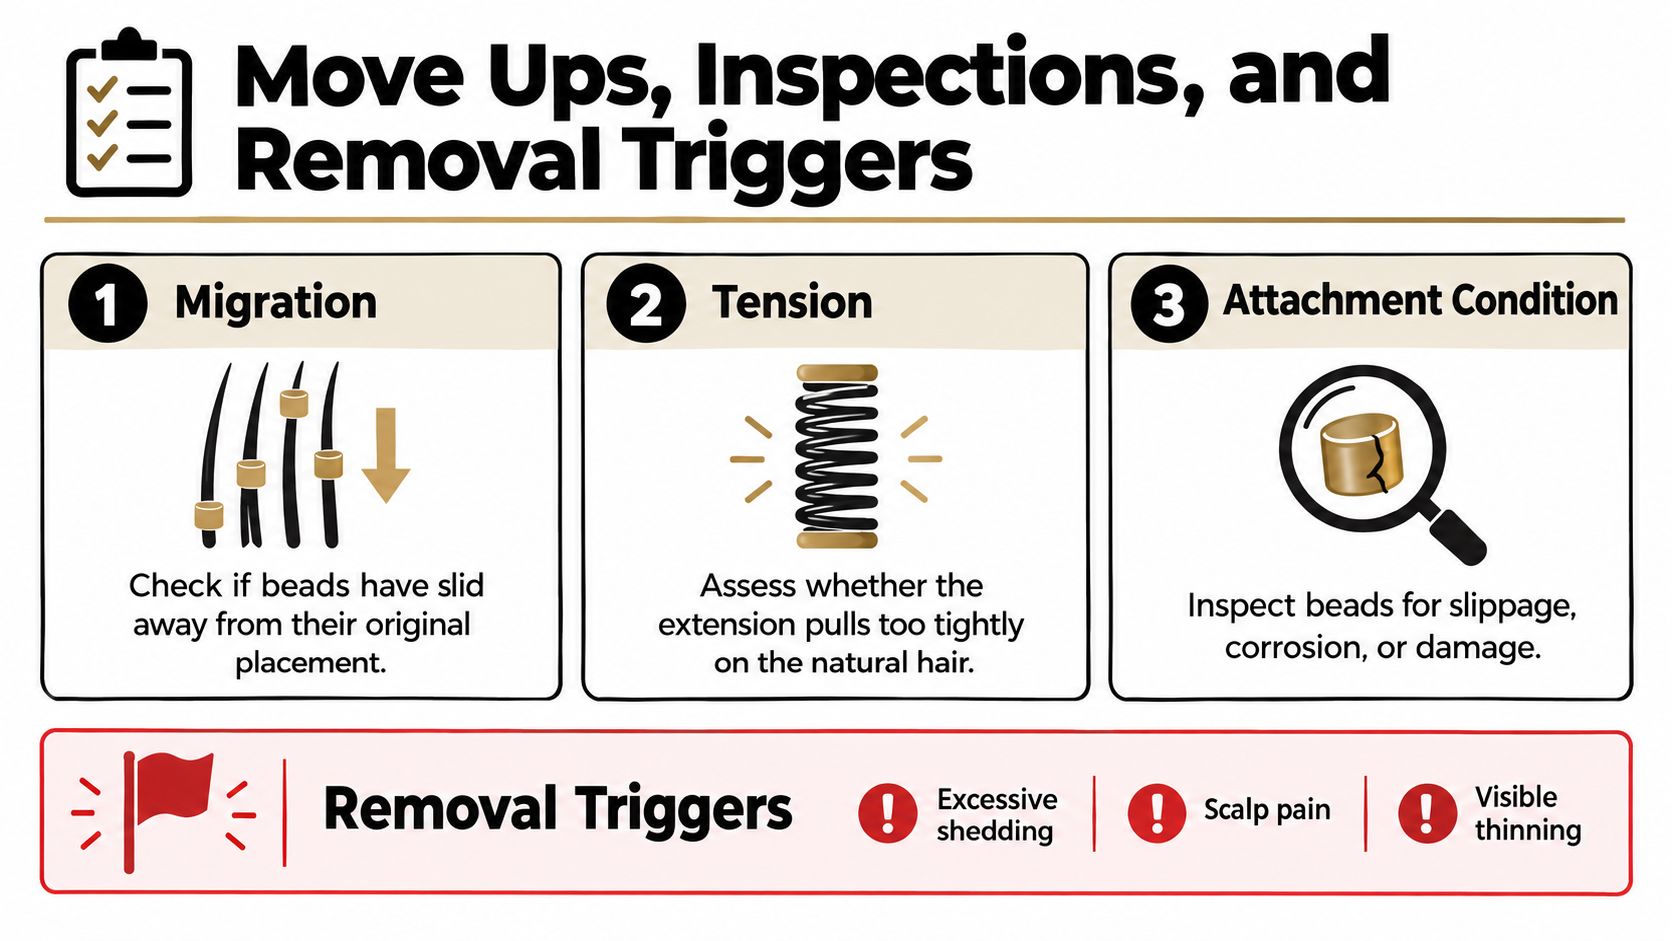
A move-up starts with evaluation. Sliding every bead upward without checking the natural hair treats maintenance as a repeat installation and misses changes that may alter suitability.
| Inspection point | Decision to make |
|---|---|
| Bead integrity | Can the hardware provide an appropriate closure, or does it need replacement? |
| Tension and fit | Is the connection comfortable and proportionate to the current pickup? |
| Base tangling | Can the area be separated cleanly before any attachment is repositioned? |
| Density change | Does the original placement remain appropriate? |
| Migration | Has the bead moved with growth, slipped, or begun loading the area unevenly? |
The micro-link hair extensions guide can support a salon's maintenance protocol. The appointment record should distinguish routine migration from slippage, discomfort, and changes in the supporting hair.
A bead creeping down the strand or concentrating pull in one area needs assessment. The stylist shouldn't repeatedly reclamp weakened hair to restore the original placement.
Removal threshold: Persistent tightness, pain, or breakage warrants stopping the wear cycle and assessing the attachment, not tightening it again.
When the supporting hair no longer appears suitable, the original density plan doesn't govern the next service. Repositioning fewer attachments, changing the design, or declining reinstallation may be more appropriate than reproducing the previous result.
Maintenance protects the client only when the stylist is willing to change the plan. A move-up appointment isn't an obligation to reinstall everything removed.
Choose I-tips for a suitable strand-by-strand plan, not because the client recognizes the method name. The useful comparison is between attachment layout, available density, maintenance access, and the client's normal styling habits.
A preference for no heat or adhesive can support the I-tip decision. It doesn't override a poor density assessment or unwillingness to return for bead inspection.
| Method family | Practical selection question |
|---|---|
| I-tips and microlinks | Does the client suit individual attachment placement and accept regular assessment? |
| Hand-tied or beaded row | Would a row-based design better serve the requested distribution than individual pickups? |
| Tape attachment | Can the planned attachment footprint be concealed and maintained appropriately? |
| Fusion bonds | Does the client prefer a bond-based service rather than bead move-ups? |
| Removable attachment | Is occasional added hair more appropriate than a continuous-wear installation? |
Those questions support a method conversation without declaring one system universally gentler, longer-lasting, or easier to maintain.
Volume Weft and Thin Weft belong in the discussion when a weft-based layout is preferable to an individual-strand design. A hand-tied or beaded-row proposal still needs its own density and tension assessment; changing the attachment family doesn't remove that requirement.
Tape-In and Tape Weft can enter the comparison when the stylist is considering a tape-based layout. They shouldn't be treated as interchangeable products without checking the matching application guidance.
For a client seeking longer wear with fewer bead move-ups, K-Tip is a method worth discussing. That preference supports considering fusion bonds, not promising a particular wear duration or describing the service as maintenance-free.
Clip-In belongs in an occasional-use conversation, while Bulk requires clarity about the intended preparation and installation method. A client who can't support continuous wear shouldn't be redirected into another continuous-wear method to preserve the appointment.
Source the hair, hardware, and education as a compatible system. A Remy label or double-drawn description doesn't answer whether the proposed tip, bead, and natural-hair pickup will work together.
The wholesale hair extension supplies guide provides a starting point for organizing a professional sourcing conversation. The purchasing decision should remain tied to the salon's intended method rather than a generic quality label.
Questions about cuticle integrity, alignment, shedding, combability, and wash durability are more useful than asking for a higher numerical grade. Descriptions such as 6A, 7A, 8A, 9A, and 10A are supplier marketing, not a standard overseen by a governing body.
A productive supplier conversation asks what supports a cuticle-intact or Remy description, how the hair should be evaluated after washing, and which hardware is appropriate for the intended installation. The stylist should also request the relevant education rather than assume a familiar-looking product uses familiar procedures.
Supplier terminology should lead to a practical evaluation, not replace one.
An initial sample assessment won't establish long-term wash durability. The salon can record how the hair handles during preparation and subsequent maintenance without turning an early impression into a performance promise.
For same-day action, the salon can prepare a professional-account inquiry that includes the intended method, hardware questions, and a request for K-Tip and I-tip education resources. That creates a concrete starting point for sourcing without committing to an unsuitable installation.
Conde Professional offers wholesale extension products and method education for licensed professionals, including resources relevant to attachment selection and install technique. Licensed stylists can visit Conde Professional to request a professional account and the K-Tip and I-tip method guides before planning their next installation.


