Your cart is empty
Tax included and shipping calculated at checkout

Drawer menu
Tax included and shipping calculated at checkout
A professional account gives you stylist pricing, priority support, early access to new releases, and education developed by working stylists.


A small, invisible bead doesn't automatically make an extension service low risk. Microlink hair extensions can deliver a discreet, mechanically attached install, but only when the natural hair, planned density, attachment spacing, and client's maintenance habits can support sustained load.
Microlinks belong on the service menu as a conditional recommendation, not the default alternative to adhesive. The deciding question isn't whether the stylist can conceal the connection. It's whether the client's natural hair can carry the proposed design through brushing, styling, sleep, and regrowth.
Consider a consultation involving fine, recently lightened hair and a request for substantially greater length. The stylist might achieve an excellent shade match and conceal every bead, yet still approve an unsuitable service. A polished finish doesn't establish that the underlying sections can support the added hair.
Professional assessment should distinguish the requested silhouette from the attachment plan needed to create it. A shorter, lighter result might be workable where a dense transformation isn't. In some cases, postponing extensions is the more responsible recommendation.
Practical rule: A concealed attachment is an aesthetic achievement, not evidence that the service is appropriate.
The professional distinction is between adhesive-free attachment and load-free attachment. Microlinks provide the former, not the latter. A sound recommendation accounts for the complete wearing period rather than judging success from the installation photograph.
That also changes the consultation conversation. Instead of promising a particular transformation before examining the hair, the stylist offers a result that fits the client's current condition and capacity for upkeep.
Microlinks create a mechanical connection. Selected natural-hair strands pass through a small bead or loop, and an installation tool compresses the attachment, making controlled placement and clean section separation central variables, as described in this professional extension education material.
A useful analogy is a paper clip closed around a cord. Insufficient closure allows movement through the connection; excessive pressure can deform or damage what the clip holds. The comparison explains clamp control, but it doesn't establish an installation pressure or universal bead size.
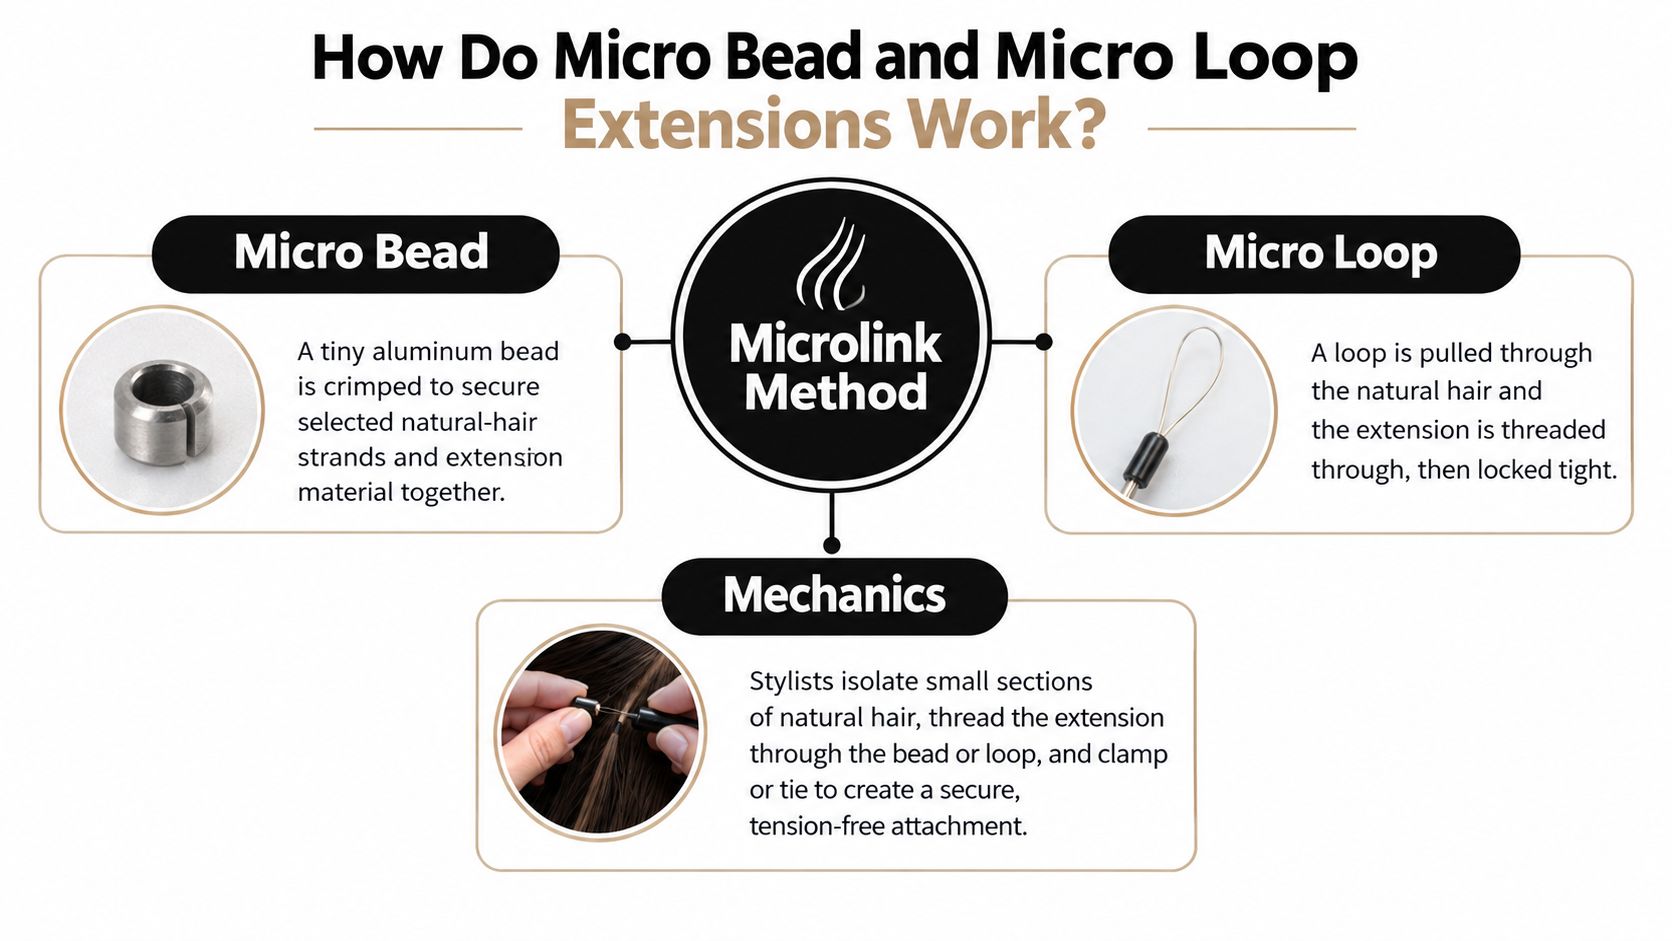
Micro bead and micro loop describe related mechanical workflows. I-tip identifies an extension format used with an appropriate bead system, rather than a completely separate principle of attachment. Supplier terminology can overlap, so the stylist should confirm the exact tip, bead, threading arrangement, and closure procedure.
The I-tip extension guide provides method-specific context for that distinction. A preloaded loop shouldn't be interpreted as permission to skip section assessment.
The operating variables remain concrete:
A secure attachment and an over-tightened attachment aren't interchangeable. Security describes resistance to unintended movement through the bead; mobility describes how the supported section moves with the client's hair.
The infographic is a conceptual overview, not a substitute for system-specific training. In a compressed-bead workflow, tightening or tying isn't an interchangeable finishing step, and no mechanically loaded attachment should be described as tension-free.
The strongest candidate has suitable natural-hair integrity in the intended placement zones, realistic expectations, and a workable maintenance commitment. Density alone isn't enough. Similar-looking heads of hair can differ in strand diameter, processing history, breakage, and tolerance for manipulation.
The consultation should document current condition before the stylist selects the final design. Photographs, part-line observations, and notes about fragile areas provide a baseline for later comparisons.
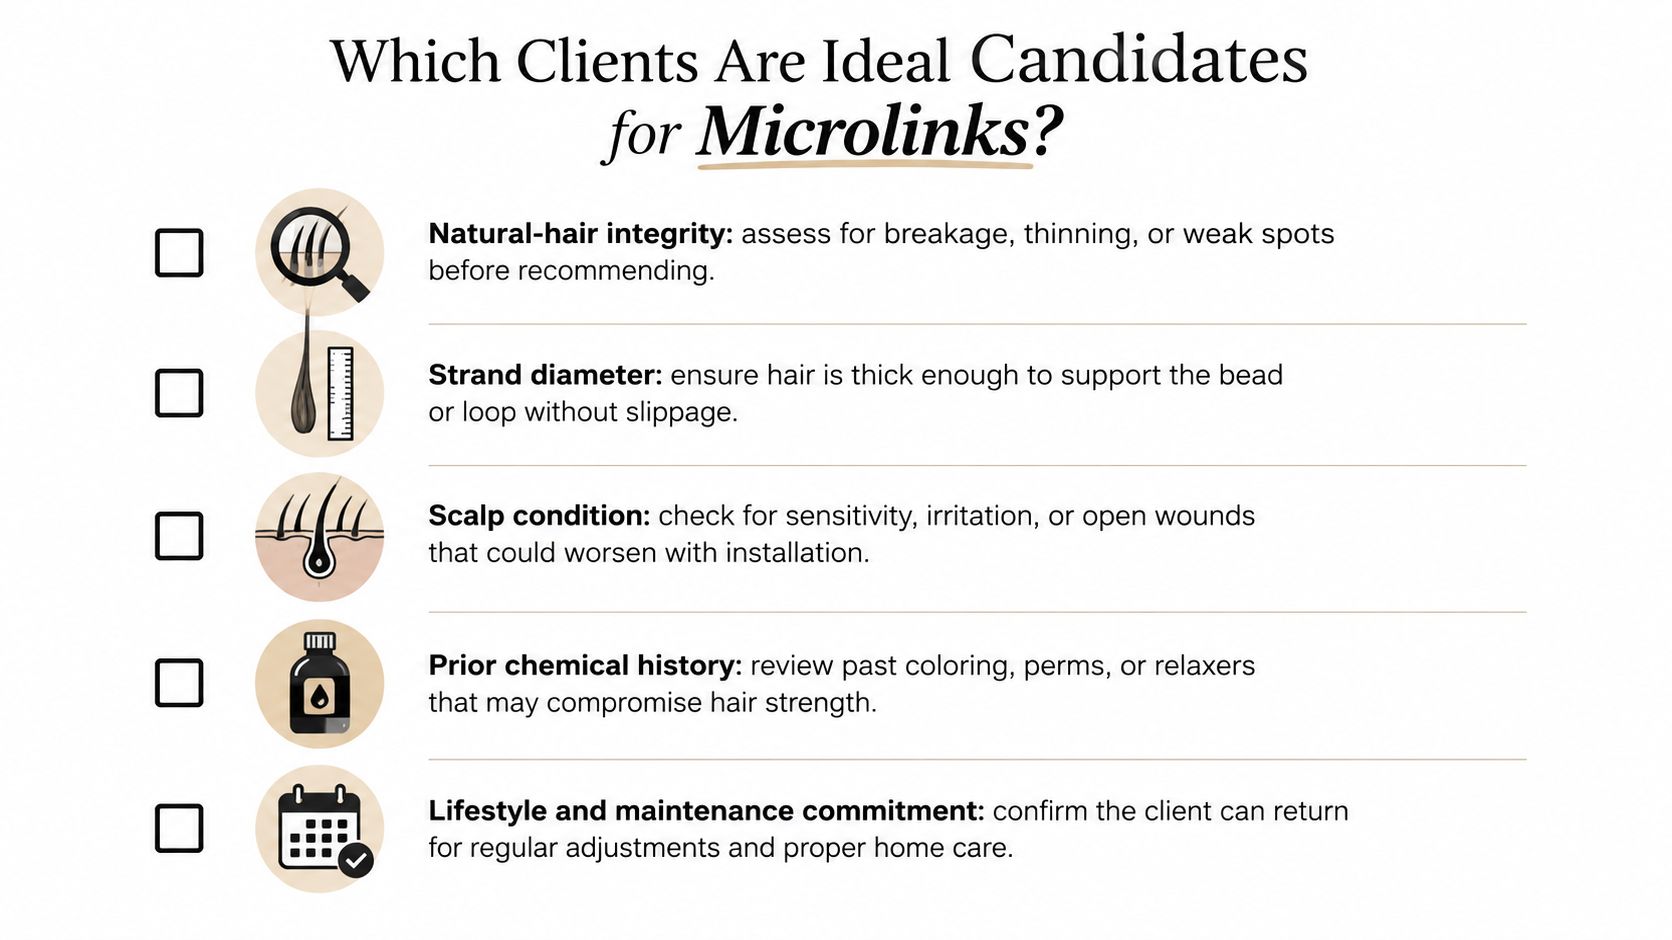
Screening should cover the following:
Fine or compromised hair calls for a more conservative proposal, potentially including less added hair, reduced length, or no installation. Stronger natural hair may permit a different placement plan, but it doesn't justify unlimited loading.
In a study of 12 women wearing extensions without subjective hair-loss complaints, dermoscopy identified signs consistent with traction alopecia in every participant, according to the clinical report on extension-associated traction findings. The study doesn't establish a microlink-specific incidence rate, but it does show why visible length and client reassurance aren't sufficient assessment tools.
A stylist's role is observation and referral, not diagnosis. Pain, persistent tenderness, follicular bumps, broken hairs, localized inflammation, or unexplained thinning should interrupt the planned service rather than become areas to camouflage.
The documented outcome should be specific: approve a conservative design, revise the requested result, defer installation, or recommend medical evaluation. A vague note that the client has “enough hair” doesn't explain the professional decision.
Method selection should compare attachment demands, service workflow, visibility, and removal, not rank techniques from universally gentle to universally damaging. The professional recommendation changes with the client's condition and intended styling.
The extension-method overview can support that discussion, but the consultation still determines which format belongs in the service plan.
| Method | Attachment Profile | Professional Strength | Primary Trade-Off | Best Fit |
|---|---|---|---|---|
| Microlinks | Discrete mechanical attachments | Targeted placement and planned reinstallation | Detailed sectioning and continuing attachment inspection | Suitable anchor zones and reliable maintenance attendance |
| Tape-In and Tape Weft | Flat adhesive attachment format | Panel-based placement for a flatter design | Adhesive application, removal, and panel positioning require control | A panel layout that fits the client's coverage and styling |
| K-Tip | Strand-level fusion bonds | Individualized distribution and blending | Bond formation, heat control, and removal require method-specific skill | Clients suited to a carefully planned bonded service |
| Volume Weft and Thin Weft | Weft-based coverage with the selected support method | Efficient design across broader placement zones | Row support and total loading need assessment | Clients whose natural hair can support the proposed row |
| Clip-In | Removable clip attachment | Temporary volume and event styling | Repeated placement still requires suitable anchor areas | Occasional use rather than continuous installation |
| Bulk | Loose hair for a professionally constructed format | Flexibility in method construction | The stylist must specify the attachment system | Services requiring an appropriate custom-built format |
For clients prioritizing flatter panels and changes between looks, a Tape-In or Tape Weft consultation may be more relevant than individual beads. That doesn't make adhesive panels an appropriate substitute over fragile attachment areas.
K-Tip suits strand-level customization when the stylist can control section design, bond placement, heat, and removal. It's the wrong choice when the client can't commit to the required removal process or the natural hair doesn't support the proposed bonded plan.
A Volume Weft or Thin Weft can fit broader coverage objectives. Neither a hand-tied construction nor a refined beaded row cancels the need to assess its supporting hair.
Microlinks occupy a useful position where discreet placement and mechanical removal suit the client. Their trade-off is exacting placement and continuing tension management, not a visible tape line. Reinstallation remains conditional on the condition of both the extension material and natural hair.
A change in attachment format isn't a substitute for reducing an unsuitable design.
Clip-In offers a temporary styling route, while Bulk supports a constructed service rather than specifying an attachment by itself. No option should be selected merely because another technique was ruled out.
Start with the client's normal hair routine, then translate the desired result into a placement proposal. Establish intended length, density, movement, part pattern, exposed styling zones, maintenance attendance, and removal expectations before selecting hair.
A structured extension consultation should record both the approved result and the limits discussed. If the client routinely wears a high ponytail, the stylist should assess that position during planning rather than discovering attachment exposure after finishing.
Bead material, lining, extension tip, and tool should be treated as a matched system. Silicone-lined aluminum and copper options shouldn't be assumed interchangeable without compatibility guidance.
Remy, cuticle-intact, and double-drawn describe different purchasing considerations; none replaces inspection. Shade selection should account for the client's root, mids, ends, and exposed placement zones, while strand alignment and cuticle direction deserve attention before construction.
Numeric labels such as 6A, 7A, 8A, 9A, and 10A are supplier marketing, not a grading standard governed by an industry body. More useful purchasing questions concern cuticle integrity, alignment, shedding behavior, combability, and wash durability.
Conde Professional describes multi-point batch inspection for cuticle integrity, color accuracy, weight, and strand strength. Those are concrete discussion points for a wholesale professional-account inquiry, not permission to infer unlisted specifications or guaranteed longevity.
The completed plan should identify placement exclusions, appropriate strand grouping, intended distribution, and reassessment expectations. Approval belongs at the point where all of those decisions agree, not when a shade has been selected.
Professional installation should follow a repeatable workflow with quality-control pauses before the stylist commits to the full design. Manufacturer-specific training governs the selected system; a general procedure can't supply universal clamp pressure, spacing, or section dimensions.
Think of distributing a client's bag across several sturdy handles rather than suspending it from a fragile edge. The lesson is proportional support, not merely increasing attachment count.
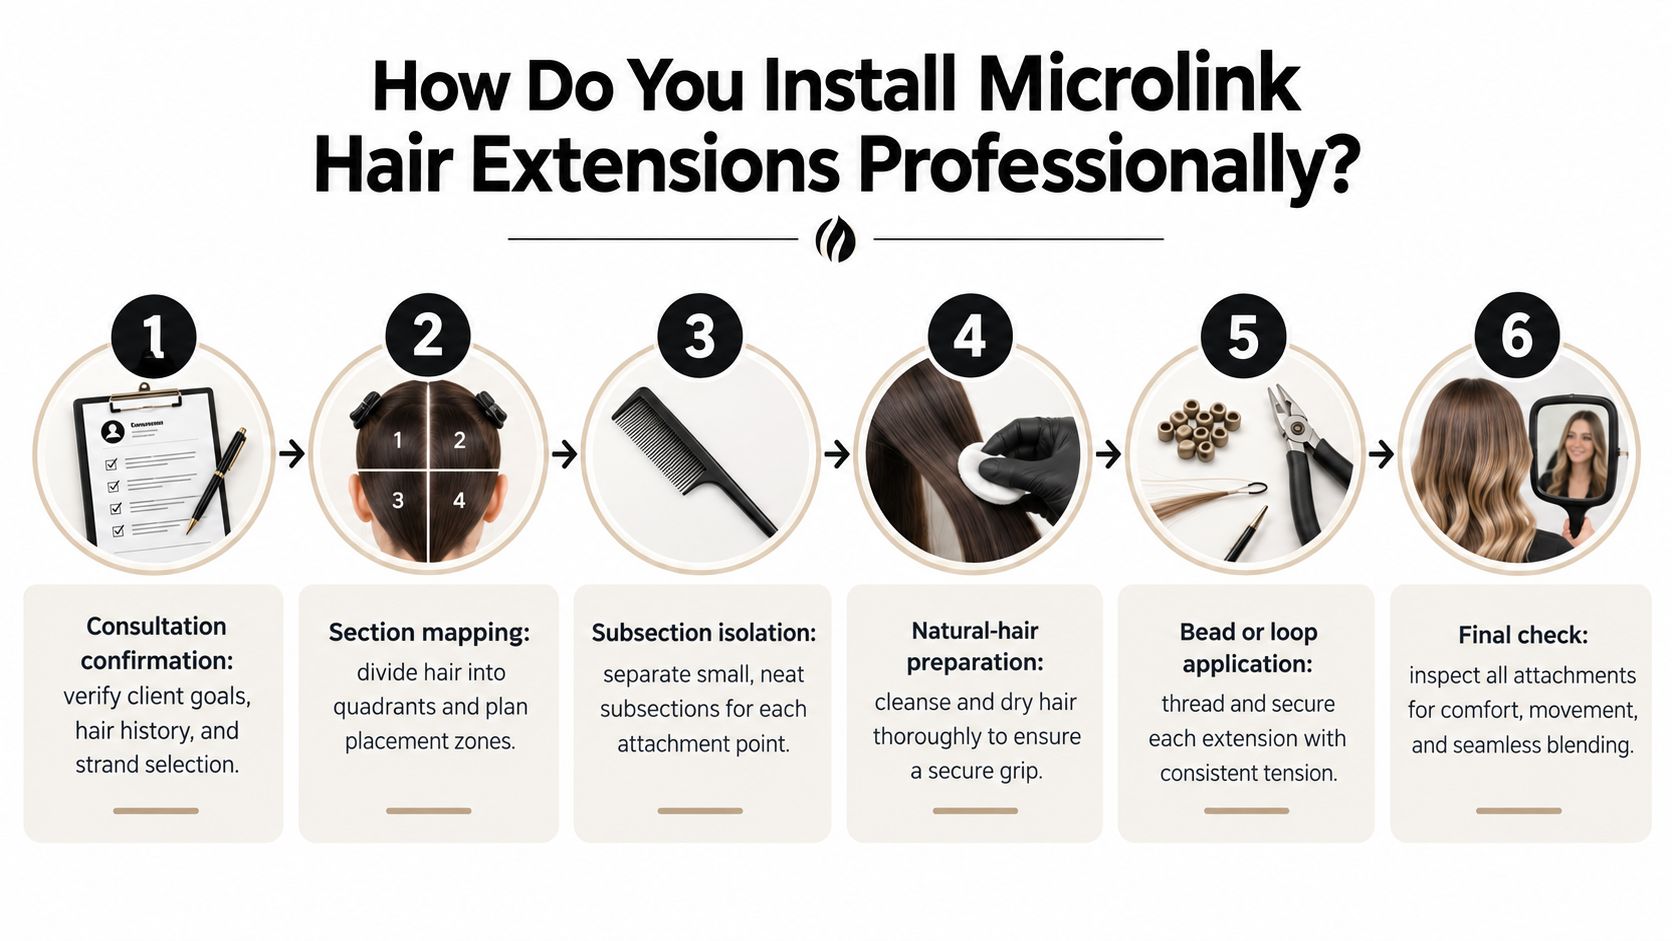
Confirm the consultation. Recheck condition and the approved result on installation day. Changes since consultation can justify a different service.
Map placement before attaching hair. Mark exclusions around weak areas, part lines, and exposed styling zones. Quadrant sectioning can organize the workspace, but the placement map should follow the client's actual density and growth pattern.
Prepare according to the system. Cleanse and dry as required by the selected attachment protocol. Preparation shouldn't involve aggressive manipulation of already-compromised hair.
The professional installation-tool guide provides context for assembling a method-appropriate workstation rather than substituting whichever pliers are available.
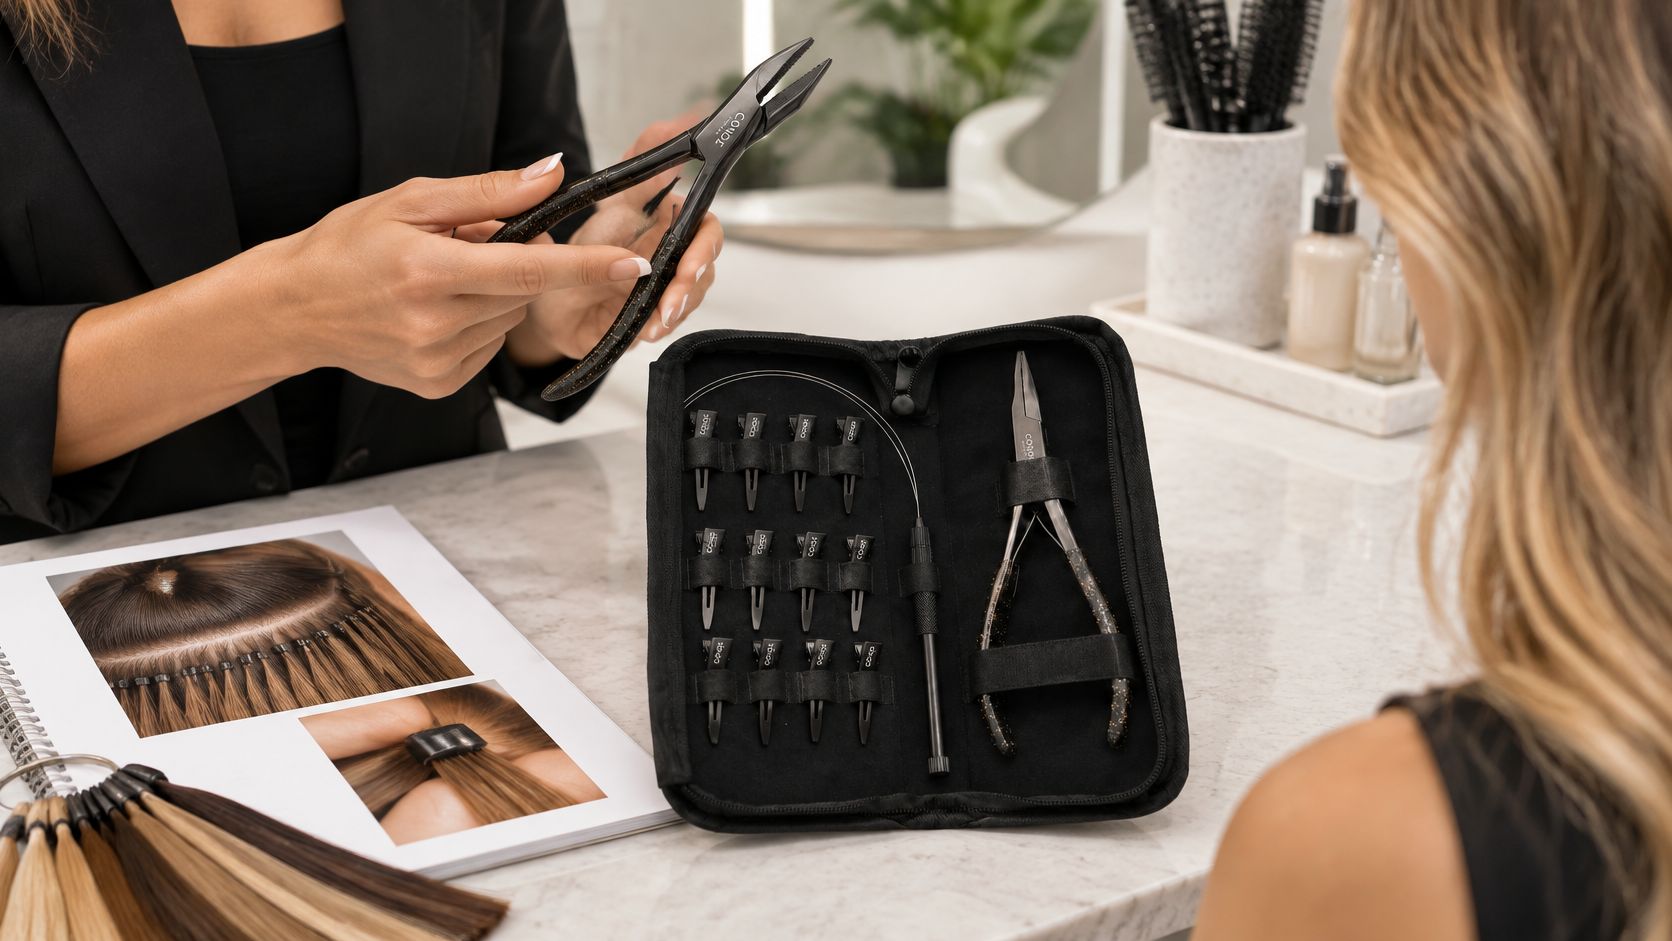
The Conde Hair Plier Loop Clip Microlink Mini Kit includes professional-grade loop pliers, a precision clip tool, and clips. Its stated compatibility covers standard micro-link and I-tip systems and Conde silicone-lined aluminum and copper beads; compatibility doesn't establish universal closure performance or eliminate the need for training.
Before cutting, inspect the install with the client upright and the hair moving through intended partings. Check whether attachments remain concealed without forcing the natural hair into a compensating position.
Finish only after the mechanical checks pass. Blending can refine shape, but cutting shouldn't be used to distract from poor placement or an unsupported attachment plan.
Maintenance is an inspection service before it's a move-up service. The stylist should establish what has changed since installation before opening, relocating, or replacing attachments.
Clinical guidance recommends reducing extension volume, length, and wear duration when extensions can't be avoided, and removing the source of tension with medical evaluation when pain, inflammation, broken hairs, or localized thinning appears, as outlined in this clinical review of traction-related hair loss. Those findings support conservative service decisions, not salon diagnosis or treatment claims.
| Professional service responsibility | Client guidance to demonstrate |
|---|---|
| Inspect attachment mobility and regrowth-related leverage | Avoid pulling attachments during brushing or styling |
| Examine redness, tenderness, breakage, and density changes | Report discomfort or unexpected changes promptly |
| Check separation, tangling, and matting near beads | Keep sections separated with the taught handling technique |
| Decide whether to reposition, reduce, remove, or defer | Attend the agreed reassessment rather than extending wear independently |
The inspection should include the perimeter, part lines, attachment sites, and changes in ponytail density. Matting near a bead requires examination before any move-up, not compression into a newly positioned attachment.
Home-care education should be demonstrated on the actual install. The stylist should show supported detangling, gentle cleansing around attachment zones, appropriate drying, and low-tension sleep arrangements without assigning unsupported wash schedules.
Product recommendations should follow the selected system's requirements. The extension-care product guide can support that conversation without replacing individualized handling instruction.
Use the appropriate removal tool to reverse the attachment without levering the bead against fragile hair. If a connection doesn't release as expected, the stylist should stop and identify the obstruction rather than pull harder.
Removal standard: Natural hair should be inspected before the next install is approved, even when the appointment was booked as a routine move-up.
After release, assess the exposed subsections and document changes. The next service may involve reduced loading, a different design, or a longer break rather than automatic reinstallation.
Professional sourcing for Volume Weft, Thin Weft, Bulk, or another suitable format belongs after that reassessment. Changing the purchased hair doesn't resolve an attachment-area concern.
A loose bead isn't automatically a request for greater clamp pressure. Troubleshooting should identify whether the fault involves closure, component compatibility, section selection, regrowth, or an unsuitable original design.
The same symptom can have different causes. Migration after wear requires a different assessment from an attachment that never held correctly.
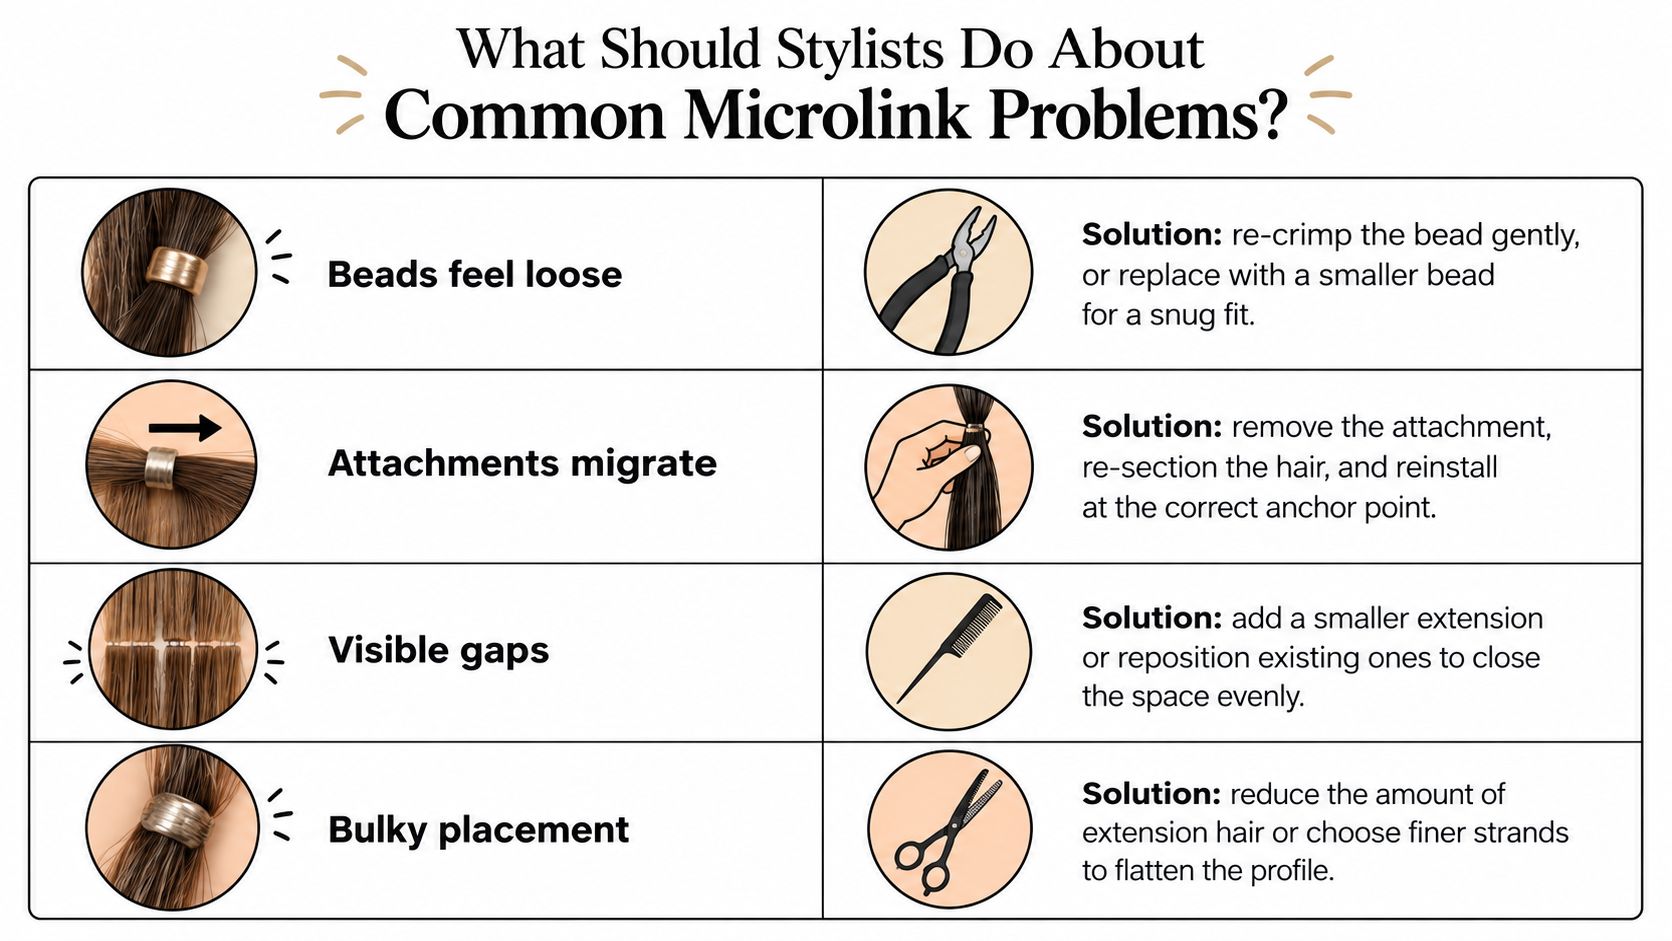
Breakage near the bead, persistent traction, scalp tenderness, headache, or redness takes priority over cosmetic correction. Following the removal guidance above, the stylist should release the source of tension and reassess rather than tighten or conceal the area.
The service order should remain consistent:
Before selecting hair or placing the first bead at the next booked microlink service, the stylist should review its consultation, loading, tension, and maintenance record.
Conde Professional offers wholesale extension formats, compatible microlink tools, and education for licensed salon professionals planning these services. For the next approved install, visit Conde Professional to open a professional account and request guidance on the appropriate hair, beads, and tools for the documented service plan.


