Your cart is empty
Tax included and shipping calculated at checkout

Drawer menu
Tax included and shipping calculated at checkout
A professional account gives you stylist pricing, priority support, early access to new releases, and education developed by working stylists.


The usual advice to choose the thinnest attachment misses the harder decision: invisible extensions need a workable load, placement, and removal plan before they need a polished finish. A discreet join isn't a suitable join if the client's natural hair can't support it or the salon can't remove it cleanly.
An invisible extension has an attachment that lies flat, stays thin, and sits on a deliberately planned seam. The join must remain concealed during movement and styling, not just while the client sits still with freshly finished hair.
The engineering principle appears in U.S. Patent No. 8,905,048, which documents a lace-weft design intended to tolerate cutting without unraveling or forming a raised edge, with publication recorded on January 25, 2013. The patent describes placement along a part line, including adhesive attachment, and an intended application period of approximately six to nine weeks. That's the design intent of that construction, not a wear guarantee for another product or client.
The useful distinction isn't invisible versus visible. It's how the attachment is built:
Attachment thickness, section size, and placement work together. A thin attachment can still show through insufficient coverage, while a correctly constructed row can disappear beneath an appropriate curtain of natural hair.
Practical rule: Define the attachment family before selecting the product. The family establishes the root geometry, working tools, and removal workflow.
A category name also doesn't establish whether a weft can be cut. Edge stability must be confirmed before scissors touch the attachment.
An invisible install is a load-management system before it's a cosmetic result. Concealment says nothing about how much added hair hangs from each base or how comfortably that base moves.
A clinical review of extension-related mechanical stress reported broken hairs and traction-related examination findings in all 12 women examined, although none reported hair-loss symptoms. For salon practice, the important limitation is straightforward: a comfortable consultation and an attractive finish don't replace inspection of the natural hair.
More attachments aren't automatically the answer either. Crowding a small area can leave too little free-moving natural hair between bases. The objective is appropriate load across suitable support, not the maximum number of concealed attachment points.
A low-density perimeter, fragile lengths, or limited comfortable movement reduces the available margin. Adding substantial length also changes how the client handles the hair during brushing and styling, so the consultation must address more than the desired finished silhouette.
The method-selection considerations for extensions on thin hair are especially relevant when the requested result exceeds the available supporting density.
A seam that disappears isn't permission to keep adding hair.
If the planned finish requires using visibly compromised edges or tightening an uncomfortable base, the stylist should reduce the design or decline that installation. Warning signs during wear require a separate stop-and-reassess decision, not a cosmetic adjustment.
Two clients can ask for the same invisible finish and need entirely different installs. Method selection starts with how the attachment carries load and where its seam can sit; the mirror result comes afterward.
Sewn tracks, adhesive sandwiches, and individual keratin bonds are three distinct attachment architectures, and those differences determine sectioning, tools, and removal labor. Conde Professional's method range includes Volume Weft, Thin Weft, Tape Weft, Tape-In, K-Tip, Bulk, and Clip-In.
| Method | Attachment | Best fit | Main trade-off |
|---|---|---|---|
| Thin Weft | Hand-tied weft sewn to a beaded track | Clients needing a flat, low-bulk row | Precise stitching; placement errors show quickly |
| Volume Weft | Hand-tied weft on a beaded track, fuller row | Clients needing added fullness across the crown with adequate supporting density | More mass per row; section planning matters more |
| Tape Weft | Weft on a tape-backed track | Clients wanting quick placement and a flat row | Adhesion needs checking at maintenance |
| Tape-In | Pre-taped weft sandwiching a thin section near the root | Clients wanting fast, repeatable placement | Adhesive contact and removal need careful handling |
| K-Tip | Flat keratin-tipped strands fused with a heated tool | Clients wanting strand-level blending and ongoing wear | Labor-intensive install and removal |
| Skin-backed weft | Ultra-thin skin-backed weft | Fine-haired clients needing a thin edge and sufficient supporting hair | Confirm cutting, adhesive, and removal specifications |
| Micro-bead | Bead-secured attachment | Clients with suitable density for discrete mechanical attachments | Bead size, section support, and movement must match |
Each row in that table is an installation architecture, and construction varies between supplied wefts. The comparison of hair extension methods helps narrow the family before committing to a placement plan.
Tape sections need clean, consistent partings. An overfilled sandwich prevents proper adhesive contact and can leave a visible ridge at the root; too little hair in the sandwich leaves the tab carrying load it can't hold. Keep adhesive on the intended hair attachment and off the scalp.
Fusion sections need consistent support, evenly positioned bonds, and an uncrowded perimeter. For tonal placement, K-Tip Espresso Blonde #5/11 Highlights provides a multi-tonal highlight blend in flat keratin-tipped strands for hot fusion. Color suitability doesn't change the section's load requirement.
Some briefs point away from a continuous row. A short or uneven perimeter may favor targeted tape or fusion placement, provided sufficient supporting hair exists. Very low density paired with a request for heavy volume is the wrong brief for a fuller row. A client who wants frequent change is better served by Clip-In, although removable attachments still require suitable placement.
Popularity doesn't settle suitability.
The Glam House reported that tape-ins were the most-recommended method for more than 61% of surveyed stylists in 2025. A commonly requested method can still be the wrong call for a low-density perimeter.
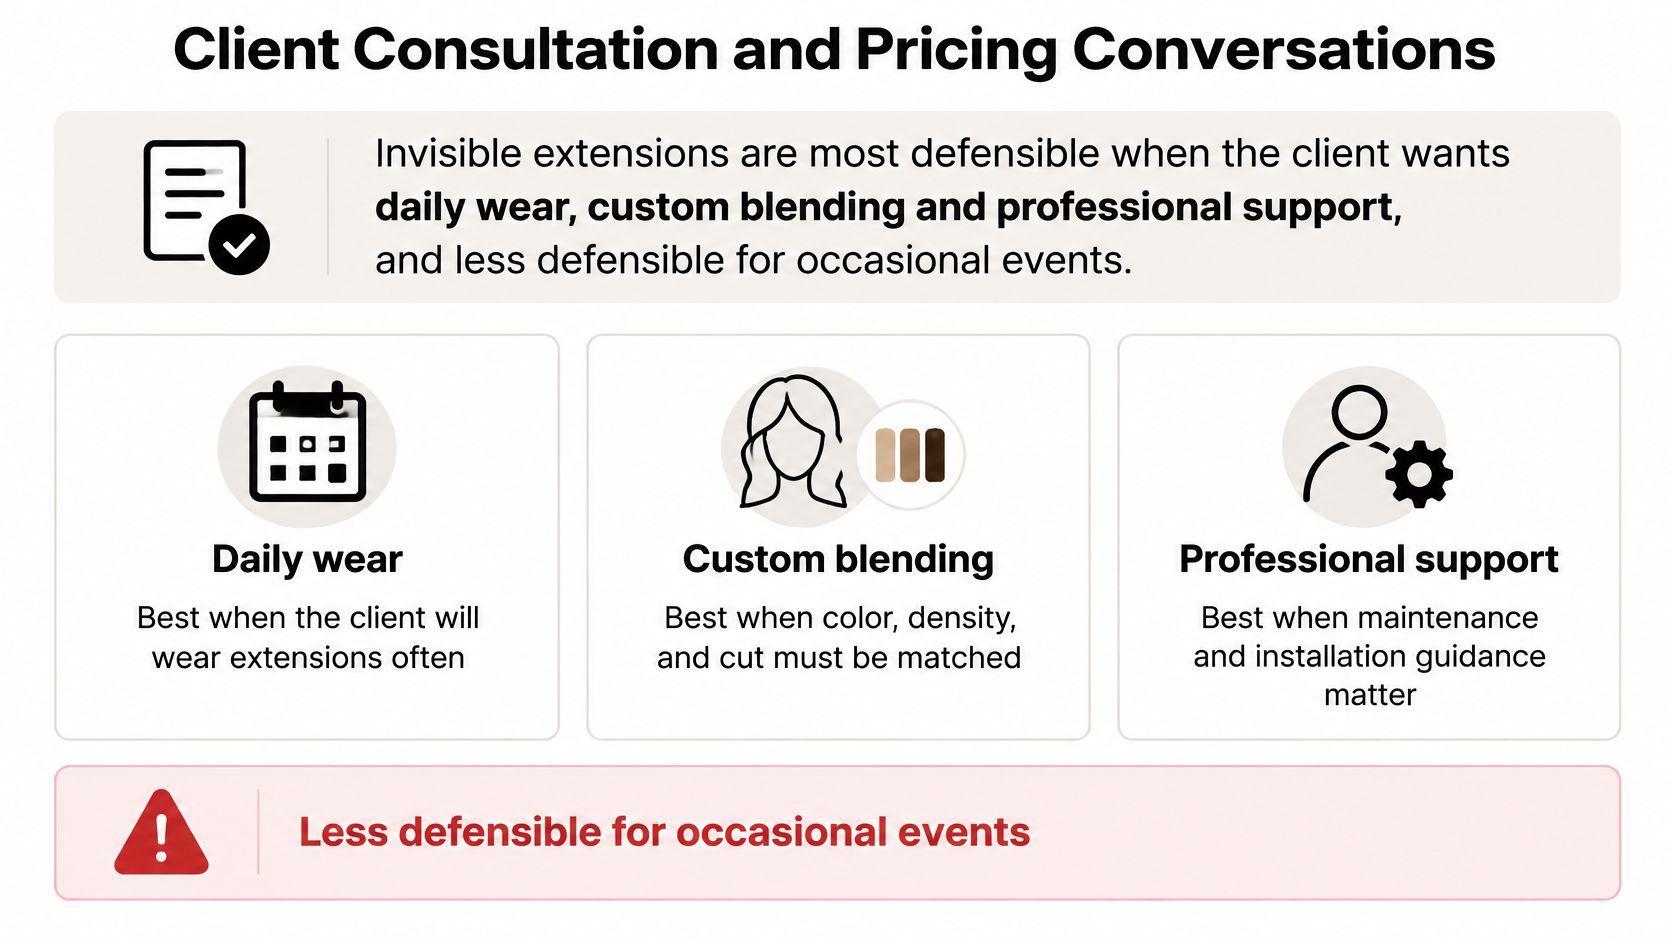
Invisible extensions are most defensible for daily wear, custom blending, and professional support. They're less defensible when the client only needs an occasional event finish and doesn't want recurring appointments.
The occasional event client needs a finished style for limited use. The consultation question is how often that result will be worn; the quote should compare temporary styling and removable hair against an install that also requires professional removal.
The regular volume client wants reliable fullness during ordinary workdays and styling. A suitable sewn row or tape system may justify the commitment, but the quote needs installation, maintenance labor, home care, and eventual replacement hair listed separately.
The long-term wear client needs a sustainable service relationship rather than a single transformation. The stylist should establish appointment availability, tolerance for removal time, color-service coordination, and what happens financially if the original shade choice needs correcting.
Industry analysis of hair extension services identifies appointment stretching and lower-commitment alternatives as relevant pressures on professional services. A client who can't sustain the maintenance plan isn't a good candidate just because the first appointment fits the budget.
A structured hair extensions consultation should end with a decision to proceed, modify, or refuse, not merely a signed acceptance of the requested length.
Conde Professional's professional courses teach both extension techniques and business skills, including improving installs and setting prices. Those skills belong together: a technically demanding removal can't remain invisible in the quote.
Match the natural base and the mid-length zone where the extension meets the client's hair, not just the tips. A convincing end color won't disguise a mismatched root curtain when the client changes direction.
The available shade families are Solid, Balayage, Bronde, Highlights, Superblend, Rooted, and Fantasy. Solid shades span Level 1 to Level 12, but a level designation doesn't replace a physical comparison of tone and depth.
| Shade family | Best used when | Blending approach |
|---|---|---|
| Solid | Single-tone match to a uniform natural base | Match at the root and mid-lengths; check under daylight |
| Balayage | Natural hair lightens or darkens along the length | Blend tones across the mid-lengths, not at the root |
| Bronde | Client sits between brunette and blonde | Match the brown base first, then assess warmth through the mid-lengths |
| Highlights | Client wants visible tonal lift against a darker base | Keep highlight tones close to the client's existing lift |
| Superblend | Client wants a softer transition | Follow the supplier's blend guidance and confirm with a physical reference |
| Rooted | Client wants a grown-out or shadowed root | Blend the root line into the natural base |
| Fantasy | Event or creative color | Match the supporting base first, then plan fashion-shade placement |
K-Tip Light Blonde #8 Solid is a single-tone Level 8 Light Blonde option in flat keratin-tipped strands. It provides a useful reference for a uniform blonde match, not an automatic substitute for every blonde with similar ends.
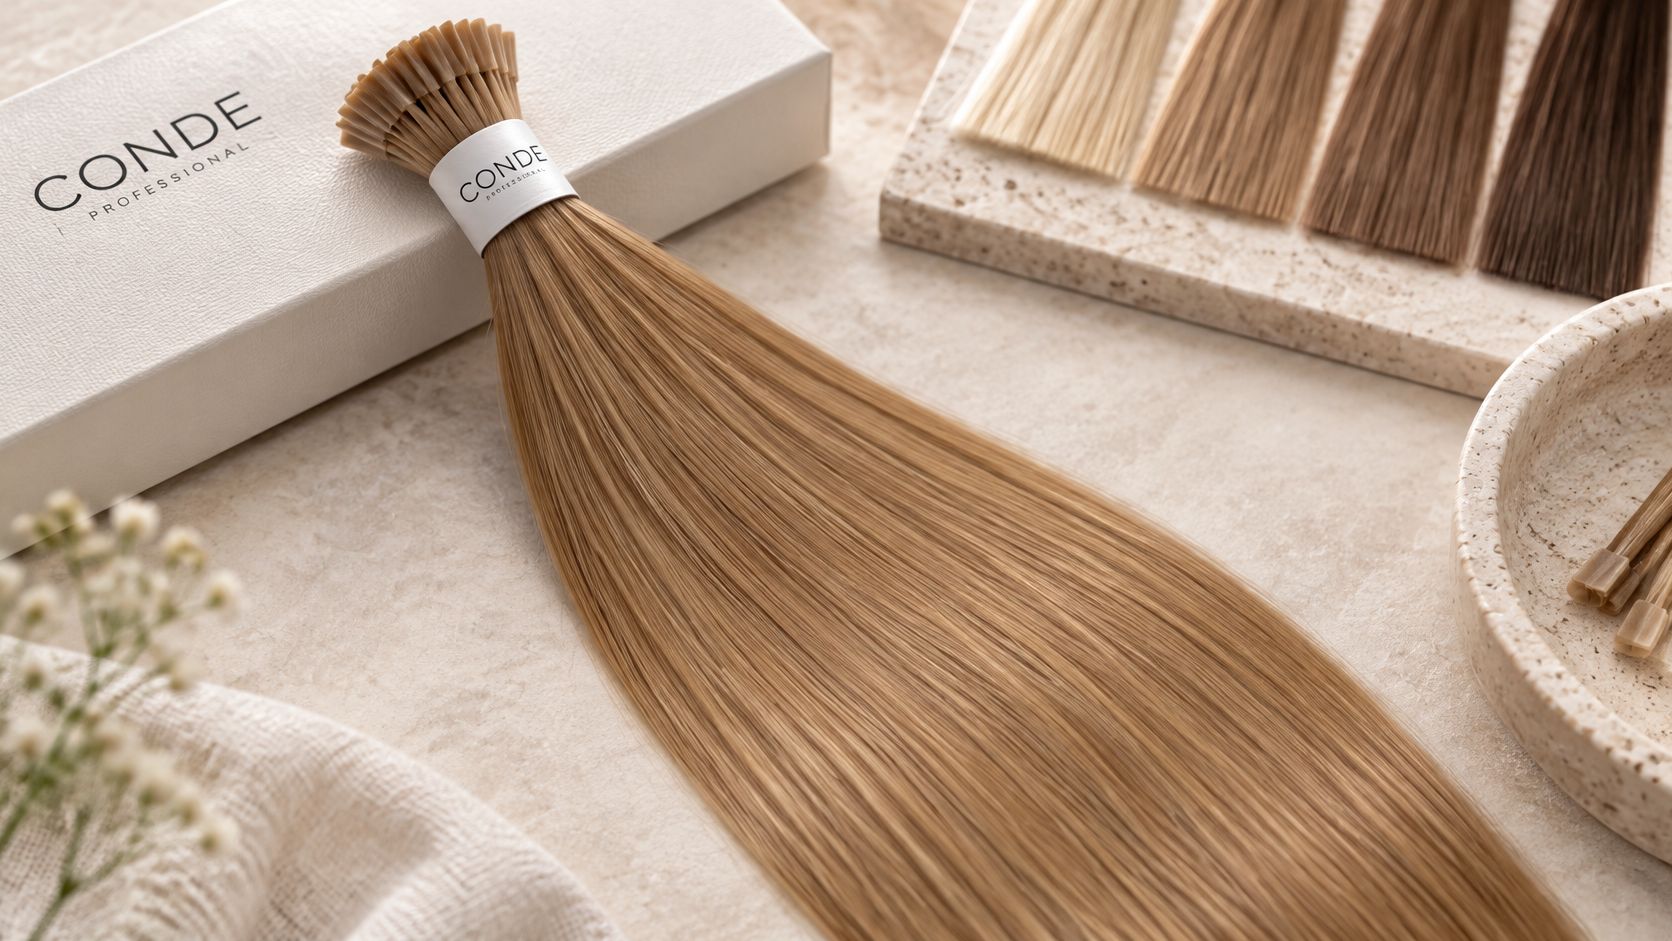
A color ring should sit against the client's actual meeting point between natural hair and extension. The stylist should compare the underside as well as the surface, because a darker interior can become visible during movement.
Checks under salon light and daylight serve different purposes. A movement check after styling then reveals whether the tonal distribution still works when the client changes the part, turns the head, or gathers the hair.
The color-matching workflow for hair extensions should precede cutting and attachment. For Superblend or an unfamiliar rooted transition, supplier guidance is preferable to guessing how the shade will distribute.
Fashion-color plans also need compatibility checks before any chemical work. A shade-family name isn't permission to recolor finished extension hair without the relevant product guidance.
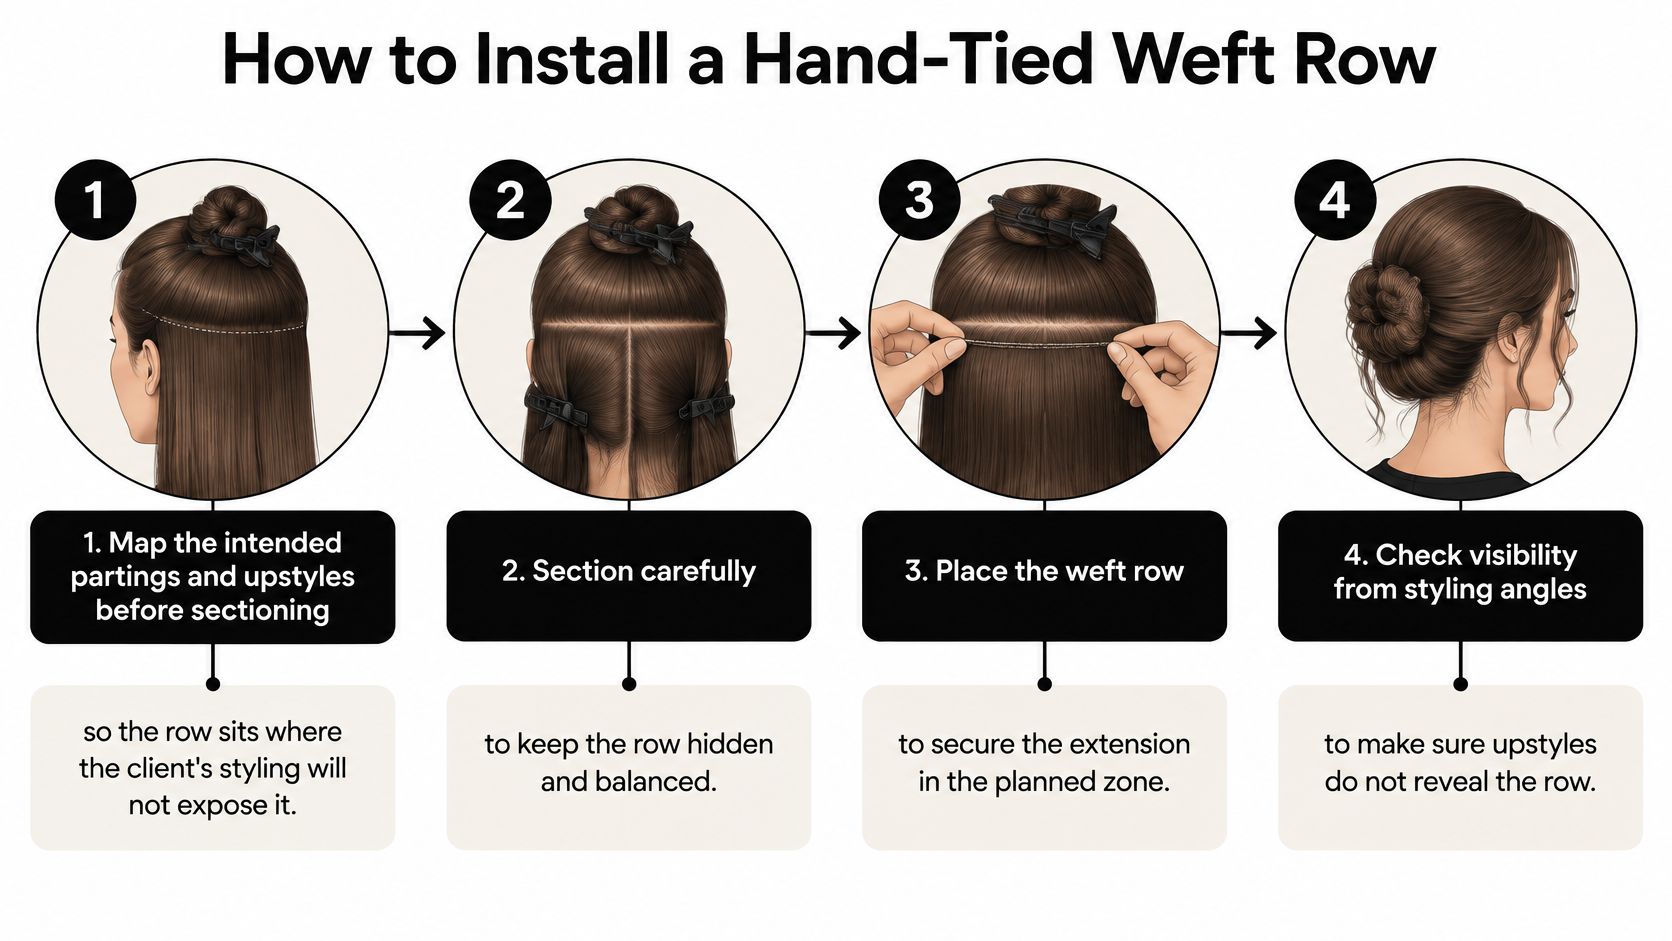
A hand-tied row is a load-bearing structure before it is an invisible one. The working sequence stays constant: map, section, build the track, position, stitch, isolate, and balance. What changes is the head under it. Conde's professional courses train stylists to read bone structure, density, scalp elasticity, and natural movement before committing to placement, and to hold bead consistency, tension gaps, and stitching precision to the same standard on every client. A row map copied from the last install will not survive the next one.
Mapping comes first. Mark the client's real partings and the upstyles she wears, then find the concealment zone that still works inside them. The common slip is sectioning from habit and discovering afterward that a preferred side part exposes the seam. Sectioning follows bone structure, density, scalp elasticity, and movement, because those features set the available foundation and decide where the row can sit without strain.
Build the beaded track with consistent formation and even tension. Maintain the tension gap specified for the method so the loaded track stays stable without restricting movement. Rushed beadwork leaves alternating loose and over-tight bases, and stitching cannot correct a foundation that was never level.
Clip the weft into position before setting the needle. Planned needle placement keeps the row flat and stops the edge from drifting; starting by eye at an unsecured end introduces waviness before the seam is established. Stitch with steady tension, checking for bubbles and shifting as you go. The stitching secures the weft without cinching the client's supporting base, and racing through the far side produces an uneven finish that only shows once the clips come out.
Keep loose hair clear of the working area throughout. Croc Clips slide into place at the root or through the section to hold hair away from the work. A clip that drags the track out of alignment creates a false working position, so fix its placement before stitching continues.
Finally, compare balance across the complete base: both sides together, row ends included, head neutral and then moving. Judging each side in isolation misses unequal tension. I would also say the harder call comes earlier: if the consultation shows low density or a scalp with little give, the foundation cannot carry a loaded row, and a hand-tied weft is the wrong method for that client no matter how clean the install would look.
Finished-row check
- Flat construction with no bubbles along the seam
- Free movement at the base rather than tightness
- Balanced support across both sides and the row ends
- Concealment inside the client's agreed partings and upstyles
That last point decides whether the service is finished. Test concealment against the styles the client wears, not a substitute chosen because it hides the work. If the row only disappears under styling the client never asked for, the placement needs reassessment before she leaves the chair.
Removal deserves the same planning as installation. The stylist needs clear access to the attachment, compatible release products, and enough appointment time to work without pulling.
A professional cosmetology reference on extension attachment systems distinguishes sewing, bonding, fusion, linking, and tube-based methods. Their different structures require different release workflows rather than a universal removal technique.
Reinstallation timing should reflect the natural hair and attachment condition, alongside the method's guidance. The record should include the removal process, observed hair condition, and actual interval between visits.
A rushed appointment shouldn't turn a careful release into a force-based one. When the removal needs more chair time, the schedule must accommodate the work.
A visible seam at the part should prompt a placement and coverage check before additional hair is added. More density can conceal the symptom temporarily while making the underlying design less suitable.
The first distinction is between a local construction fault and an unsuitable foundation. A small stitching correction may be completed during a correction appointment; a row positioned outside its concealment zone needs removal and repositioning.
| Symptom | Likely cause | Fix |
|---|---|---|
| Visible seam at the part | Row too close to the part or an overfilled attachment section | Re-section appropriately and shift away from the part. Repositioning requires reinstallation of the affected attachment |
| Bubbles or waviness in a weft row | Uneven stitching or uneven tension | Re-stitch with even tension and check needle placement. Local correction is possible if the track remains sound |
| Row shifting after a few days | Track not secured or tension gap incorrect | Rebuild the affected foundation and tension gap. Reinstall the row rather than adding stitches to an unstable base |
| Tenderness at attachment points | Excess mass per section or tight placement | Release the uncomfortable attachment and reassess support. Persistent discomfort rules out immediate reinstallation |
| Tape lifting at the root | Poor adhesive contact or root residue | Remove the affected panels, clean appropriately, and reassess placement before reinstallation |
| Color mismatch in daylight | Shade selected under salon light only | Rematch in daylight and adjust the blend shade. Plan replacement or redistribution rather than assuming a styling fix |
Persistent soreness or tenderness, bumps around attachments, broken hairs, or a widening part line mean the service needs to stop and be reassessed. The stylist shouldn't tighten, conceal, or encourage the client to tolerate those signs.
Clinical prevention guidance on excessive traction supports reducing prolonged tension and avoiding compromised perimeter areas. A salon response stays within professional scope: release the problematic load, document observations, and recommend appropriate medical assessment for persistent scalp concerns rather than diagnosing them.
Discomfort isn't an adjustment period that a stylist should promise will pass.
A correction appointment also needs a clear endpoint. If an attachment remains uncomfortable after release and reassessment, the service shouldn't continue just because the original design can be recreated more neatly.
Repeated seam exposure calls for a new coverage map. Repeated lifting calls for a review of preparation and sectioning, while repeated waviness calls for inspection of the foundation before another stitching correction.
Most recurring installation faults begin before the final blend cut. Placement, supporting density, and the requested amount of hair deserve review before the salon repeats the same design.
Verify performance before ordering on the strength of a label. Cuticle integrity, alignment, shedding, combability, and wash durability are more useful purchasing criteria than a numerical grade.
A supplier-industry guide to extension quality terminology describes Remy as cuticle-intact hair kept in one direction, while noting that the term isn't regulated by a universal certification or specified aligned percentage. Grades such as 6A through 10A are supplier marketing, not a governing-body standard.
Conde Professional's founders spent years installing extensions before starting the company. That background is relevant to professional product development, but the salon should still evaluate incoming stock against its own documented acceptance criteria.
A wholesale human hair extension purchasing framework should connect supplier verification with the services the salon can competently install, maintain, and remove. The next business step is a professional account, not a consumer checkout decision.
Conde Professional offers extension methods, shade options, tools, and education for licensed professionals building technically sound invisible-extension services. Visit Conde Professional to open a professional account and identify the method and shade references needed for the salon's next planned install.


