Your cart is empty
Tax included and shipping calculated at checkout

Drawer menu
Tax included and shipping calculated at checkout
A professional account gives you stylist pricing, priority support, early access to new releases, and education developed by working stylists.


The popular advice that tape-ins are gentle because they lie flat overlooks the more important decision: client screening, placement, tension and removal technique matter more than the method label. Tape-ins are a practical choice for suitable fine-to-medium hair, but a quick install doesn't justify adhesive exposure, overloaded sections or a maintenance schedule the client won't keep.
Most tape-in comparisons stop at comfort and low heat. Those are real advantages, yet neither decides whether the client's hair survives the method. That outcome is set in the chair: the section chosen, the load placed on it and the way the adhesive comes out at removal. Tape-ins win on speed, low profile and simple maintenance appointments for suitable fine-to-medium clients. They lose on adhesive contact, removal labor and traction exposure when placement or loading goes wrong.
Tape-in pros and cons on the criteria that matter in the chair
| Criterion | Tape-in profile | What it means on the chair |
|---|---|---|
| Wear time before maintenance | One full wear cycle between repositioning visits | Prebook the maintenance appointment rather than stretching the application |
| Load distribution | Adhesive panels spread added hair across a horizontal section | Distributed loading still requires an appropriate supporting section |
| Traction exposure | Present across extension methods | Keep attachments off the perimeter, temples and fragile zones |
| Adhesive contact | Adhesive bonds to natural hair inside the sandwich | Document reaction history and follow manufacturer compatibility-testing instructions |
| Removal method | Bond-release product followed by gradual separation | Force breaks natural hair; the removal section covers the technique in detail |
| Maintenance pattern | Release, reassess and reposition at each cycle | Rebooking needs a separate service allowance; the maintenance section covers timing |
| Installation time | Time the complete service, including sectioning and finishing | Measure actual chair time before quoting |
| Daily styling | Added fullness can reduce repeated volumizing work | Don't turn that advantage into permission to heat the adhesive |
| Hair-type fit | Healthy fine-to-medium hair is the working profile | Coarse, heavy or compromised hair needs individual assessment |
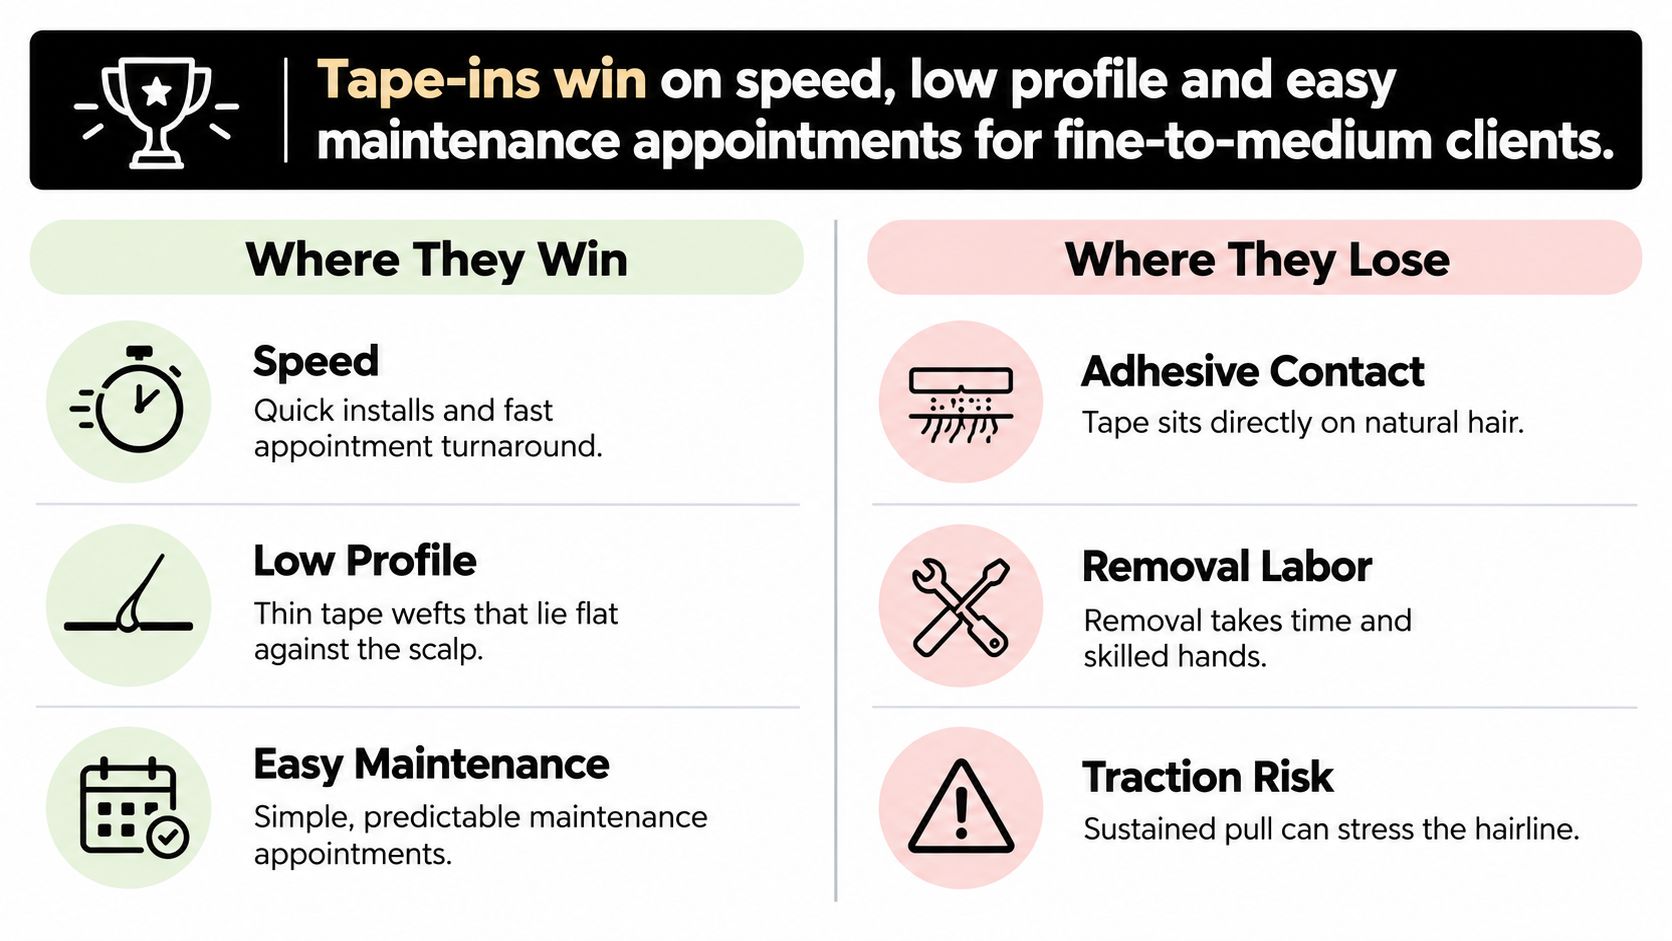
The core trade-off is fullness and styling time against repeated adhesive and removal exposure. A clinical review of extension-related concerns describes mechanical breakage associated with adhesive removal and emphasizes cumulative pulling, tightness, duration and natural-hair condition.
Practical trade-off: every reapplication repeats the adhesive, remover and separation cycle, so the cost of tape-ins is measured across months of wear, not the first install.
Compare tape panels with a hand-tied or beaded row, microlinks and fusion bonds by examining the attachment footprint, supporting hair and removal process. The guide to hair extension methods provides a useful framework for that consultation.
A flat attachment still needs a suitable section underneath it. The same method can suit a healthy interior section and be the wrong choice near a sparse temple.
Suitability is decided during consultation, not by the product label. Fine strands and thinning density are separate findings on the same head, and a client's request for a particular method never substitutes for a strand-strength and scalp assessment. The screening has three jobs: confirm the supporting hair can carry the panel, place it where tension stays low, and rule out adhesive risk before anything is taped.
Client and hair cases that set the tape-in decision
| Client or hair case | Tape-in fit | Action on the chair |
|---|---|---|
| Healthy fine-to-medium natural hair | Good fit | Use interior placement and conservative weight |
| Fine or chemically compromised hair | Conditional | Consider lighter, narrower panels and lower density; defer if strength is inadequate |
| Existing traction alopecia or active thinning | Avoid | Decline or defer tape-ins and document the reason |
| Fragile hairline, temples or perimeter | Avoid placement | Use suitable interior sections or change the service plan |
| Scalp pain, redness or broken hairs at consultation | Hold | Investigate before installing |
| Documented adhesive reaction | Avoid tape adhesive | Assess a non-tape alternative |
| Hair beyond shoulder length | Caution | Reduce added weight and measure the planned panel's length and weight against the supporting hair |
| Healthy coarse or thick hair with strong combability | Good fit if checks pass | Verify shedding, strand strength and concealment |
Every row runs on the same three checks.
A client with fine strands may have adequate density and strong interior sections. Another may have thicker strands but insufficient supporting hair where she wants the panels placed. The fine and thin hair extension guide keeps those two conversations separate instead of treating both clients as the same case.
Take a reaction history before selecting tape. A review of medical adhesive allergens identifies colophony derivatives, rubber additives, acrylates and methacrylates among recognized allergens.
Ask about previous reactions to extension tape and other adhesives, then follow the adhesive manufacturer's controlled compatibility-testing instructions. A clear test result still leaves symptom monitoring active for the whole wear period.
Keep a hair-to-hair adhesive system off the scalp. Significant swelling, blistering, pustules or rapid localized shedding calls for stopping the service and referral for medical assessment, not a different tape placement.
For a documented tape-adhesive reaction, discuss an appropriately screened K-Tip plan or Clip-In service rather than trying stronger tape. Fusion bonds still require material compatibility checks, and clip attachments still require adequate supporting hair.
For a fragile perimeter, a Thin Weft or Volume Weft plan may allow interior placement if those interior sections pass the same checks. Neither option makes active thinning acceptable for an install. Every method requires tension control, and sometimes the correct alternative is no extension service until the concern has been assessed.
A panel that has crept toward the part, a tape edge catching in the brush, or a client reporting pulling between visits is a maintenance event. Book it. The wear window is measured in weeks, but the limit that matters most is the first sign that growth, placement or tangling has changed the load on the supporting hair. Client screening and tension control set that limit more than the tape-in label does.
Growth moves each panel farther from the scalp and changes the pull on the tape. Slipping, rotation or trapped shed hairs can raise tension even when the bond still feels secure. Retention alone does not qualify an application for continued wear.
Leave solvent timing, panel release and panel inspection to the removal procedure. This visit is for decisions and limits:
Reuse depends on panel condition. A weft with broken construction, persistent contamination, or adhesive that cannot be prepared cleanly is retired.
A delayed maintenance visit doesn't eliminate removal work. It can leave a tighter release, more trapped hair and less freedom to repeat the original plan.
Clients who stretch appointments to cut spending need a service-level conversation: lower density, shorter added length or a temporary method may cost less than wearing an unsuitable application longer. Written home instructions should say to contact the salon sooner for pulling, unusual tangling, irritation or unexpected shedding; the booked date is a ceiling, never permission to wait through a developing problem.
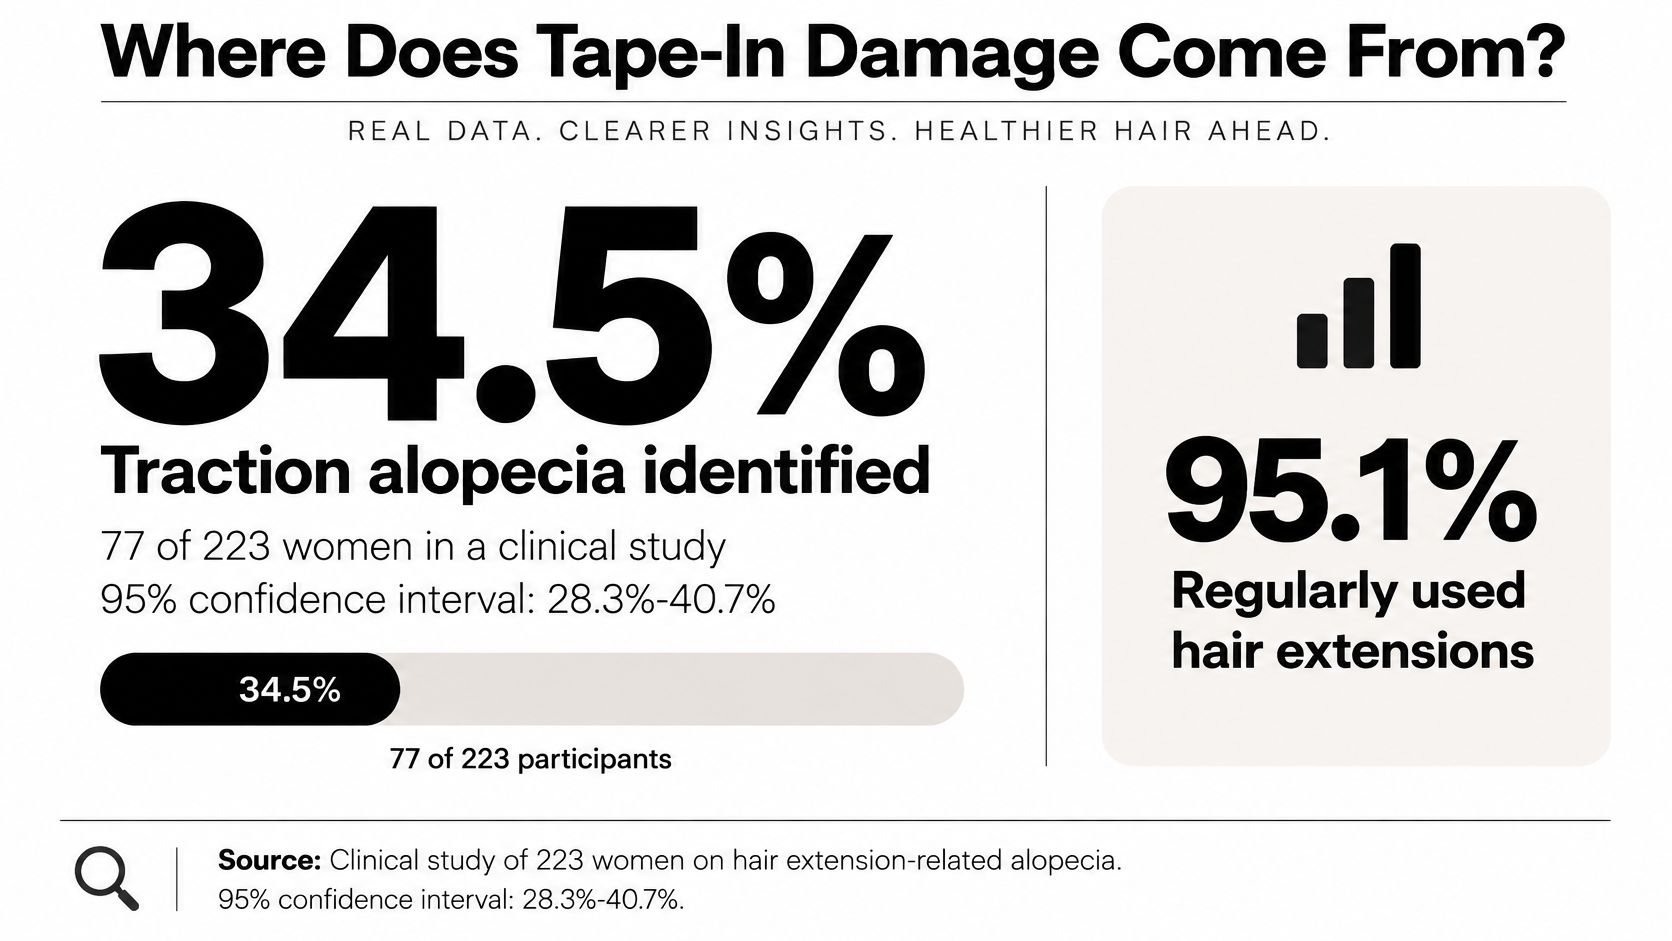
The method label never injured a follicle; sustained load at the attachment site does. In a clinical study summarized in the dermatology evidence on extension-related traction, traction alopecia was identified in 77 of 223 women, or 34.5% of participants (95% confidence interval 28.3–40.7%), in a cohort where 95.1% regularly used extensions and 63.7% renewed their hairstyles monthly.
That cohort mixed several attachment methods, so the figure describes extension wearers broadly and tape-in clients only indirectly. Regular upkeep did not leave the group damage-free. A style the client has worn for years, maintained on schedule, can still be loading the same follicles past their tolerance.
Sustained pulling acts on the shaft and on its anchor inside the scalp. Tension-related thinning begins as a nonscarring, reversible process; when the same follicles stay loaded, the loss can turn permanent. The useful window sits inside the wear period, well before any scheduled move-up.
The clinical case series on extension-associated hair loss documented four women reporting acute loss 7–20 days after application, with affected patches at former attachment sites. The cases involved extensions generally, and the lesson carries straight into tape-in work: a stylist who waits for the next booked visit misses the stage where releasing tension can still reverse the process.
Damage risks, warning signs and the chair response
| Risk | Mechanism | Warning sign | Response |
|---|---|---|---|
| Traction alopecia | Sustained pulling stresses hair at attachment sites | Localized thinning or tenderness | Release load on the affected area and arrange assessment before refitting |
| Breakage at removal | Adhesive resistance or an unfavorable attachment angle loads natural hair | Broken or pulled hairs on the removed panel | Switch to slower, solvent-led separation |
| Acute shedding | Early loss following an install | Unusual shedding or reduced attachment-zone density | Remove tension and assess before rebooking |
| Adhesive sensitization | Reaction to adhesive materials | Itching, redness, burning or blistering | Stop the service and refer for medical evaluation |
| Folliculitis | Occlusion and friction around an attachment | Pustules or persistent soreness | Stop the service and seek scalp assessment |
Treat this table as a recognition and referral framework. Labeling every red attachment site as an allergy, or every shed hair as traction alopecia, oversteps the stylist's role.
For background on the terminology, PRP For HairLoss explains traction alopecia. Clinical assessment, not a salon treatment promise, is the appropriate route for suspected hair loss.
A review of hair-loss camouflage methods describes broken hairs and traction-related signs in all 12 examined extension wearers, despite none reporting hair-loss concerns. An attachment zone can look quiet and still be losing hair.
That changes the inspection standard. A panel loosening over compromised support calls for release and reduced load, never for pressing the sandwich tighter or hanging more length on the same section. Tenderness at the root, broken hairs around the tab and falling attachment-zone density all say the placement is asking more than the section can carry.
A painless install can still be an overloaded one. Inspect the supporting hair directly; the client's comfort report is the last signal to arrive, never the first.
Scalp clearance and a clean sandwich matter more than speed. Prepare the section so the panels can move with the hair without collecting neighboring strands or forcing roots into an unnatural direction.
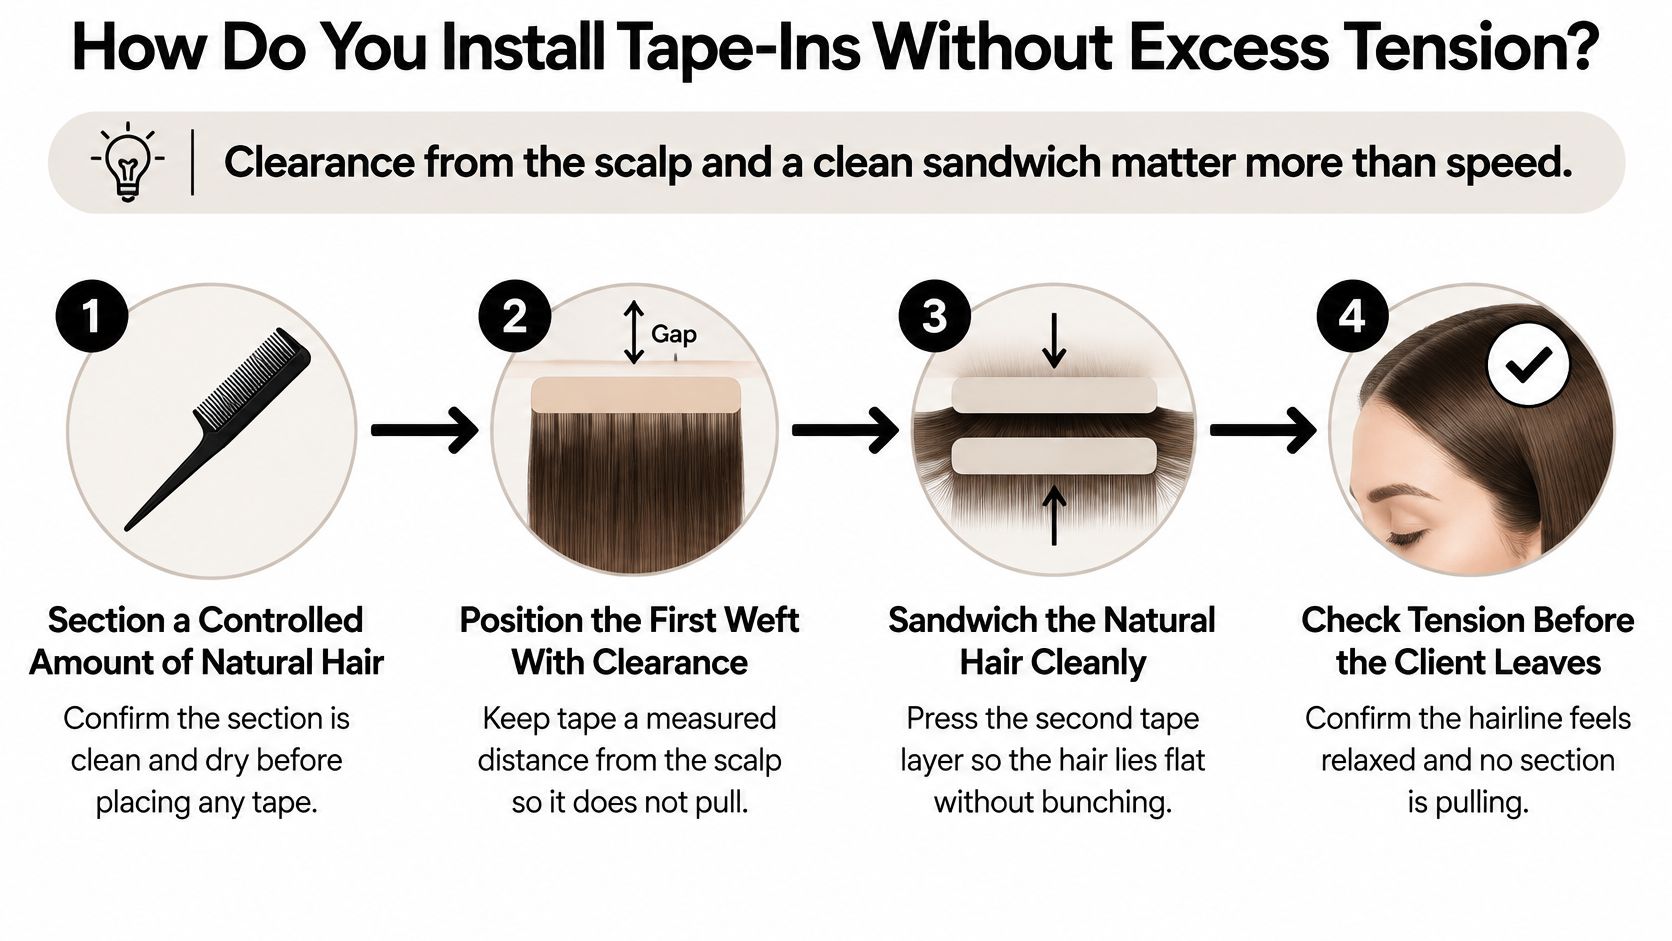
The adhesive system's own written instructions override these example measurements where they differ. The tape-in installation guide can support training, but it doesn't replace system-specific directions.
A single-tone option such as Tape-In Extra Light Blonde #10 Solid and a blended shade such as Sandy Shore #6/11 Superblend still require the same attention to isolation and loading. Color selection doesn't change the supporting section's capacity.
One particularly avoidable error is trapping unrelated strands before compression. Once caught, those hairs can pull from a different direction and complicate removal. Correct the section immediately rather than hoping the attachment will settle.
A panel that still grips after its first dwell gives you one decision: reapply remover and wait, or pull and take natural hair with it. There is only one correct answer. Most removal breakage is mechanical, and much of it traces back to placement and tension choices made at install, so a stubborn sandwich tells you as much about the last fitting as about this one.
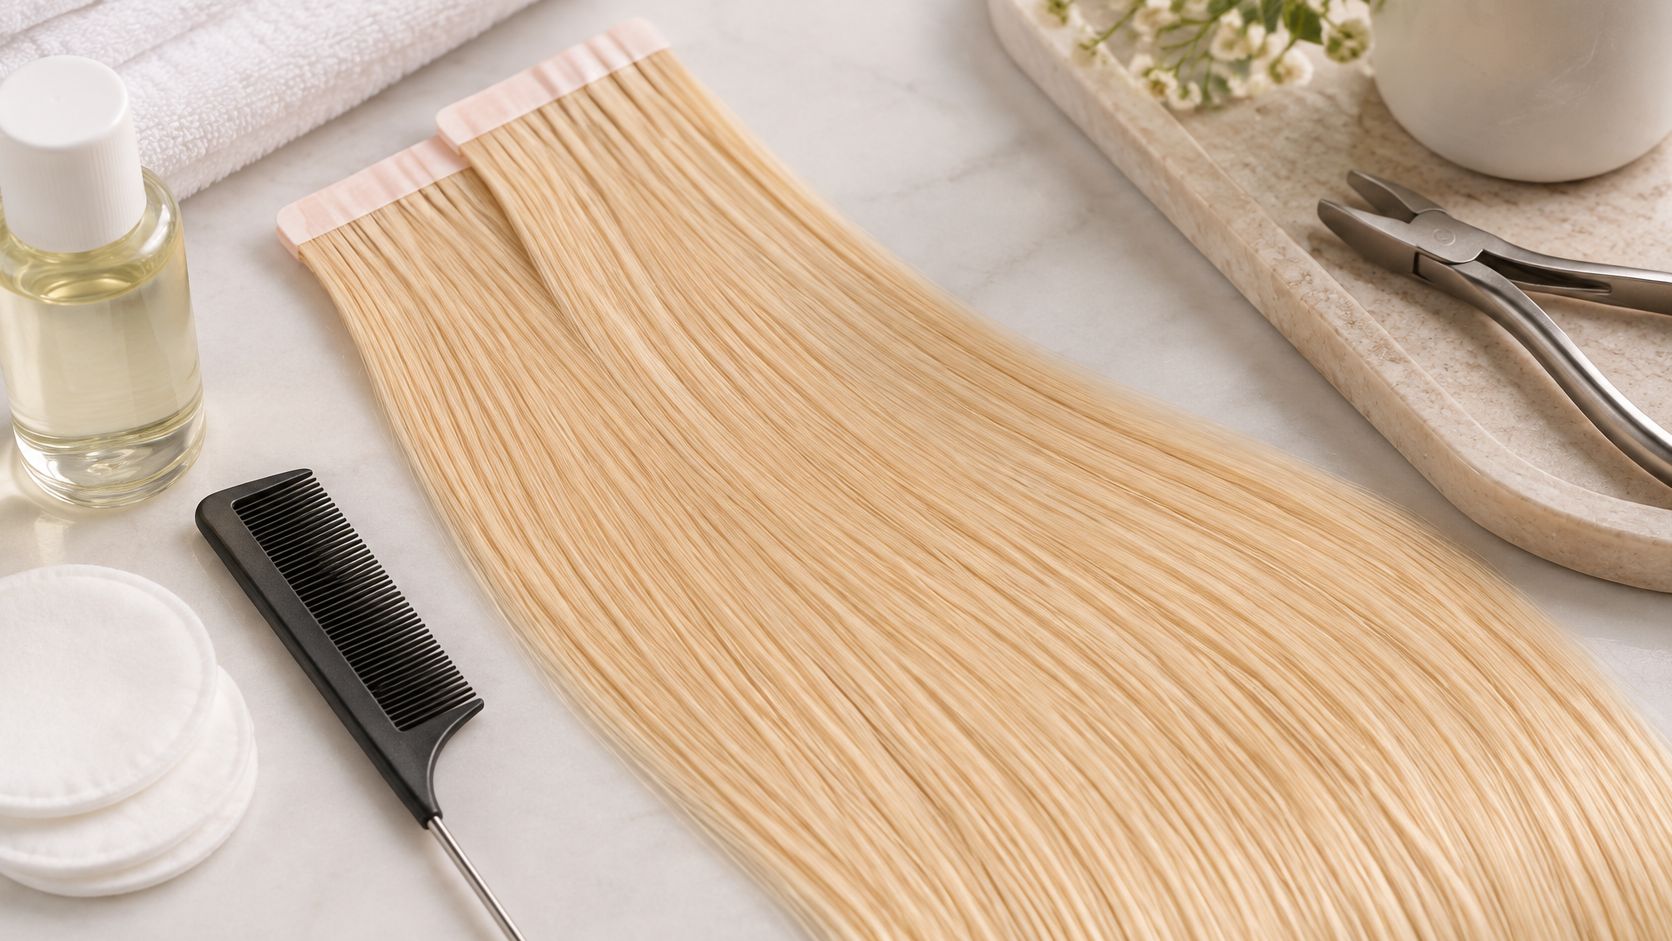
The professional guidance on removing hair extensions describes reaching both sides of the tape sandwich with release product and separating the panels gradually. Keep the natural section supported throughout the process.
Heat has no role here; the bond releases chemically. I treat every stalled panel as a dwell problem until the remover proves otherwise, and the tape-in removal guide gives a salon a consistent process to build into staff training.
Tell the client before removal that the post-release findings decide whether refitting proceeds. Breakage that disappears beneath fresh panels becomes breakage you caused at the next removal.
The Salon Project's 2026 NYC reporting places typical tape-in installations at $300–$1,000, with maintenance needed after 6–8 weeks. That's a local reference point, not a wholesale quote or a margin target.
Cost and earning lines for a tape-in service
| Cost or revenue line | What to track | Figure or status |
|---|---|---|
| Product cost per install | Panel-set cost at the actual order size | Confirm through the professional account |
| Install labor per head | Consultation, preparation, placement and finish | Enter actual timed minutes |
| Removal labor per visit | Release, cleanup and inspection | Log separately from refitting |
| Client price per install | Local service fee | Compare against the NYC benchmark without copying it |
| Maintenance visits per year | Planned cycle and actual attendance | Calculate from the booked schedule |
| Panel reuse | Panels retired for damage or unreliable attachment preparation | Condition-based; no promised reuse count |
| Recurring margin per client | Maintenance revenue less product, labor and booking costs | Calculate from salon records |
Recurring revenue isn't automatically recurring margin. Price removal and maintenance explicitly rather than absorbing extra release time to preserve the original quote.
The salon extension cost guide can support the service-pricing discussion. The useful test this week is whether each client's maintenance revenue covers the actual removal, refitting and administrative work. If it doesn't, revise the price or service scope without extending wear to make the numbers work.
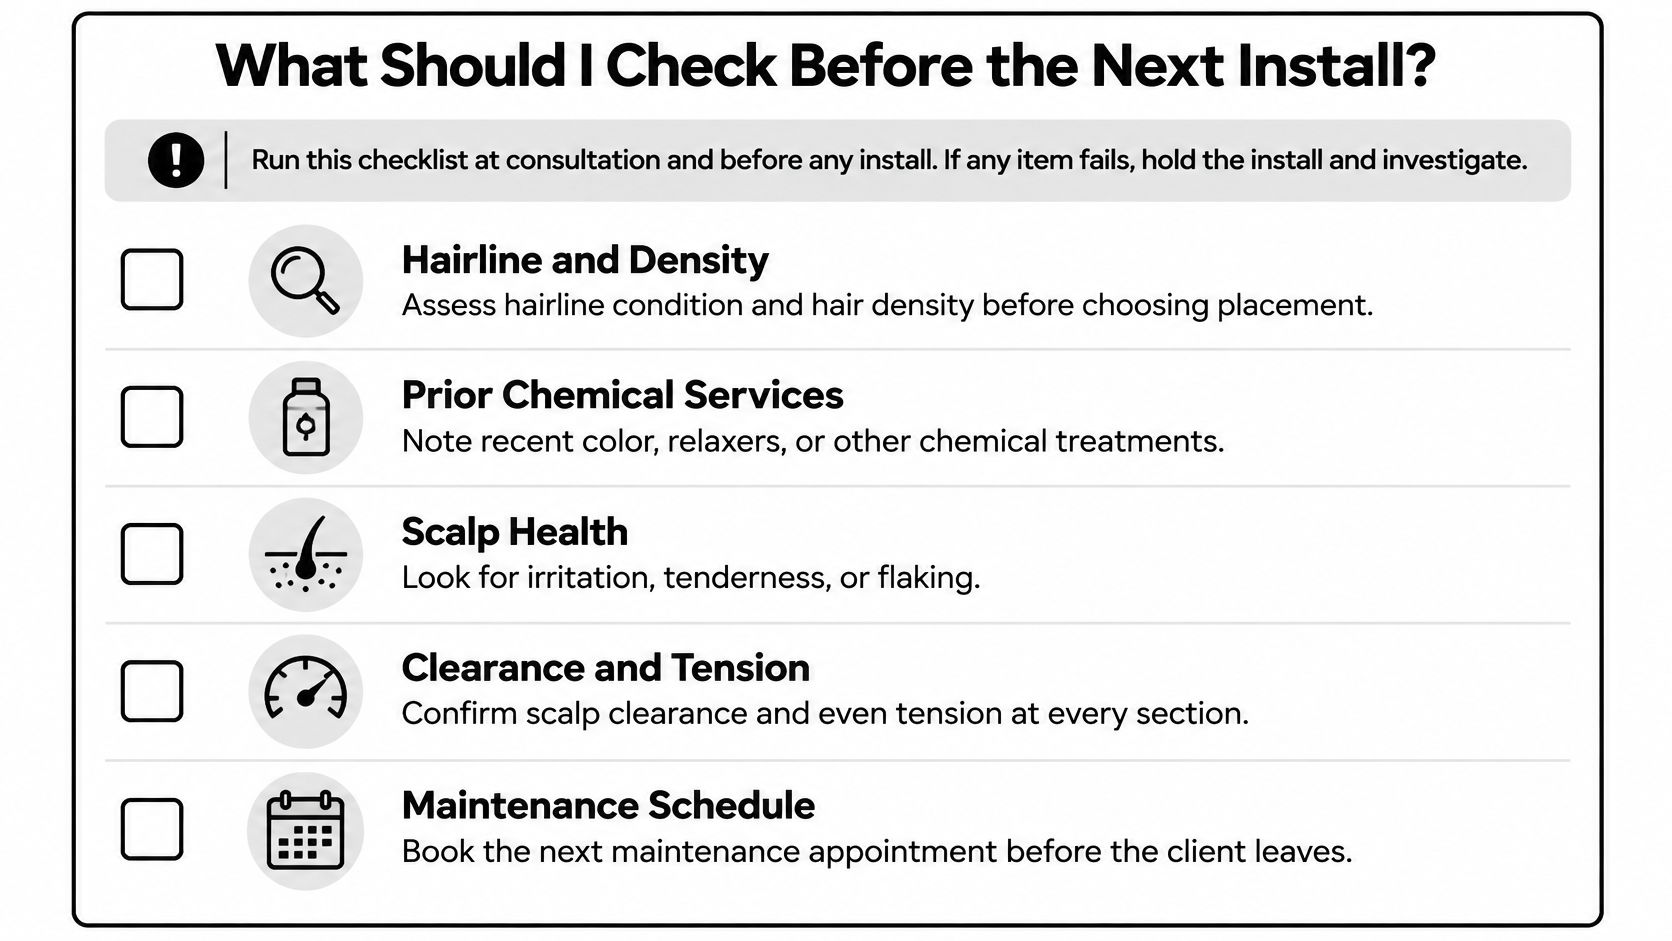
Run the checklist at consultation and again before attachment. If an item fails, hold the install and investigate rather than compensating with a different panel layout.
Request the bond and remover instructions, panel width and weight at the intended length, shade options for the client's level and tone, and confirmation that the adhesive system is designed for hair-to-hair bonding.
Record those answers in the client file. A product claim without a written specification isn't a specification. Remy, cuticle-intact and double-drawn descriptions don't replace practical checks for alignment, shedding, combability and wash durability.
Keep Tape-In distinct from Tape Weft during ordering, and match Volume Weft, Thin Weft, K-Tip, Clip-In or Bulk to the actual service plan rather than treating the formats as interchangeable.
Conde Professional supplies extension hair and professional education for licensed stylists choosing between attachment methods. Visit Conde Professional to open a professional account, then request a suitable tape-in shade in the salon's most-used length for a documented consultation and install on a healthy fine-to-medium candidate.


