Your cart is empty
Tax included and shipping calculated at checkout

Drawer menu
Tax included and shipping calculated at checkout
A professional account gives you stylist pricing, priority support, early access to new releases, and education developed by working stylists.


A client who asks for 24 hair extensions is not automatically a candidate for them. The labeled length is a straight measurement, and texture, density, and tension decide whether that length gets installed, shortened, or refused.
On many average-height clients, straight hair at this length reaches the waist. The same weft in a deep wave finishes well above that line. Method, fiber condition, and how long the client will wear the set matter as much as the inch count on the bag.
A 24-inch set rarely photographs as 24 inches. Row height, wave pattern and the client's own cut decide where the ends land, and the gap between the bag label and the mirror is where most consult disagreements start.
Wave pattern eats vertical drop. Straight fiber shows nearly the full labeled length. Body wave gives back some of that length to the pattern. Deep wave gives back more, so a client asking for waist-grazing deep wave with a 24-inch bundle is asking the fiber to do something it cannot do at that length. She either accepts a shorter finished drop or books a longer length.
| Texture | Labeled length | Visible length after styling | What changes the read |
|---|---|---|---|
| Straight | 24 in (60.96 cm) | Close to the full labeled length | Row height and the natural cut at the ends |
| Body wave | 24 in | Noticeably shorter than straight | Wave pattern pulls the ends upward |
| Deep wave | 24 in | Shortest visual drop of the three | Tighter pattern and weight at the ends |
Run these in the same consult, in this order.
Measured length. Hold the weft or bundle straight and measure tip to tip. Do not measure it waved on a mannequin. If the fiber is not a true 24 inches when pulled straight, the finished look will be shorter than the client agreed to.
Texture. Straight shows the most length. Body wave and deep wave give inches back to the pattern. If the client's reference photo is sleek waist-length hair, a 24-inch deep wave will not match it. I would rather reset that expectation before the order than after the install.
Height and proportions. Measure from the planned row down the back. A short torso can put 24 inches at or past the waist. A long torso on the same overall height can leave it on the lower back. A phone photo of a different client is useless for this.
Row placement and the client's own length change the finish again. Rows set lower make the added length read longer and thinner at the tips. Tension at the row matters too. A row pulled too tight lifts the ends, and a loose row lets the weft sag and read longer than planned. A blunt natural cut that stops well above the extension ends creates a visible gap that shows hardest in bridal and event work, where the deliverable is a photograph, not the bag label.
Write both the measured length and the expected worn length on the consult card before sectioning starts, and have the client initial it.
That habit stops the “it looked longer in the picture” conversation after the color is already matched.
Length is the easy variable. Conde extensions run from 18 to 28 inches in straight and wavy textures, so 24 is available in every method you would quote. The method decides where the weight goes and how much of it a single attachment point has to carry. That distribution, not the number on the bag, is what a client feels after a week of wear.
A full comparison of constructions sits in this guide to the types of hair extension methods.
| Method | Attachment | Fit at 24 inches | Main trade-off |
|---|---|---|---|
| Volume Weft | Machine weft sewn or beaded in rows | Even, full movement | Heaviest panel per inch, so rows need wide sectioning |
| Thin Weft | Thin weft in rows | Lighter visible bulk for finer clients | Less coverage when the client wants a thick perimeter |
| Tape Weft | Weft on tape, installed in rows | Fast, light application | Tape lift and removal timing |
| Tape-In | Sandwich tape panels | Adjustable at the move-up | Load concentrates in the tape zone |
| K-Tip | Individual keratin bonds | Near-invisible, directional control | Bond count and removal time on a full head |
| Clip-In | Temporary clips | Events and occasional wear | Daily removal, and clips on a fragile hairline cause breakage |
| Bulk | Loose Remy hair, custom installation | Any method you can build | Needs a separate attachment plan |
Volume Weft suits clients who want even, full movement and have the density to carry a machine weft. The Jet Black #1 in the Solid Volume Weft line is a single-tone Level 1 weft, and it is sold in 24 inches like the rest of the range. Dense construction packs more hair per inch, so the row plan has to spread the mass. Tension scales with length at the same mass, so band placement decides how the set ages as much as the panel does.
Thin Weft is the lighter row for finer or lower-density clients who still want a weft line. It will not deliver a thick perimeter, and no amount of sectioning fixes that.
Tape Weft and Tape-In shorten the appointment and both stay light in the hand. Tape Weft behaves like a weft in the row. Classic sandwich Tape-In adjusts easily at the move-up, but the load sits in the tape zone, so careless placement reads as a ridge and as pull.
K-Tip gives individual, near-invisible wear with real directional control at the perimeter. The cost is time on both sides of the chair. Every bond is placed and later removed, and a full 24-inch head in K-Tip is a long service the client has to sit through.
Clip-In fits events and occasional wear. It has no place in a daily plan, and clips parked on a fragile hairline break hair faster than any bonded method.
Bulk is loose Remy hair, and it is not a finished method. Choose the attachment first, then build the row plan, because ordering bulk before the plan exists is how weight ends up in one band. It suits a stylist who already owns the method; it does not teach one.
A low-density client who wants daily wear is a poor match for a heavy 24-inch Volume Weft, even in a perfect color match. Move her to Thin Weft or step back to 20 or 22 inches. Wave adds a second variable: it eats inch count and adds bulk at the row, so a 24-inch wavy Volume Weft on fine hair behaves like a heavier install than the same length straight. Quote the method against the density test, not the photo.
The client's request does not settle the length. Added length increases force at the attachment: for a similar mass, longer fibers pull harder on the natural hair and the follicle. Clinical dermatology references identify extensions, weaves, braids, and other tension-producing styles as causes of traction alopecia, and prevention guidance is to reduce extension weight and avoid excessive tension, especially at the frontal hairline. The risk is cumulative. A set that feels fine on day one can still stress follicles across weeks of wear.
Proportion the install to density and diameter, not to the photo. Use fewer grams on fine or chemically weakened hair, spread attachment points, keep concentrated load off the temples and hairline, and check that the finished set does not leave scalp tenderness, headache, or visible follicle traction. Read density, chemical history, scalp sensitivity, and expected wear time in the extension consultation before you cut a 24-inch plan.
| Client factor | Signal to watch | Adjustment |
|---|---|---|
| Natural-hair density | Visible scalp at the part | Blend 20 to 22 inches and reduce grams |
| Fine or chemically weakened hair | Breakage at the ends or loss of elasticity | Fewer grams and attachments spread over a wider area |
| Frontal hairline | Tenderness at the temples | Keep rows back from the hairline or shorten the length |
| Existing traction signs | Visible traction or broken hairs | Decline 24 inches and refer to a dermatologist |
| Shedding or fragile fiber | Heavy shedding on gentle brushing | Reject the stock or reassess before installing |
| Wavy or curly texture | Visible length shorter than the labeled length | Set expectations using the length reference table |
Low density with scalp showing at the part will not hide a sparse 24-inch perimeter. A blended 20- to 22-inch install with less weight usually looks fuller and lasts longer in the chair's real week, not just in the after photo.
Fine or relaxed, lightened hair needs fewer grams and a wider spread of attachment points. Do not stack a heavy crown row “to make the top look thick.”
Temple tenderness means the rows stay back, or the length comes down. Existing traction or broken hairs means you decline 24 inches and send the client to a dermatologist before any install. Shedding stock gets rejected, not “worked in.”
Stop rule: Scalp tenderness, headache, or visible follicle traction means the set comes out and the plan is rebuilt. Comfort at the bowl is not a passing grade.
If she still insists, the line to use is simple. “Twenty-four inches measured straight will overload this density. A shorter, fuller install will look longer in photos and leave your hairline alone. I won't place the longer set.”
6A through 10A grades are supplier marketing. No governing body stands behind them, and the FTC guides for wigs and other hairpieces (16 CFR Part 252) do not create a national grade scale. Buy on measurable traits instead: cuticle alignment, shedding, combability, wash durability, and color accuracy at the shade you ordered.
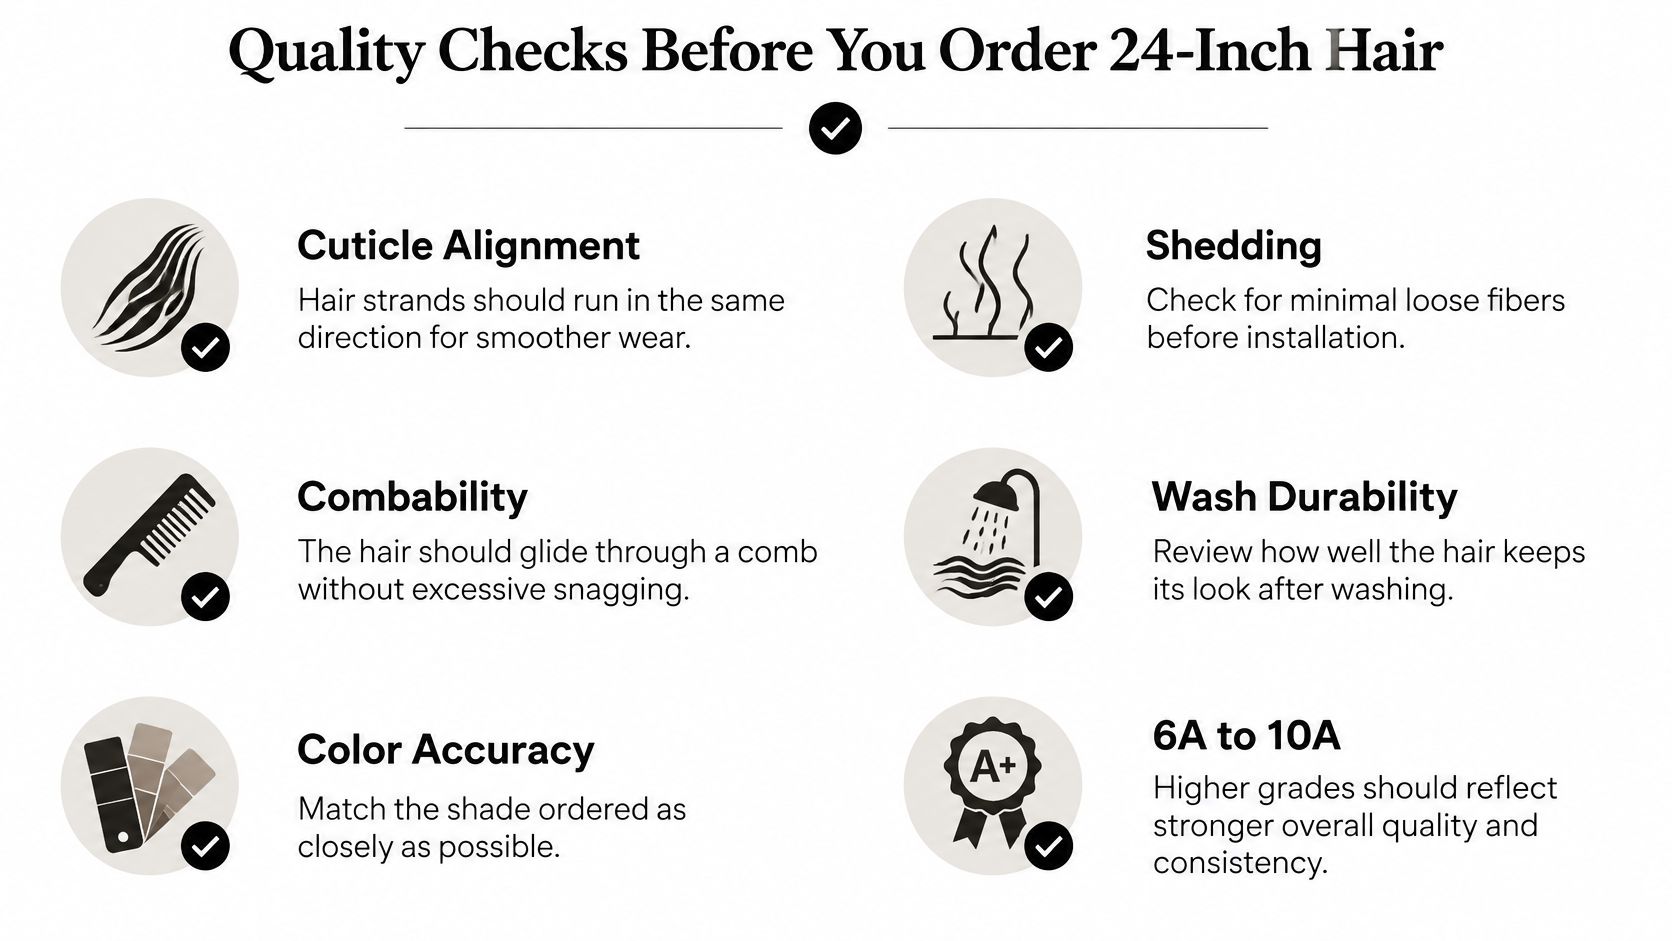
Terms such as cuticle-intact, Remy, double-drawn, hand-tied, or human hair belong on a product only when the supplier can substantiate that claim for that named product. Unsupported performance language is a labeling problem. What those construction words should mean in practice is set out in this note on Remy human hair.
Cuticle alignment. Take a small handful. Strands should run the same direction. Snagging that reverses halfway down the length will tangle once the hair is 24 inches and wet, and no amount of serum fixes a mixed-direction bundle.
Shedding. Gentle handling should not dump loose fibers on the table. Heavy shed before install only gets worse after brushing.
Combability. The hair should pass a wide-tooth comb without a hard stop. A snag on dry virgin-looking fiber previews the client's morning routine for as long as the set stays in.
Color accuracy. Match the ordered shade in daylight against the shade chart, root to tip. A single-tone solid that shifts halfway will not blend at the part. The Solid range runs Level 1 to Level 12, so pull the swatch and the chart side by side rather than trusting a screen.
Length and texture. Confirm the stated length with the hair held straight, then confirm Straight versus Wavy against the consult card. Wavy fiber reads visibly shorter than its label, so a client who wants 24 inches of visible length in a wavy texture is choosing from the 26- and 28-inch end of the range, not the middle.
The checks do not change with the method. Volume Weft, Thin Weft, Tape Weft, Tape-In, K-Tip, Bulk and Clip-In all hang the same fiber off the same head, and a bundle that fails alignment will fail it in every one of them. Stylists who want the checks tied to method choice can work through The Hair Extensions Workshop.
Ask the supplier four things before the order is final: how each construction claim was verified, what the shedding test showed, whether color stays consistent across the batch, and whether length is measured straight.
Stock that fails a shedding or alignment check does not go on a client. Send it back or cut it from the plan. A bad bundle at 24 inches is visible from across the salon, and it stays visible every day the client wears it.
Set the room before you touch the hair. The European Agency for Safety and Health at Work hairdressing guidance calls for workbenches at appropriate heights, height-adjustable chairs, and enough space to move and change position. It also pushes adjustable stools, comfortable hand tools, and less repetitive reaching. Those controls apply across Volume Weft, Thin Weft, Tape Weft, K-Tip, Tape-In, Clip-In, and Bulk work, especially on dense installs and move-up days. Attachment mechanics for each method are covered in how you attach hair extensions.
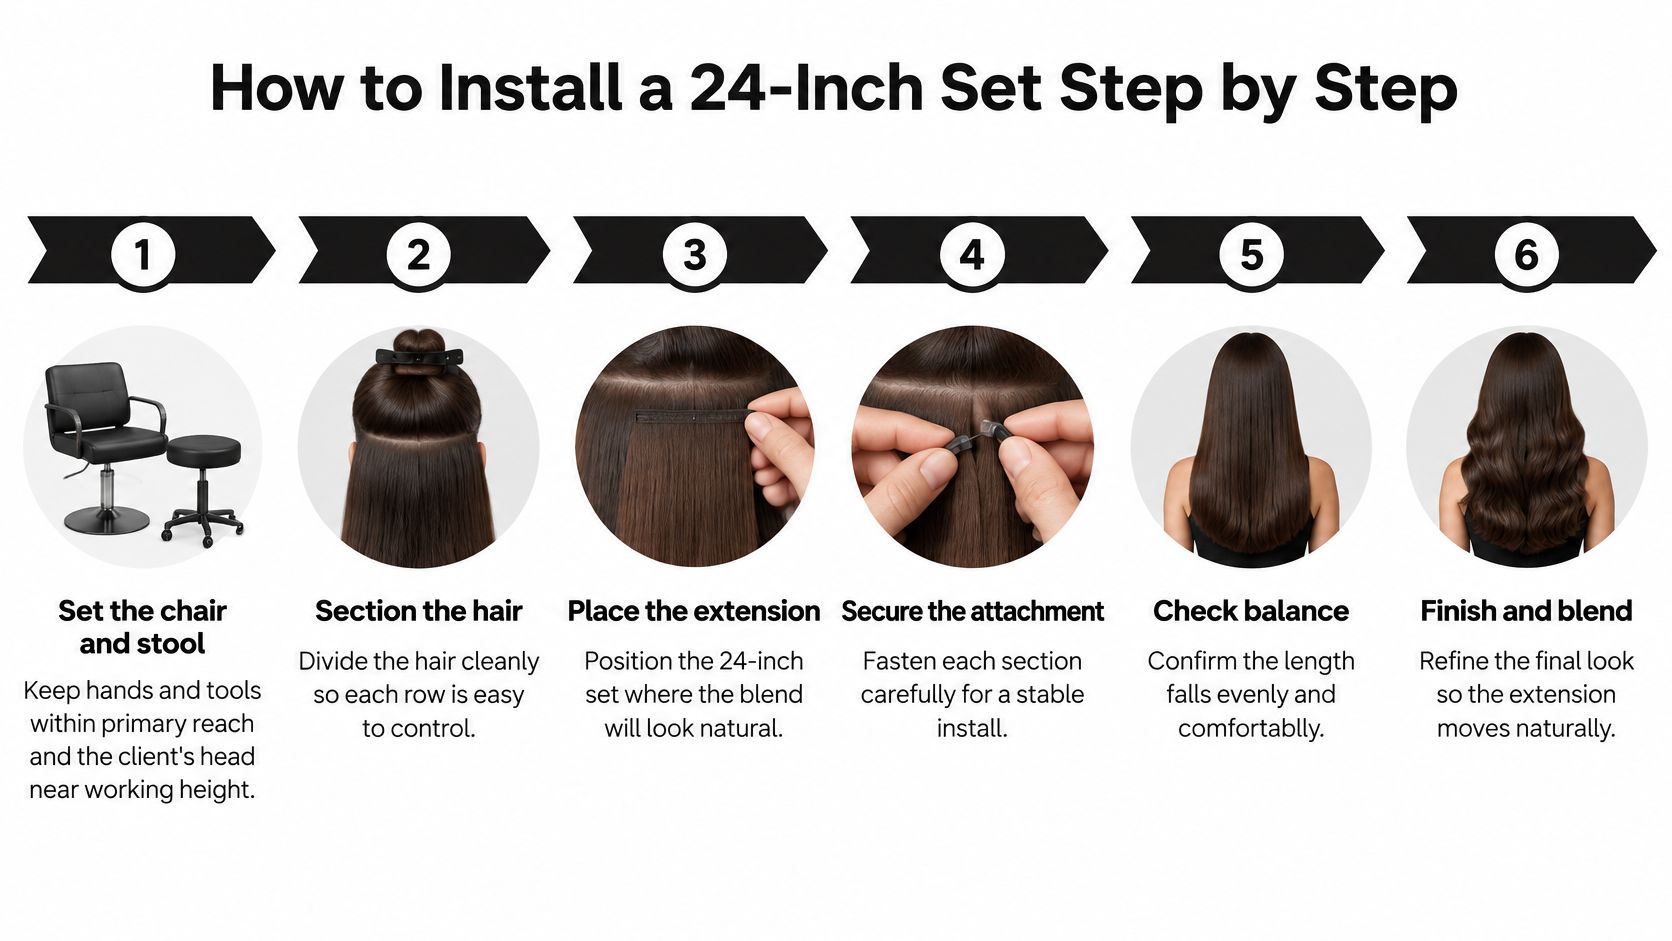
The most common miss is a row placed too low at the nape. Long fiber hanging from a low anchor drags the whole set, mats at the neck, and makes the crown look sparse by comparison. Keep nape rows shorter in reach or lighter in load.
A balanced 24-inch install, when she turns, moves as one length. No ridge at the tapes or bonds, no tenting at the beads, and no thin curtain at the ends that exposes the natural cut.
Longer fibers offer more surface to brushing, heat, color, and detangling. Handling rules have to scale with that length, or the ends fail before the move-up.
Independent fiber testing found tensile-strength values of about 3.2 for virgin hair, 2.8 after bleaching, and 2.7 after bleaching plus dyeing, reported reductions of 12.5% and 16.6%, though those differences were not statistically significant in that experiment, according to work published via SciELO. Separate bleaching research in the same discussion dropped tensile strength from 14.66 g/cm² in virgin hair to 12.95, 12.61, and 11.43 g/cm² after the first, second, and third bleach, with cuticle lifting and fracture under the microscope. Lightened or heavily toned 24-inch lengths need stricter handling than a virgin solid.
Detangle from the ends upward with the attachment held so you are not yanking the row. Start at the tips, work up, and stop if the comb grabs.
Skip aggressive brushing on wet hair. Wet fiber stretches. A long wet set plus a paddle brush is how mid-lengths shatter.
Thermal protection, then controlled heat. One pass with intent beats three passes “to smooth it.” Flat-iron temperature stays in a range the fiber can survive, not the range that erases a wave in one swipe.
No corrective bleach on hair that has already been lifted. Another round is how you trade a color fix for a length you have to cut off.
Sleep and daily styling should cut friction. A loose braid or low silk-covered tie, and a smooth pillowcase, limits the tangling that starts at the nape on long sets. High ponies and claw clips parked on the rows recreate the tension you avoided at install. Between salon visits, a simple conditioning rhythm like the one described for scalp and hair care at Inner You keeps the length manageable without turning home care into a second chemical service. Day-to-day product order for installed hair is spelled out in how to take care of extensions.
Set the reinstall around fiber condition and how she wears the hair, not around a fixed calendar promise. Log shedding, split ends, and breakage at every service. A 24-inch set that is detangled, protected, and moved up on time can look stronger than a heavier set left to mat.
At each visit, check cuticle feel, shed in the brush, splits at the perimeter, uneven porosity, and any new tenderness at the rows. If two of those are worse than last time, shorten the wear cycle or the length. Do not add more hair to hide it.
Make 24 inches a decision you can defend in writing: measured length, agreed worn length, method matched to density and maintenance tolerance. If any suitability signal from the earlier checks is present, the order should reflect a shorter length or a modified set, and the consult card should say which one and why.
Conde Professional supplies professional hair extensions to stylists and backs the range with education built by working stylists. The collection covers Volume Weft, Thin Weft, Tape Weft, Tape-In, K-Tip, Bulk, and Clip-In, in straight and wavy textures across 18, 20, 22, 24, 26, and 28 inches. A professional account gives you ordering access for the methods you install, and the team can confirm what is available in your length and texture before you quote the service.
Keep professional installs off the consumer checkout. A retail transaction does not confirm the method, shade, or length the service depends on, and it leaves you sorting a short or off-tone batch on your own. When stock lands, run the shedding and alignment rejection rule before the hair touches a client. Rejected hair goes back before rows are built.
Write the agreed worn length on the consult card while the client is still in the chair. That card is what protects you when she later asks for waist-length and the fiber will only carry 22.
Start at Conde Professional to open the account and confirm current length and texture availability ahead of the consult.


