Your cart is empty
Tax included and shipping calculated at checkout

Drawer menu
Tax included and shipping calculated at checkout
A professional account gives you stylist pricing, priority support, early access to new releases, and education developed by working stylists.


The usual advice to press tape harder misses the control points: clean adhesive contact, balanced sectioning, and attachments that move without pulling. A professional tape-in install should start with the client's supporting hair and maintenance capacity, not the strongest possible bond.
For stylists searching for tape in hair extensions how to guidance, the useful distinction is retention versus tolerable load. A panel can stay attached and still be the wrong choice for that section.
Screen the scalp, perimeter density, hair history, and root comfort before taking the first section. Decline or modify placement wherever visible thinning, irritation, or breakage makes the proposed attachment unsuitable.
The consultation should establish what the hair can support today, rather than what it supported at a previous appointment. A requested length or full-head panel count shouldn't override the condition of the attachment areas.
Screening findings and the action
| Finding | Action |
|---|---|
| Visible thinning at temples, hairline or partings | Modify or decline; no dense placement over that area |
| Inflammation, redness or itching at the scalp | Decline or modify until the scalp is cleared |
| Broken hairs or prior traction signs | Decline the affected area and document the breakage |
| Pain, persistent tenderness or tight feel at the root | Loosen or remove; treat as a warning sign, not normal wear |
| Clean, healthy perimeter with no reported pain | Proceed with lightweight sectioning and balanced weight distribution |
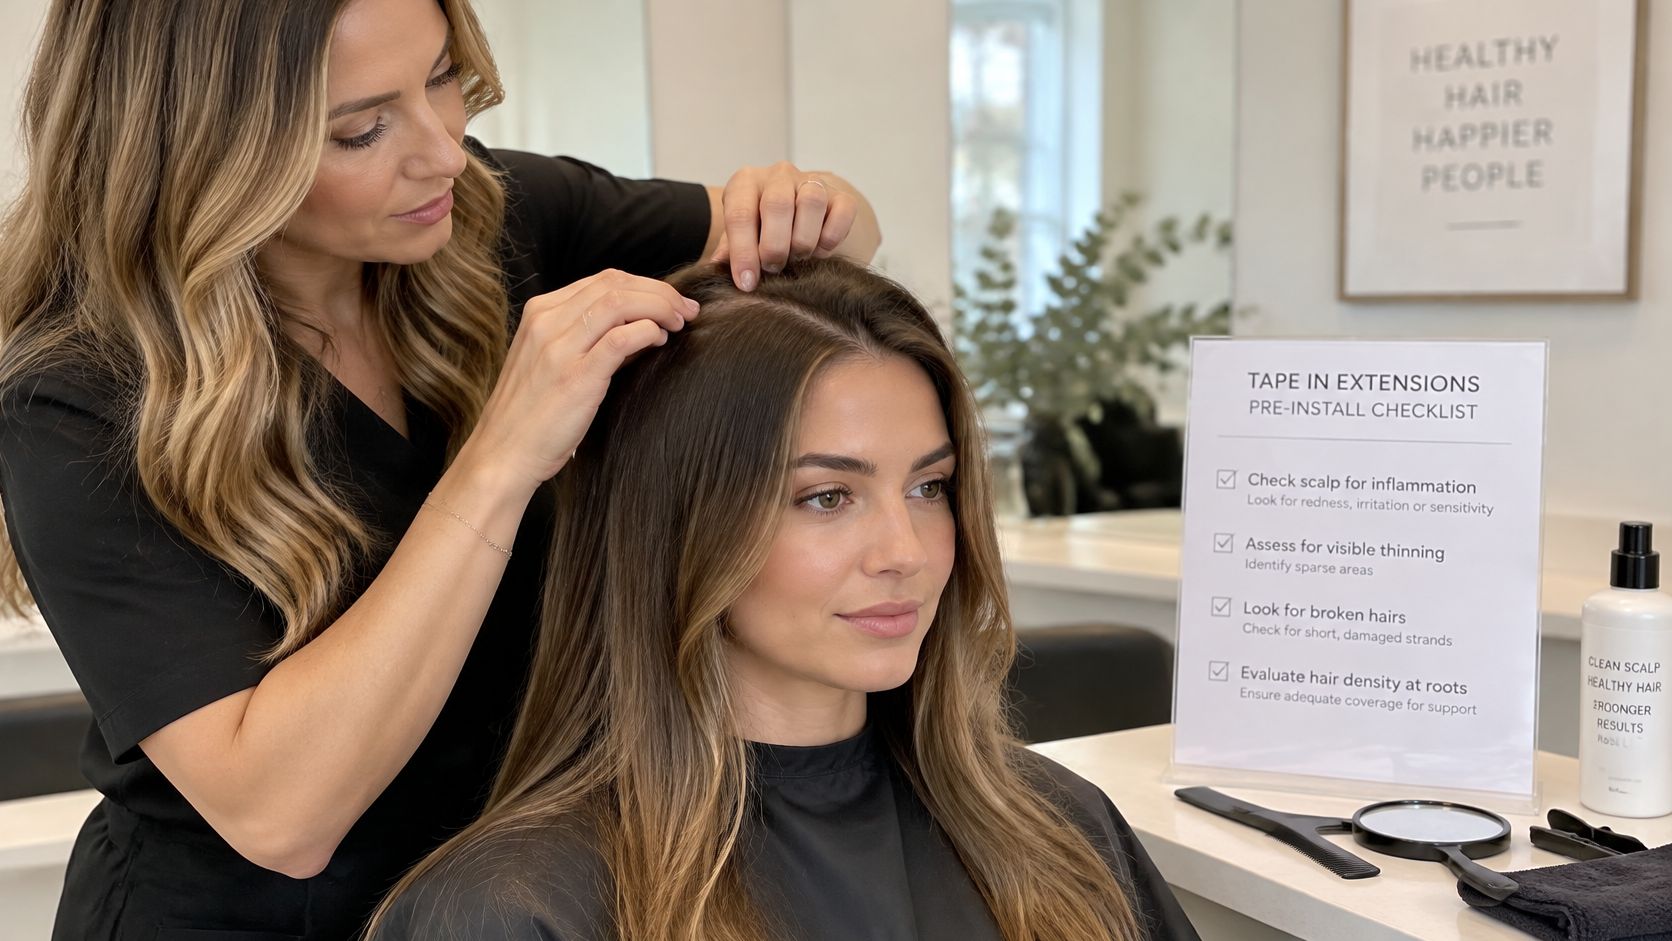
A 2009 British Journal of Dermatology case report described four women with extension-related traction alopecia who noticed acute hair loss between 7 and 20 days after application, with extensions detaching attached to tufts of natural hair. That finding concerns extension users, not a universal failure rate for tape-ins.
A dermatology review of traction alopecia describes how persistent tension can progress from nonscarring loss to scarring or permanent alopecia. For salon practice, the actionable response is conservative placement and prompt inspection of pain, persistent tenderness, redness, itching, increasing sensitivity, or localized thinning.
Comfort is a screening signal, not proof of safety. An attachment that feels comfortable at installation still requires monitoring during wear.
The literature doesn't establish a reliable universal tape-in success percentage. Track retention, slippage, discomfort, and breakage by client instead of promising a generic rate.
A consistent hair extensions consultation should record the reason for any exclusion zone or refusal. Unexplained scalp changes belong with an appropriate healthcare professional, not a stylist's diagnosis.
Choose the attachment strategy that keeps the planned load manageable for the client's actual hair. Maximum hold during the appointment isn't the same as a suitable method over the full wear period.
Tape-In can suit fine-to-medium hair when the client wants a flat attachment, efficient installation, and straightforward maintenance appointments. Tape Weft may suit continuous coverage along a section, but the panel specification and supporting density still need checking.
Method choice by client situation
| Client situation | Method to consider | Trade-off |
|---|---|---|
| Fine to medium hair needing quick installs and easy maintenance | Tape-In | Flat, lightweight bond; commit to the planned reassessment |
| Client wanting continuous coverage along a section | Tape Weft | Confirm panel specification and remover requirements before choosing |
| Dense volume or heavy length | Volume Weft or K-Tip | Confirm attachment weight and supporting density; tape may not suit the planned load |
| Traction history, thinning perimeter or fragile hair | Pause, or choose a lower-tension method | Adhesive choice does not reduce tension risk |
Volume Weft and K-Tip aren't automatic solutions for an overloaded tape plan. A beaded row concentrates support differently from individual fusion bonds, while hand-tied work and microlinks introduce their own placement and maintenance decisions.
For a client requesting substantial length on a sparse perimeter, reducing the requested result may be more appropriate than changing methods. The same client may need less added hair, a different distribution, or no semi-permanent install.
The extension method comparison can support that discussion, but the final choice belongs to the consultation and section-by-section assessment.
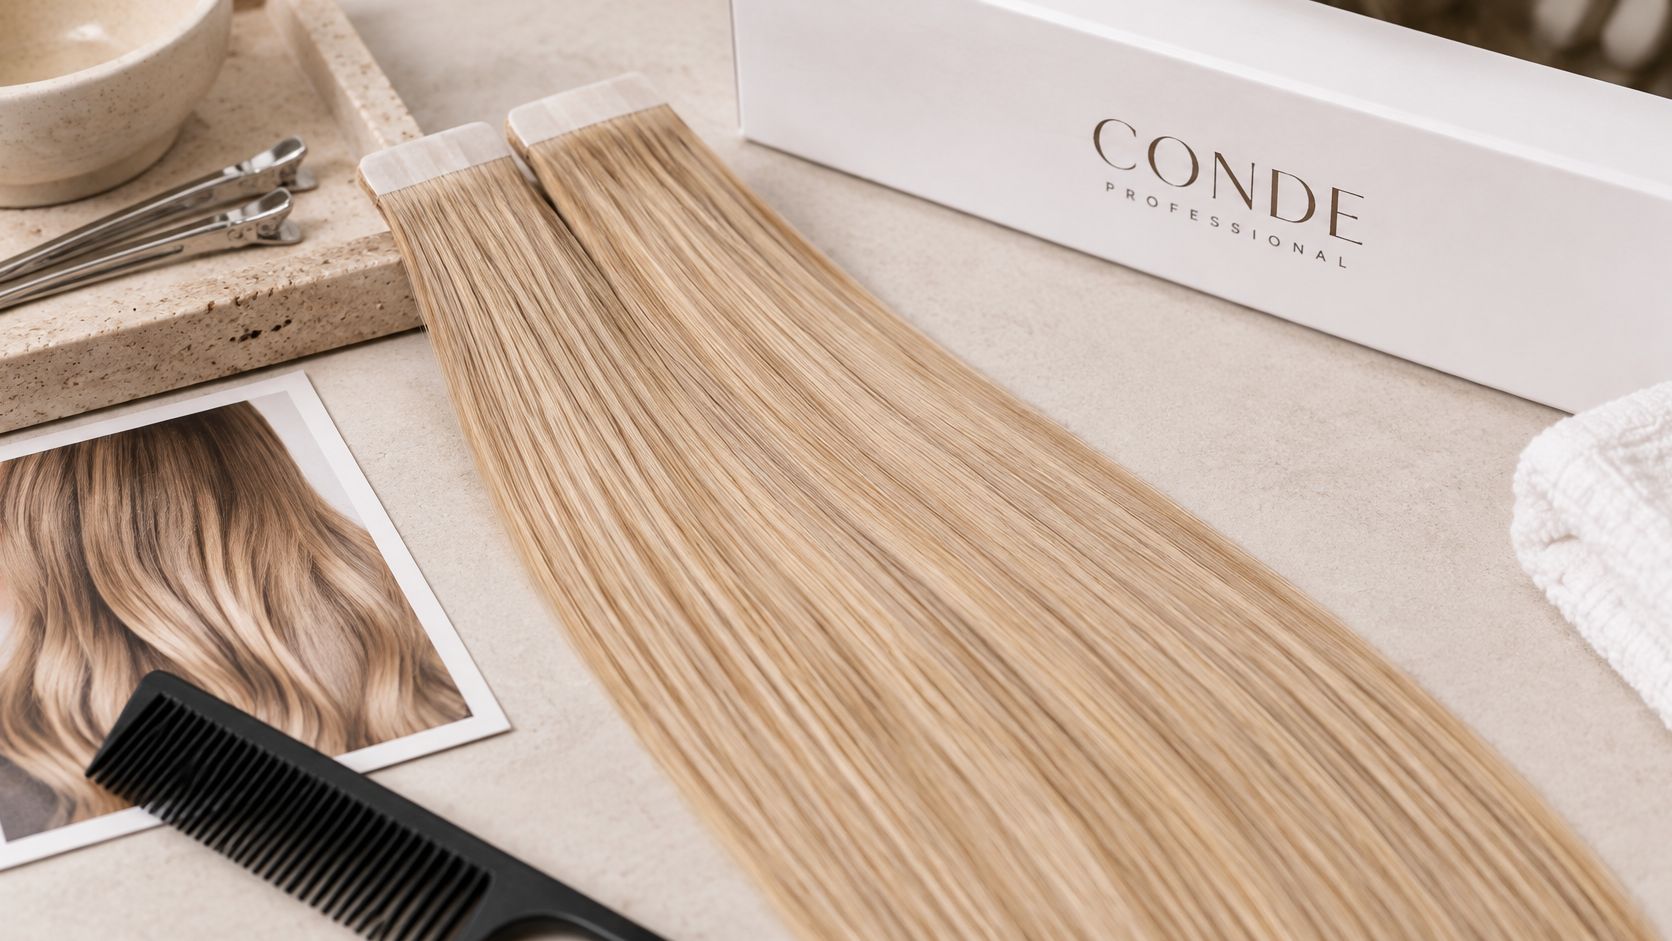
Conde Professional's Tape-In Sandy Shore #6/11 Superblend is a multi-tone option for professional adhesive-backed panel application. A suitable color blend doesn't establish whether the planned attachment is suitable for the client.
The trolley needs a fine tail comb, sectioning clips, replacement tape intended for the system, its compatible remover, and any specified sealing tool. The remover should be available before installation begins, not ordered after a difficult release.
Supplier discussions should cover cuticle integrity, alignment, shedding, combability, and wash durability. Remy, cuticle-intact, and double-drawn descriptions address different purchasing considerations; none replaces checking the hair and attachment specification.
Read the application and removal labels before ordering. Compatibility between the tape, extension base, remover, and sealing procedure matters more than a familiar salon habit.
A panel that feels comfortable in the chair tells you almost nothing about whether the install is safe. Comfort only means the load hasn't reached the client's awareness yet; the tension still sits on the same follicles from day one. Placement, clearance, and section weight decide the outcome, so treat every step below as a tension decision rather than a mechanical one.
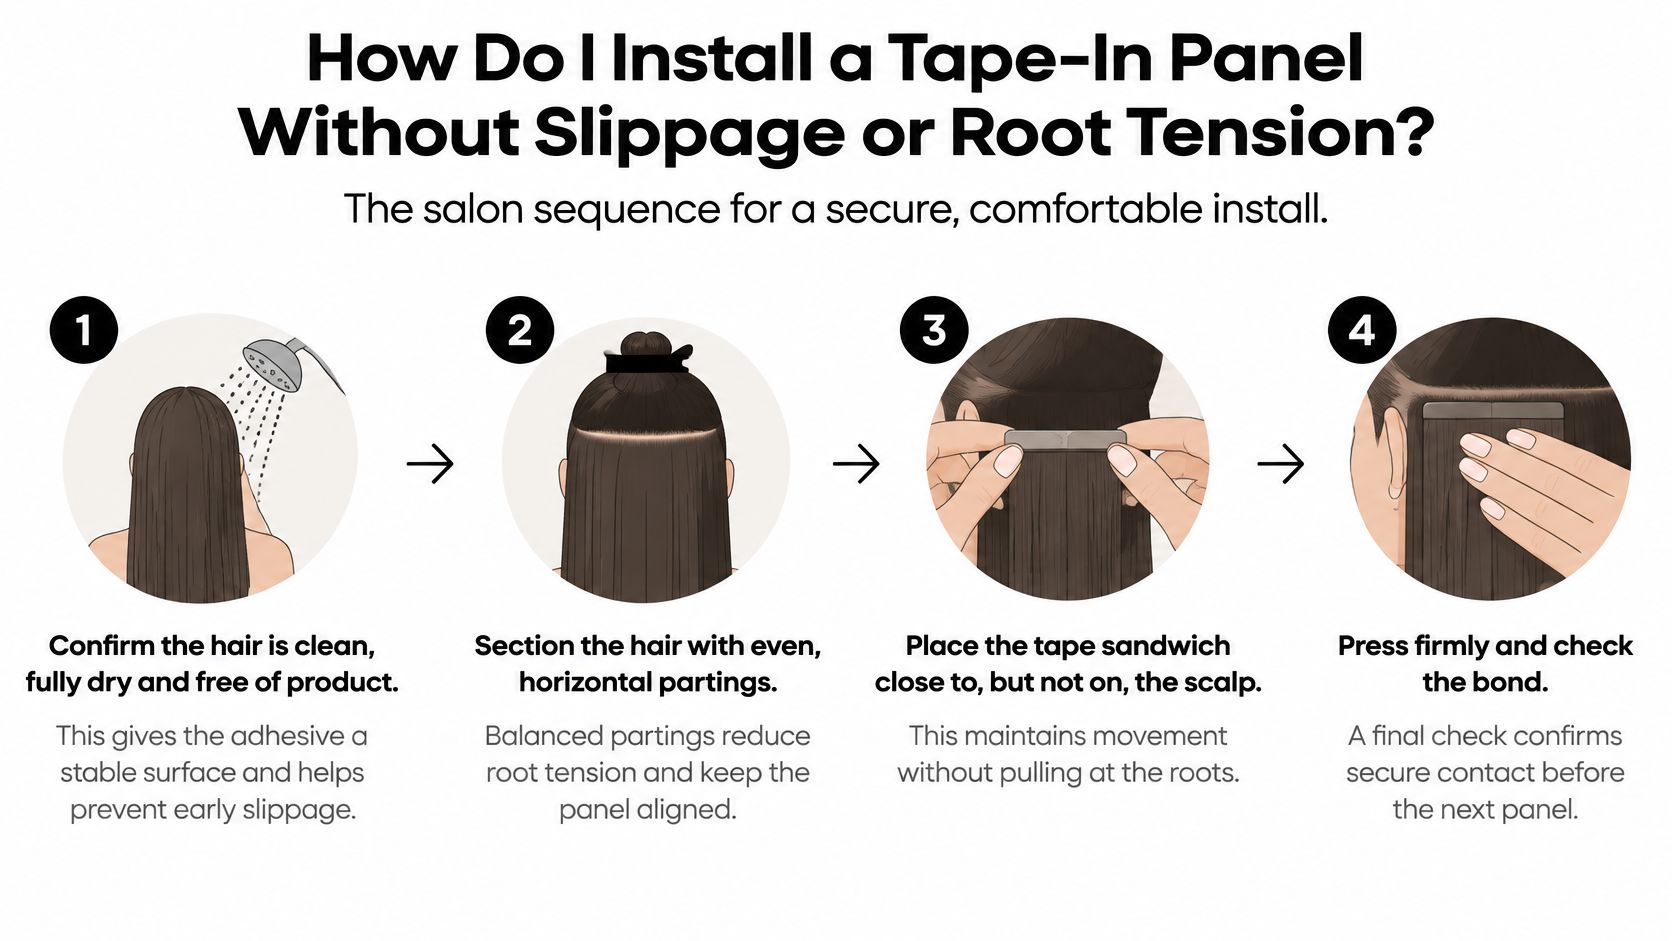
Too much supporting hair blocks useful adhesive-to-adhesive contact. Too little leaves a weak section carrying the full panel, so making sections progressively finer to chase retention is poor troubleshooting.
Uneven distribution is harder to spot. If most of the supporting hair sits at one end of the sandwich, an aligned outer edge can hide an attachment that loads one side of the root zone for the entire wear period.
Contaminated adhesive, excess or insufficient hair between panels, misalignment, and placement too close to the scalp are install faults worth ruling out before blaming the tape. Pressure cannot fix a section taken in the wrong direction.
A bond should be secure at the adhesive interface and mobile at the root. Those are separate checks.
Lift each attachment gently in the direction the client will wear the hair, then in the direction they wear it up. The panel should move without tenting the scalp, catching neighboring strands, or producing a pinch.
Ask the client to turn their head and shift position before final styling. When they report no pulling, treat that as one signal among several and confirm visually: look for lifted follicles, blanched skin at the section base, or a slight ridge where the root meets the tape. Movement that reveals dragging means remove and reposition the panel; trimming away trapped natural hair relocates the problem rather than solving it.
The tape-in damage and placement guide centers the consultation on these application decisions rather than assurances tied to the method name. Cumulative tension, attachment location, and how long the panel stays in decide the outcome, and the section beneath the sandwich is where all three begin.
A panel that feels loosely seated tempts a stylist toward the flat iron already heating on the station. Whether heat belongs anywhere near a tape bond depends on the adhesive system in use, and the only reliable answer sits in that product's own instructions.
Some pressure-sensitive adhesive systems prohibit direct heat because it can compromise adhesive strength. Others specify pressure alone and never mention a hot tool. Either instruction applies to that system, and assuming one tape behaves like the last tape used is how bonds get softened at install.
For the selected Tape-In or Tape Weft system, establish whether direct heat is prohibited, unnecessary, or specifically permitted before a hot tool comes out. When the system specifies pressure alone, sealing comes from correct pressure, clean tape, and accurate alignment.
Styling the extension lengths is a separate operation. Keep the hot tool away from the adhesive interface and avoid clamping through a concealed panel while polishing the root area.
Part through the finished hair at the root and inspect each attachment from different angles. Check the client's habitual parting and ordinary tied-back position, not just the position used for photographs.
A client reporting no pulling at the finish is reporting comfort, which is a signal worth hearing rather than proof the attachment is safe. Position and section weight decide that over the full wear period, so a polished finish never justifies leaving a tight bond in place.
Finishing standard: Flat attachments, concealed edges, and natural movement must be present together.
If tape becomes visible during movement, reassess placement and coverage. Adding more hair over a misplaced panel builds bulk without resolving the underlying problem.
Plan reassessment around 6 to 8 weeks, with move-up or removal determined by inspection. The Johns Hopkins summary of dermatology guidance recommends a break after approximately 6 to 8 weeks of weave or extension wear and reports guidance limiting these styles to two or three months at most, followed by a non-extension hairstyle.
That's a maintenance planning framework, not permission to leave every tape install untouched until a deadline. Natural hair continues growing beneath the attachment, and a client with early tangling or discomfort needs an earlier appointment.
Visit sequence and wear limits
| Visit or point | What to check | Action |
|---|---|---|
| Scheduled reassessment | Slippage, matting, attachment flatness and grow-out | Move up the panel or remove it |
| Between visits | Brushing, oils near the tape and tight styles | Reinforce home-care instructions |
| Beyond the booked reassessment window | Growth beneath attachments and rising tension | Remove; do not extend wear without inspection |
At a move-up, inspect before applying fresh adhesive. A panel that has rotated, collected neighboring hairs, or developed root matting needs controlled removal and a new placement decision.
The salon should separate three questions: whether the natural hair remains suitable, whether the extension hair is reusable, and whether the attachment surface can be properly prepared. Passing one doesn't mean the others pass.
Have the client demonstrate the brushing support position before leaving. A verbal instruction to brush gently is less useful than showing where the supporting hand belongs.
The salon's tape-in longevity guidance should distinguish appointment timing from extension-hair reuse. Retention alone doesn't establish that continued wear is appropriate.
Book maintenance while the client is still in the chair. A calendar reminder can support attendance, but it can't replace clear instructions about contacting the salon before the scheduled visit if something changes.
A client who felt no pulling all cycle can still hand you a section full of shed hairs at removal. Comfort signals current load, not cumulative damage, and the attachment is where weeks of tension finally show. Work each panel through these steps.
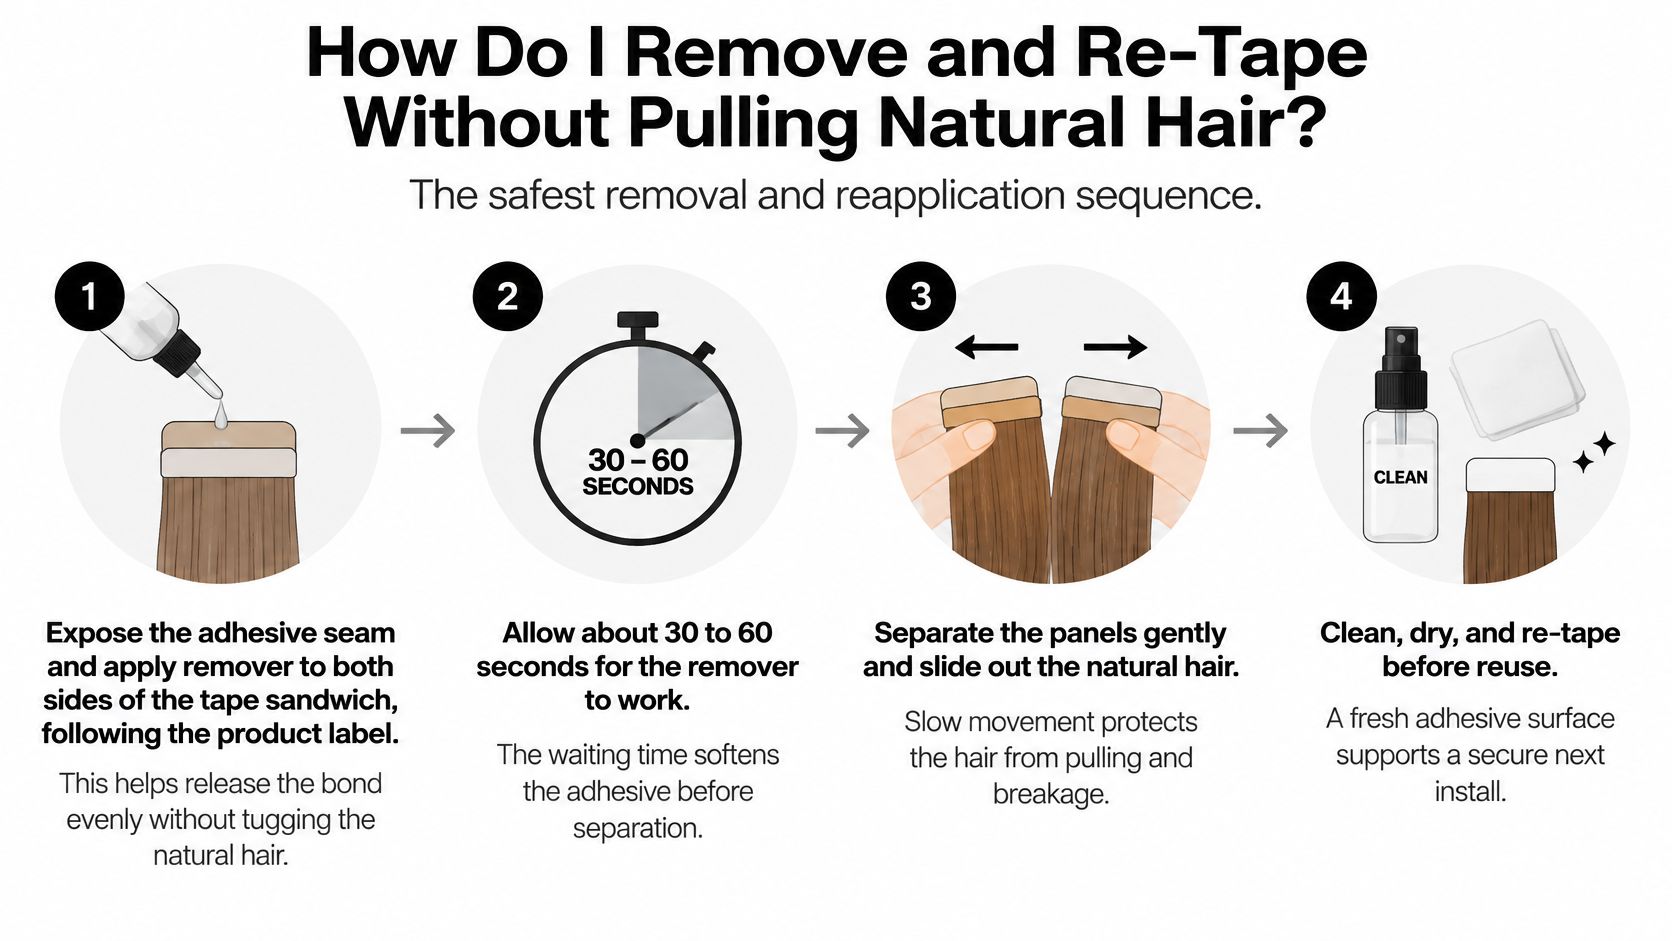
The tape manufacturer's instructions call for a clean, fully dry weft before new adhesive goes on, and for handling tabs without touching the exposed adhesive face. Fresh tape on a contaminated base holds like old tape.
Symptom, cause and fix at removal or re-tape
| Symptom | Likely cause | Fix |
|---|---|---|
| Bond still grips after dwell time | Remover hasn't reached the full seam | Re-apply at the seam where the label allows and test again |
| Panels part but leave a tacky film | Adhesive softened, not fully broken down | Second remover pass on the weft; dry fully before re-taping |
| Softened glue smeared into nearby hair | Sliding or combing through residue | Isolate the section and clear residue before it spreads |
| Weft stretched or torn at the base | Panels pulled apart instead of slid | Retire that weft rather than re-tape a distorted base |
| Broken hairs at the attachment | Removal force transferred into natural hair | Stop, support the section, and resume the parallel slide |
| Shed hairs and root irritation in one spot | Tension accumulated across the wear period | Record the site and exclude it from the next install |
These are troubleshooting possibilities, not diagnoses established by appearance alone. Ask about home products, heat use, brushing, and when the failure started before selecting the correction.
Heavy matting, residue that won't clear, or broken extension strands take reuse off the table. Re-taping follows inspection, cleaning, and complete drying; it isn't an automatic effort to preserve every panel.
A consistent tape-in extension removal procedure should give every stylist the same stopping point: stop and reassess rather than add adhesive over a compromised bond.
A client rebooks because the last set “felt fine,” then mentions tenderness at the nape by week five and two panels placed too close to the hairline. Treat early comfort as a weak safety signal. The booking decision should weigh cumulative tension, attachment location, and wear duration before the calendar gets a say.
If the screen fails, decline or modify the install and explain the decision plainly. A booking target should not turn an unsuitable section into an acceptable attachment site.
Record baseline density, hair condition, scalp comfort, previous extension issues, and the proposed placement exclusions. Keep photographs consistent enough to compare the same areas at later appointments.
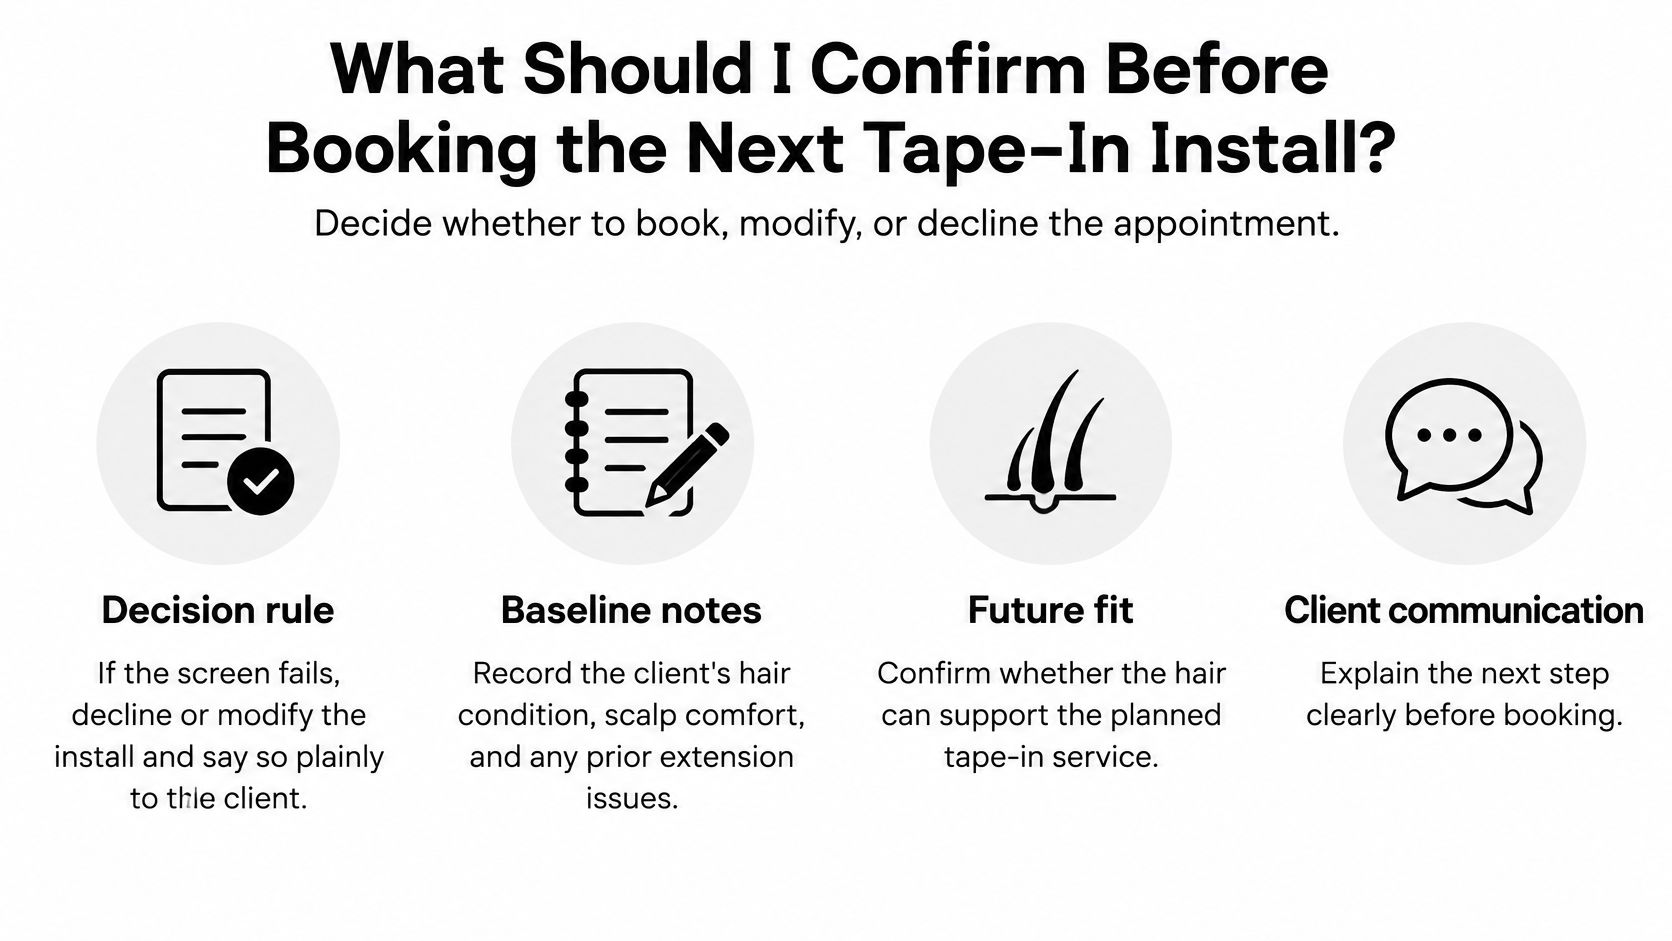
Before committing to the appointment, ask Conde Professional which tape and remover the selected product requires, whether direct heat is prohibited, unnecessary, or specifically permitted, which lengths and textures are available for the selected method and shade, and whether a patch test is recommended with a defined observation procedure.
Conde Professional's method range includes Volume Weft, Thin Weft, Tape Weft, Tape-In, K-Tip, Bulk, and Clip-In. The useful question is narrower than the menu: Conde hair extensions run 18 to 28 inches in straight and wavy textures across Solid, Balayage, Bronde, Highlights, Superblend, Rooted, and Fantasy, so confirm the exact method, shade, length, and texture for this client rather than assuming every option maps to every head.
The service record should identify the chosen method, planned exclusions, removal requirements, and next maintenance appointment. It should also record what would trigger an earlier inspection, such as root pain, slippage, residue, matting, or broken hairs at the attachment.
Conde Professional sells professional hair extensions and offers education for stylists. Its professional courses cover extension techniques and business practices, including improving installs, setting prices, and building a business.
Commercial terms belong with the account team rather than assumptions carried over from another supplier. The practical next step is establishing professional account access before ordering for the next booking.
Conde Professional offers professional hair extensions and stylist education covering installation techniques and the business of premium extension services. Visit Conde Professional to open a professional account before the next tape-in booking and confirm the selected system's tape, remover, and application requirements.


