Your cart is empty
Tax included and shipping calculated at checkout

Drawer menu
Tax included and shipping calculated at checkout
A professional account gives you stylist pricing, priority support, early access to new releases, and education developed by working stylists.


The advice that I-tip hair extensions are automatically gentler because they use no heat or adhesive misses the deciding factor: a cold bead is not a low-load install. Book the method only when the natural-hair sections can support the strands, the attachments allow comfortable movement, and the client can commit to return visits.
An I-tip extension is a pre-tipped strand secured to a small section of natural hair with a microbead or ring, without heat or adhesive during installation. It belongs to the micro-link family, a recognized attachment category in The Business Research Company's hair extensions market classification.
The practical advantage is placement control. Individual strands let the stylist build partial density, work around changes in growth direction, and avoid laying a continuous track across an unsuitable zone. Removal uses the appropriate bead-opening pliers rather than melting a fusion bond or dissolving tape adhesive.
The trade-off is concentrated attachment load. Every bead relies on the natural hair inside it, so attractive placement doesn't compensate for an undersized section or poorly matched connector. The install also requires patient strand-by-strand work and scheduled maintenance.
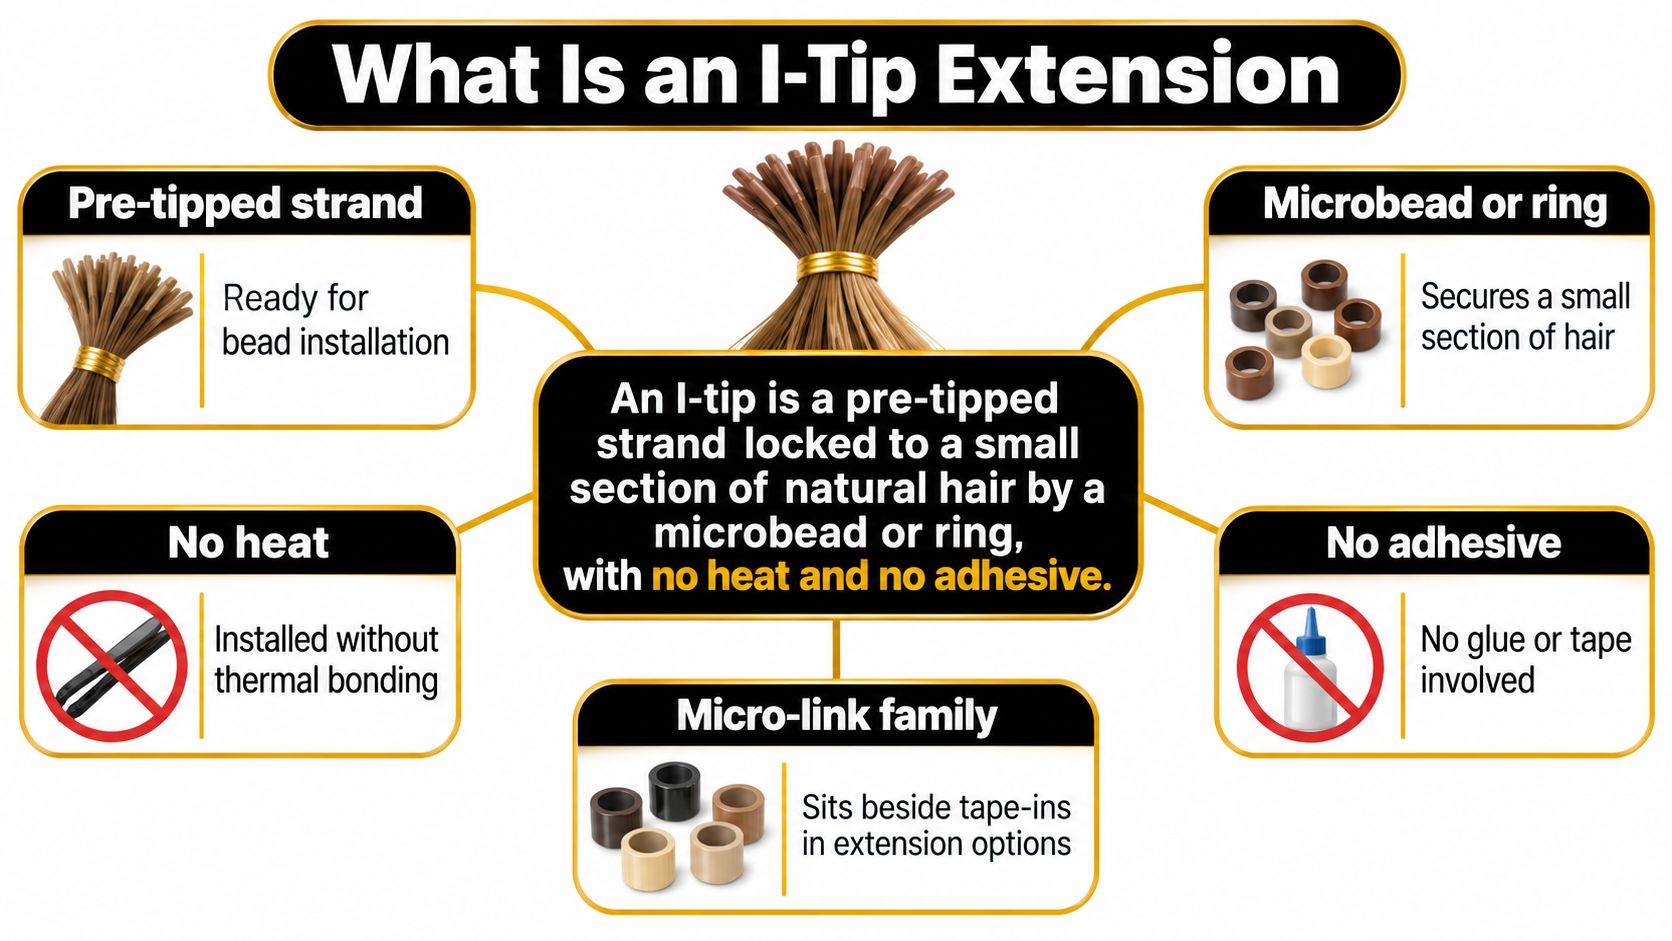
The working components are a slim pre-formed tip, a compatible metal or silicone-lined bead, and extension pliers matched to that connector. For cuticle-intact human hair, the finished tip must enter the bead cleanly without forcing, folding, or splitting.
A sound strand may be suitable for another installation after inspection. A crushed tip shouldn't return to service because the lengths still look good, and a damaged bead should be replaced rather than repeatedly squeezed into shape.
A flat K-tip requires a fusion iron to form its bond. Tape panels and wefts distribute an installation across a wider base, although that doesn't make every panel or row appropriate for every density.
I-tips offer finer placement control, but that control costs chair time and technical attention. A tape row may be the more efficient booking when the design calls for broad coverage rather than isolated strands.
Practical rule: Choose microlinks for the placement problem they solve, not merely for the tools they leave out.
The consultation therefore needs to settle fit, attachment compatibility, shade placement, and maintenance before the stylist commits to the install.
Choosing I-tips because the install skips heat and glue is the wrong starting point. A cold bead still concentrates strand weight on one small section of natural hair. Fit is decided by section strength, bead pressure, and return visits, and those factors separate a bookable candidate from a risky one.
Which Conde method fits this install
| Method | Attachment | Heat or adhesive | Best client | Wrong when |
|---|---|---|---|---|
| I-tip / micro-link | Pre-tipped strand in a bead | Neither during installation | Partial density, cold install, custom placement | Hair cannot fill and support the bead, or the client won't attend move-ups |
| K-Tip | Flat keratin fusion bond | Heat; no separate liquid adhesive | Client wants a flat bond and accepts fusion | Hair isn't suitable for thermal bonding, or the stylist avoids fusion tools |
| Tape-In | Sandwich panels or tape row | Adhesive, no installation heat | Faster application and a clean, flat line | Client can't follow drying and attachment-zone product restrictions |
| Volume Weft, Thin Weft, or Tape Weft | Beaded row, sewn attachment, or adhesive-backed weft | No bonding heat for bead-and-sew work; adhesive for tape application | Fuller coverage across a suitable support zone | A track would show or density is too patchy |
| Bulk | Loose Remy hair finished by the stylist | Set by the chosen bead, fusion, or other build | Custom tips and hand-built methods | The booking requires ready-tipped strands |
| Clip-In | Temporary clips | Neither | Event or trial wear | The client needs an ongoing salon-installed method |
Conde Professional's method range covers Volume Weft, Thin Weft, Tape Weft, Tape-In, K-Tip, Bulk, and Clip-In. The table compares attachment mechanics; the same premium hair can sit behind several of these choices.
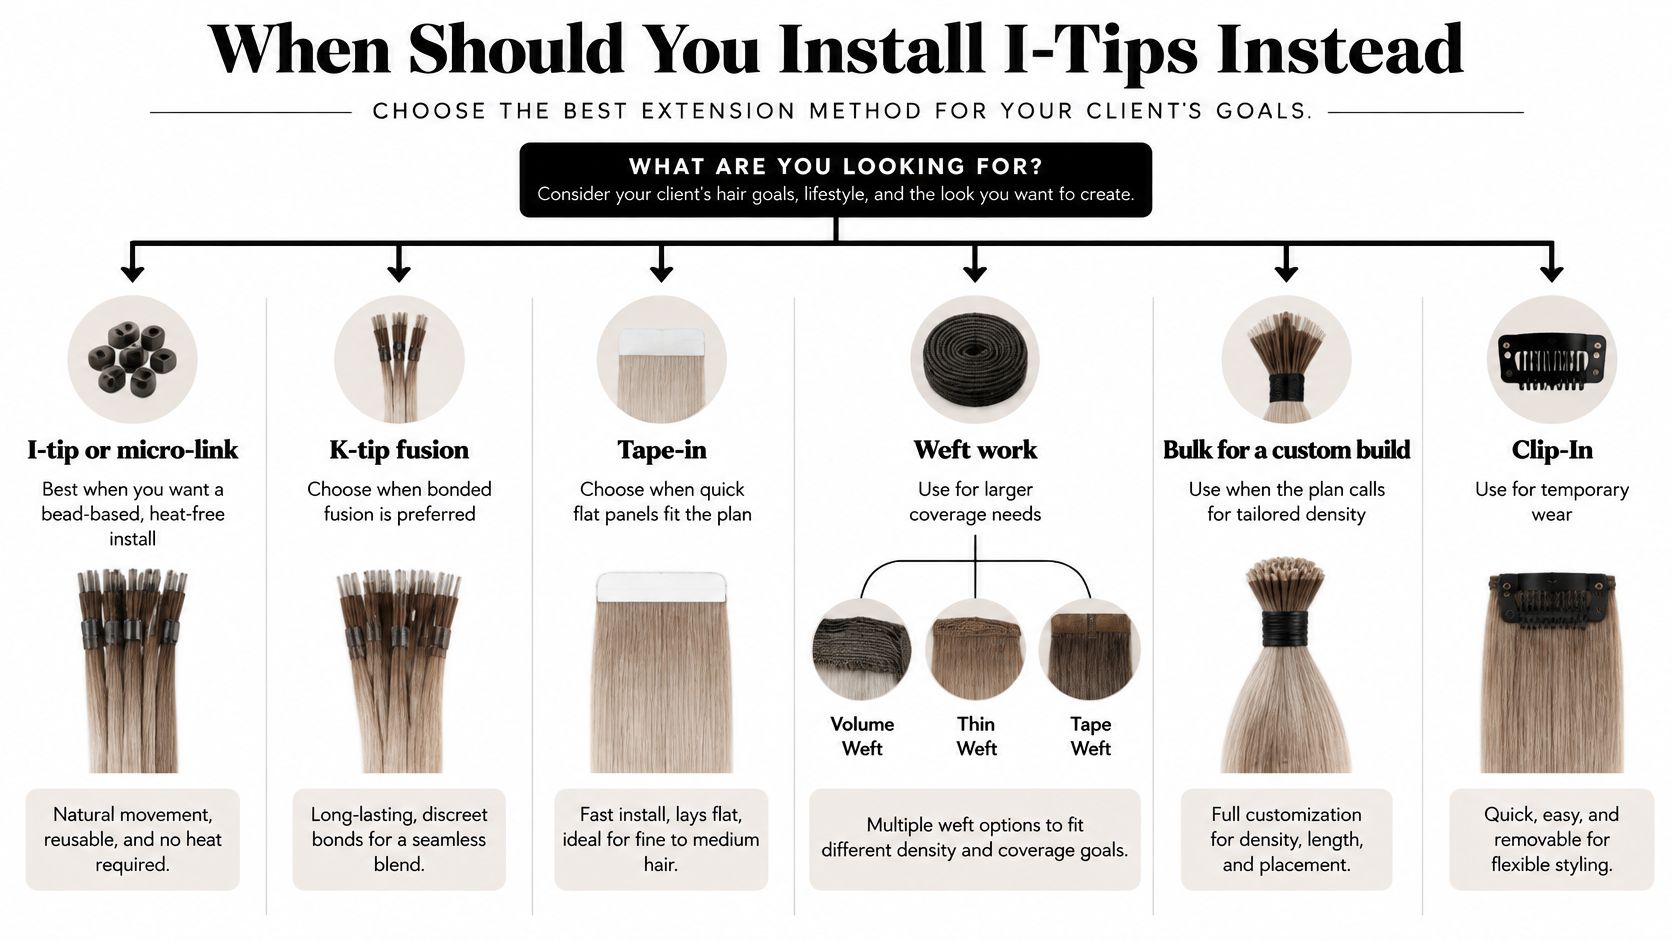
I-tips make sense when a continuous weft track would interfere with the design while individual attachment zones remain suitable. An awkward growth pattern calls for selective strands rather than a row forced across changing directions.
Fine hair works only when the support zone holds enough density. Fine texture over adequate supporting density is a different proposition from sparse hair that cannot conceal or carry a connector, and switching to tape or a Thin Weft does not manufacture density where the zone lacks it.
Choose Tape-In for a suitable client who wants a flat line and a shorter appointment. Tape-In Brunette #6/7/10 Balayage illustrates the format: an adhesive-backed, multi-tonal panel rather than a bead-ready strand.
K-Tip suits a client who accepts thermal bonding and prefers the resulting bond profile. The I-tips versus K-tips method comparison helps separate that attachment decision from shade or length preferences.
Before reserving a strand-by-strand appointment, the stylist should confirm:
Book Clip-Ins for the bride who wants fullness at the trial and the ceremony with nothing to maintain between appointments. Book Bulk when a trained stylist intends to build the attachment, whether finishing custom tips for bead work or forming bonds by hand. Decline both when the problem is an unsuitable support zone, because a different package does not change what the screen found.
Start at the root, not the ends. Individual I-tip strands can expose a mismatch as repeated stripes, even when the overall shade looks close on a color ring.
Read the root level, mid-length transition, and ends in natural light. Hold the ring against the actual placement zone, then examine the proposed shade through the lengths rather than matching only the brightest piece around the face.
Solid suits a consistent tonal read from root to tip. Rooted accommodates a darker base, while Balayage, Bronde, Highlights, and Superblend help reproduce existing dimension. Fantasy belongs to a deliberate fashion-color plan, not an attempt to disguise a near-match.
Consider a single-level solid result. A strand that agrees with the ends but starts too light can expose each attachment when the hair separates; matching only the root can leave the added lengths looking heavy or dull.
A dimensional result needs a different judgment. The transition must remain visible in the finished blend, so stacking the lightest strands together can create a flat block beside lived-in color.
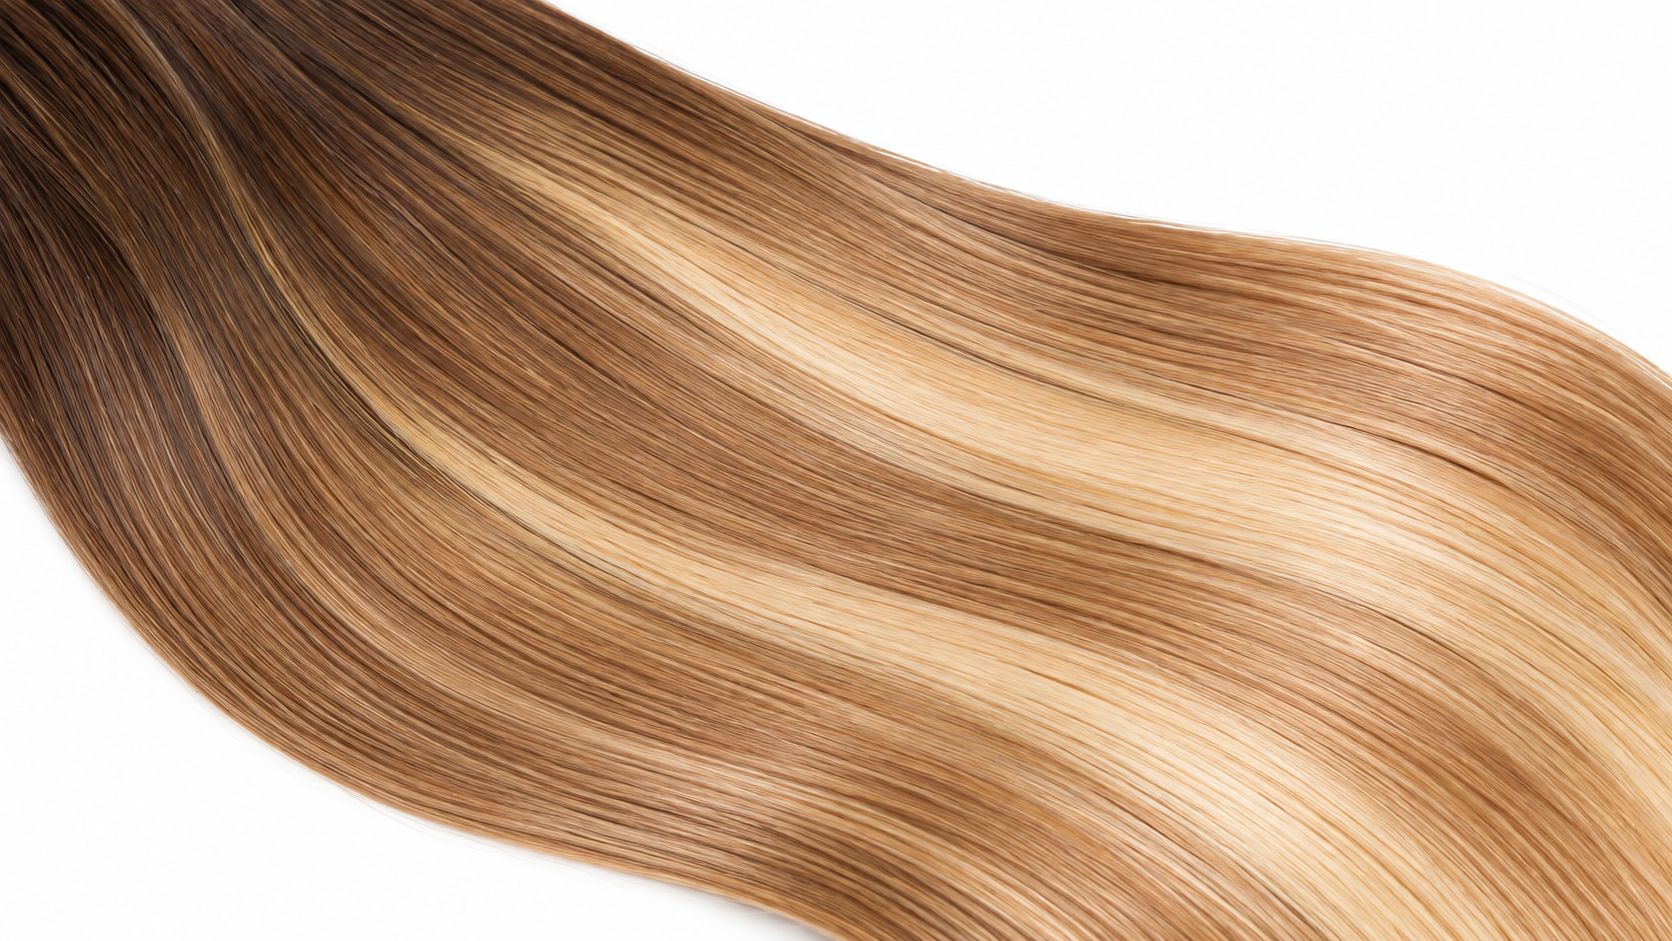
The panel shown illustrates a tonal transition, not an I-tip attachment. Straight and wavy hair require the same level and undertone assessment; texture won't hide an incorrect color choice.
Letter-number labels such as 6A through 10A aren't a governed quality standard. They're supplier marketing and don't replace checks for cuticle integrity, alignment, shedding, combability, or wash durability.
Conde Professional checks every batch for weight, color accuracy, and strand strength, and hair that falls short of its standards stays at the facility. Those checks are relevant to selection, but the stylist still needs to confirm the shade against the client's hair.
The professional color-matching guide provides a useful framework for recording that decision. A photograph under warm salon lighting shouldn't be the sole order reference.
A removable bead can still overload hair if the section is too small, the bead is too tight, or the row carries too much extension hair. Treat suitability as load management, not as a reward for choosing a non-adhesive method.
Screen the intended attachment zones before threading a bead. Sparse edges, visible breakage, tenderness, recent chemical work, substantial postpartum shedding, or discomfort when the hair is lifted all call for a more conservative decision.
A dense crown doesn't make fragile perimeter sections suitable. The stylist should map usable areas, omit questionable zones, and reduce the design rather than adding length or fullness solely to match an inspiration photograph.
Recent bleach or relaxer work requires a close look at the actual attachment section. A history alone doesn't describe its current handling, and a neat parting doesn't establish that the hair can carry the proposed strand.
The fine and thin hair extension guide supports method selection, but a category label can't replace an in-chair assessment.
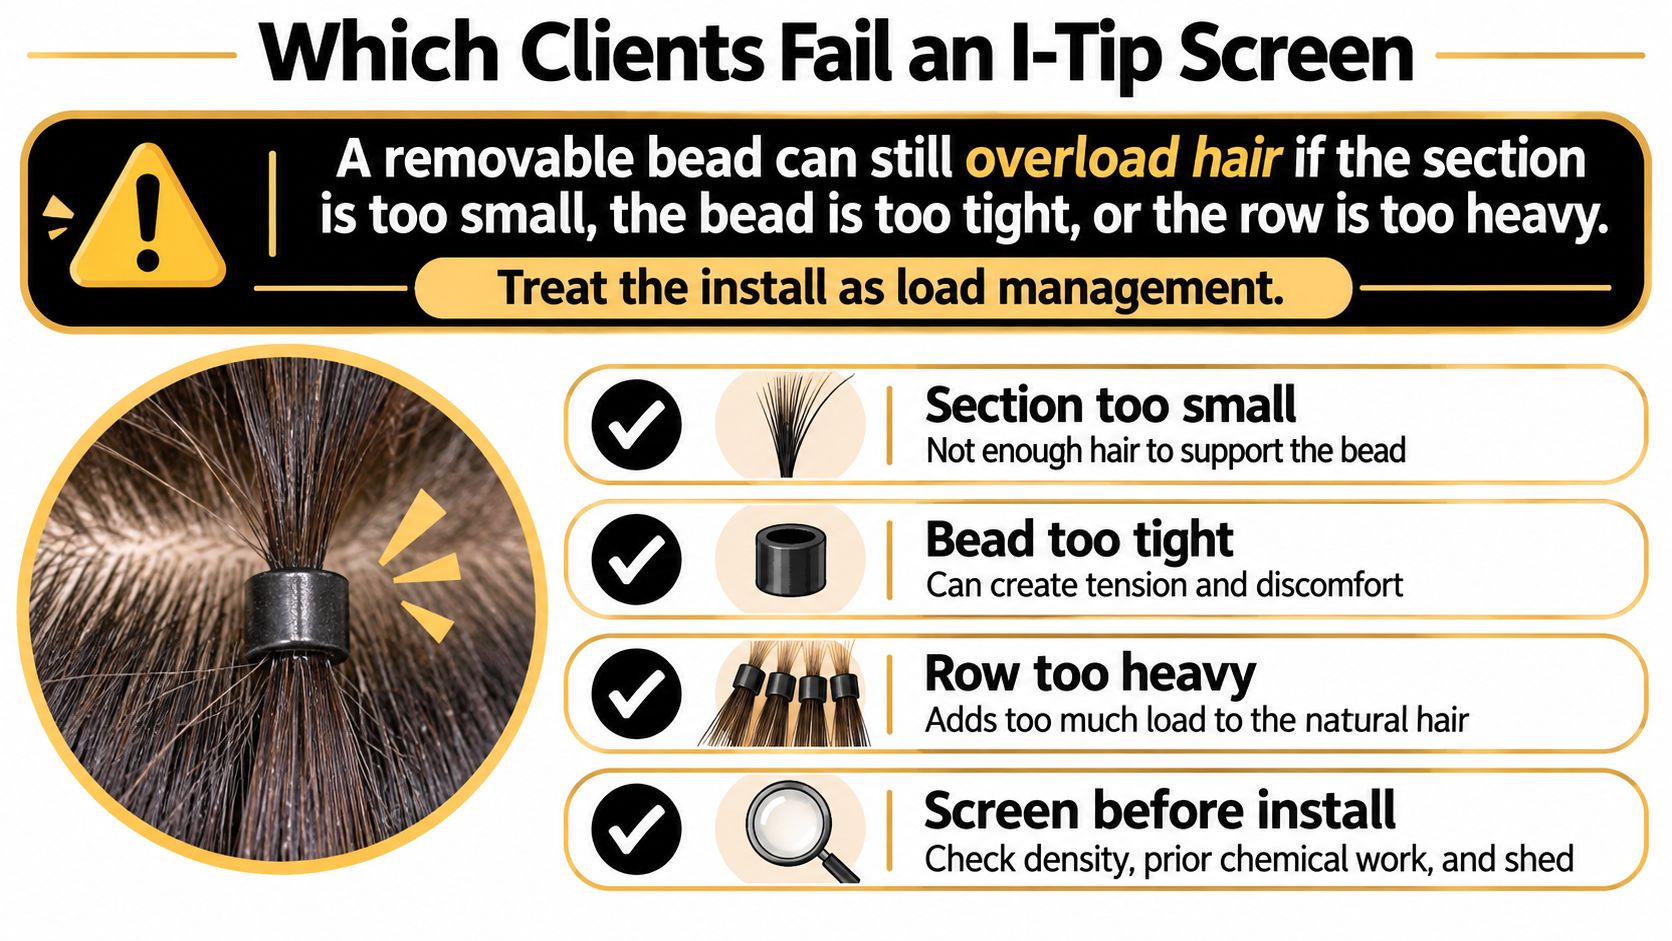
I-tip warning signs and the chair response
| Sign | Mechanical reading | Action |
|---|---|---|
| Pain or pulling on head movement | Possible undersized section, tight bead, or excessive row load | Loosen or remove the attachment before the client leaves |
| Bead against the scalp | Insufficient room for scalp movement | Reposition off the scalp and retest |
| Redness, bumps, or growing tenderness | Possible sustained pulling; not a salon diagnosis | Remove the affected row and refer to a physician if symptoms persist |
| Broken hairs at the bead | Possible over-compression or unsuitable support hair | Reduce density there or change the method |
| Slippage or a spinning bead | Possible under-closure or connector mismatch | Check compatibility, then reclose correctly or replace the bead |
These observations guide the chair response; they don't establish a medical cause. The stylist shouldn't diagnose scalp symptoms or keep adjusting around an unresolved complaint.
Comfort during a head turn matters more than an invisible bead in a still photograph.
Pain, a headache beginning during placement, or increasing tenderness isn't a break-in requirement. Stop application, address the affected attachments, and reassess before continuing; persistent symptoms warrant removal and referral rather than another attempt to conceal the problem.
Skipping adhesive and heat does not make this a low-load install. Each attachment carries real tension, and three things decide how that load sits: the strength of the section it hangs from, the pressure used to close the bead, and how faithfully the client returns for move-ups. Use a controlled sequence and test each attachment before proceeding through the head.
Exact spacing belongs to the selected system. Bead dimensions, tip construction, natural density, and technique don't support a universal gap that every stylist should copy.
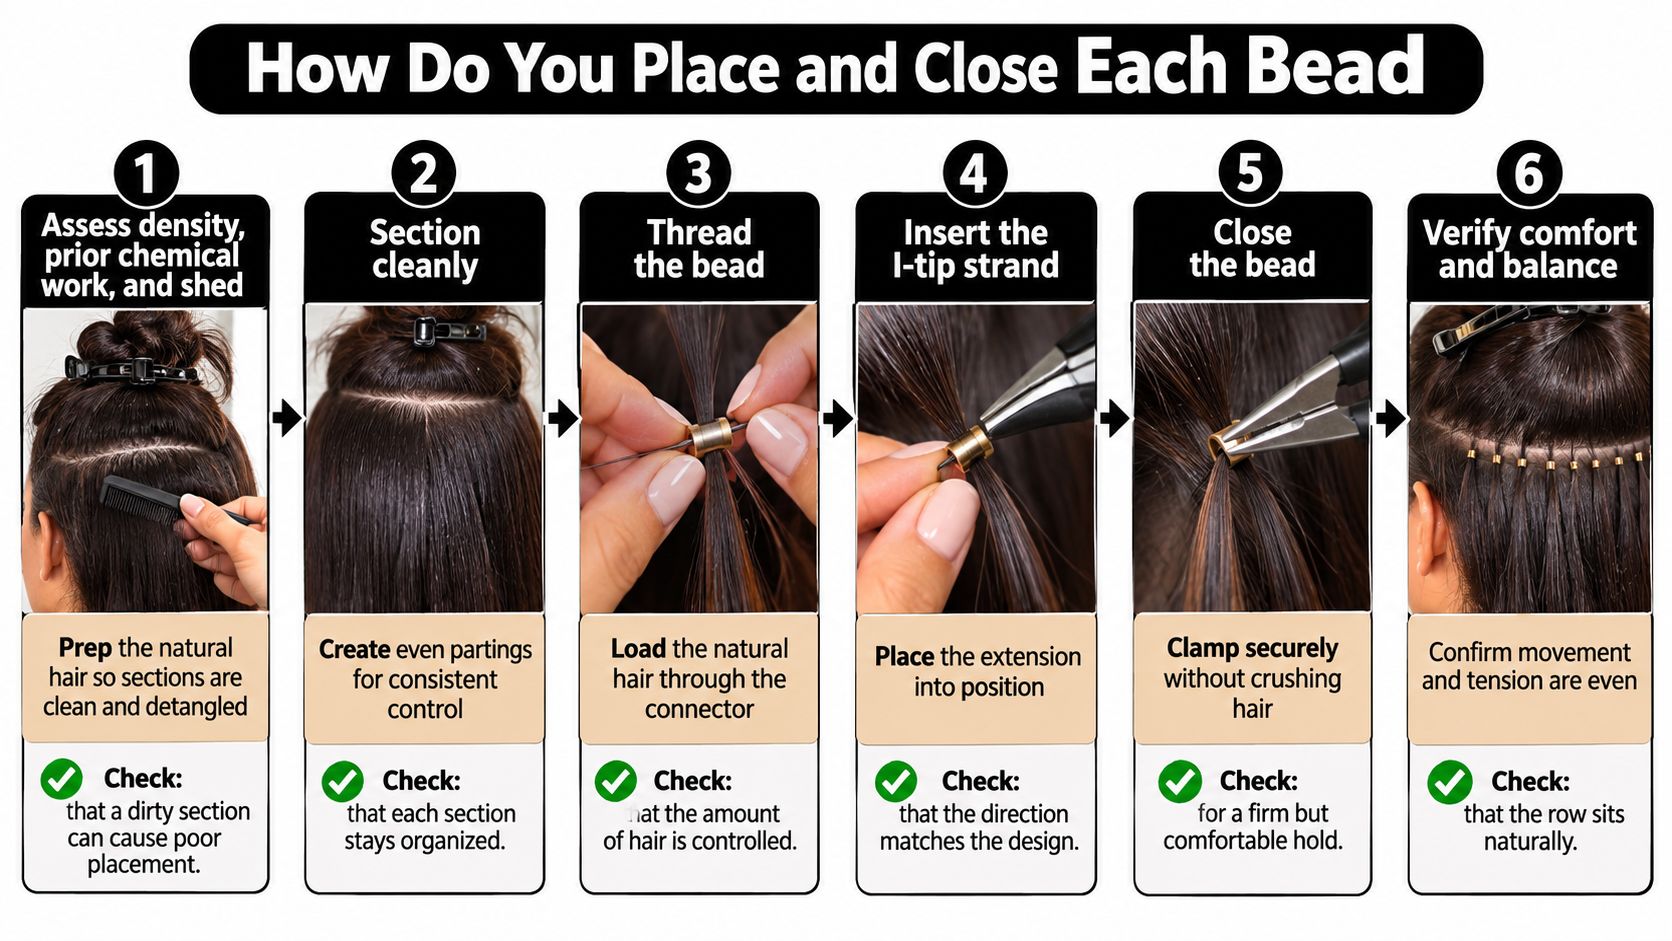
Choose the bead to match the hair, the tip, and the connector dimensions. Silicone-lined and standard options each suit different combinations of component and technique, so the decision follows what sits inside the connector and how the stylist was trained to close it.
The bead selection guide helps organize that compatibility check. Pliers should suit both closure and opening, since a secure install still needs a controlled removal.
Closure check: If a bead needs more force, check the tip and connector pairing first. A correctly matched bead holds cleanly at ordinary pressure.
When an attachment falls anywhere on the borderline between pass and rebuild, I rebuild it before the client leaves. The minutes spent on a fresh section and a clean closure cost far less than an early service call.
Finish with the hair in a simple wearable style, not only a heavily curled presentation. That final check makes visible connectors, directional restriction, and poor distribution easier to identify before the client leaves.
Book the return appointment before the client leaves the chair. A cold bead carries no adhesive and no heat, yet the strand still loads the same section of natural hair every day, and that load stays safe only while the attachment sits where it was placed. The maintenance schedule is part of the install, not an afterthought.
A common salon planning range puts a move-up at roughly four to six weeks, with eight to twelve weeks as the outside limit for full removal and reinstallation. Some protocols stretch reassessment toward eight to ten weeks. Use the ranges as planning limits, and book earlier when shedding or slippage appears. Growth rate, density, bead stability, tangling, extension condition, and the salon's own protocol set the actual date. As the attachment grows farther from the scalp, the longer lever changes how the strand pulls during brushing and styling.
A move-up rebuilds each attachment from the inside out. Sliding and squeezing without inspecting the captured hair leaves the stylist guessing about what is inside the connector.
A creased tip should be retired, not reinstalled unchanged. Hair matted at the bead needs controlled removal and evaluation, while a strand whose faded color no longer blends comes out of that client's installation.
The stylist should demonstrate handling on an accessible section and ask the client to repeat it. A written product list alone does not confirm the client understands where to hold the hair.
The salon's written instructions can draw on this extension-care guide. The appointment record should also state what requires earlier contact, including unexpected slipping, root tangling, or discomfort, so the calendar never makes the call alone.
Record the method the consultation supported before placing an order. A client who fails the bead-support or return-visit check shouldn't leave with an I-tip booking because microlinks were the original request.
For a confirmed I-tip service, the order specification needs a matched shade family, compatible pre-tipped hair, and the correct beads and pliers. A custom build requires appropriate loose hair and trained tip construction; the available product format should never dictate an attachment the stylist hasn't prepared to install.
The salon should keep a concise decision sheet with:
Conde Professional supplies licensed professionals and offers stylist education. Its professional courses address installation technique and the business of premium extensions, including improving installs, setting prices, and building a service business.
For suite operators, service planning also needs to fit the premises agreement. FindMy.beauty's resource on understanding salon suite rental terms is useful alongside planning appointment blocks and operating responsibilities.
The concrete next step is opening a professional account once the method decision is documented. Shade confirmation by text, phone, or email can then resolve selection questions before the first order, without forcing an unsupported assumption about a pre-tipped format or collection.
Conde Professional offers professional hair extensions, installation tools, and education for licensed stylists planning extension services. Visit Conde Professional to open a professional account, then confirm shade and component suitability before ordering for the approved I-tip service.


