Your cart is empty
Tax included and shipping calculated at checkout

Drawer menu
Tax included and shipping calculated at checkout
A professional account gives you stylist pricing, priority support, early access to new releases, and education developed by working stylists.


A thin, flat tape panel isn't automatically a gentle panel. Tape in extensions damage is driven by sustained load on too few natural hairs, extension length, scalp health and the condition of the attachment zone, not by adhesive profile alone. The popular reassurance that tape-ins are safe because they're lightweight fails the moment a long, dense panel is anchored to fine, relaxed, miniaturized or actively shedding hair. Prevention starts with load accounting before placement, signs checked at every visit, and willingness to decline or change method.
Tape-ins damage hair mainly by transferring sustained tensile load through a small group of natural hairs, not through adhesion alone. Tape-in extensions can cause traction alopecia when the adhesive weft transfers that load to relatively few strands, and prolonged pulling can loosen the shaft from the follicular ostium and trigger perifollicular inflammation, as described in clinical guidance on traction alopecia mechanisms. Clinical reports also describe small localized alopecic patches, erythema and broken hairs at former attachment sites. Early traction alopecia is generally nonscarring, but repeated or prolonged tension can progress to follicular fibrosis and permanent loss.
Think of one rope tied to a few hooks. The risk doesn't come from how thin the rope looks. It comes from what those hooks carry, for how long, and whether they're already pulling out of the wall.
A tape panel works the same way. Panel weight, panel length, number of natural hairs captured per row, size of the natural section and tension during wear and removal form one load chain. Improve one link and ignore the rest, and the follicle still pays. A sandwich that feels flat at install can still overload fragile shafts once length adds force during brushing, styling, sleeping and ponytails.
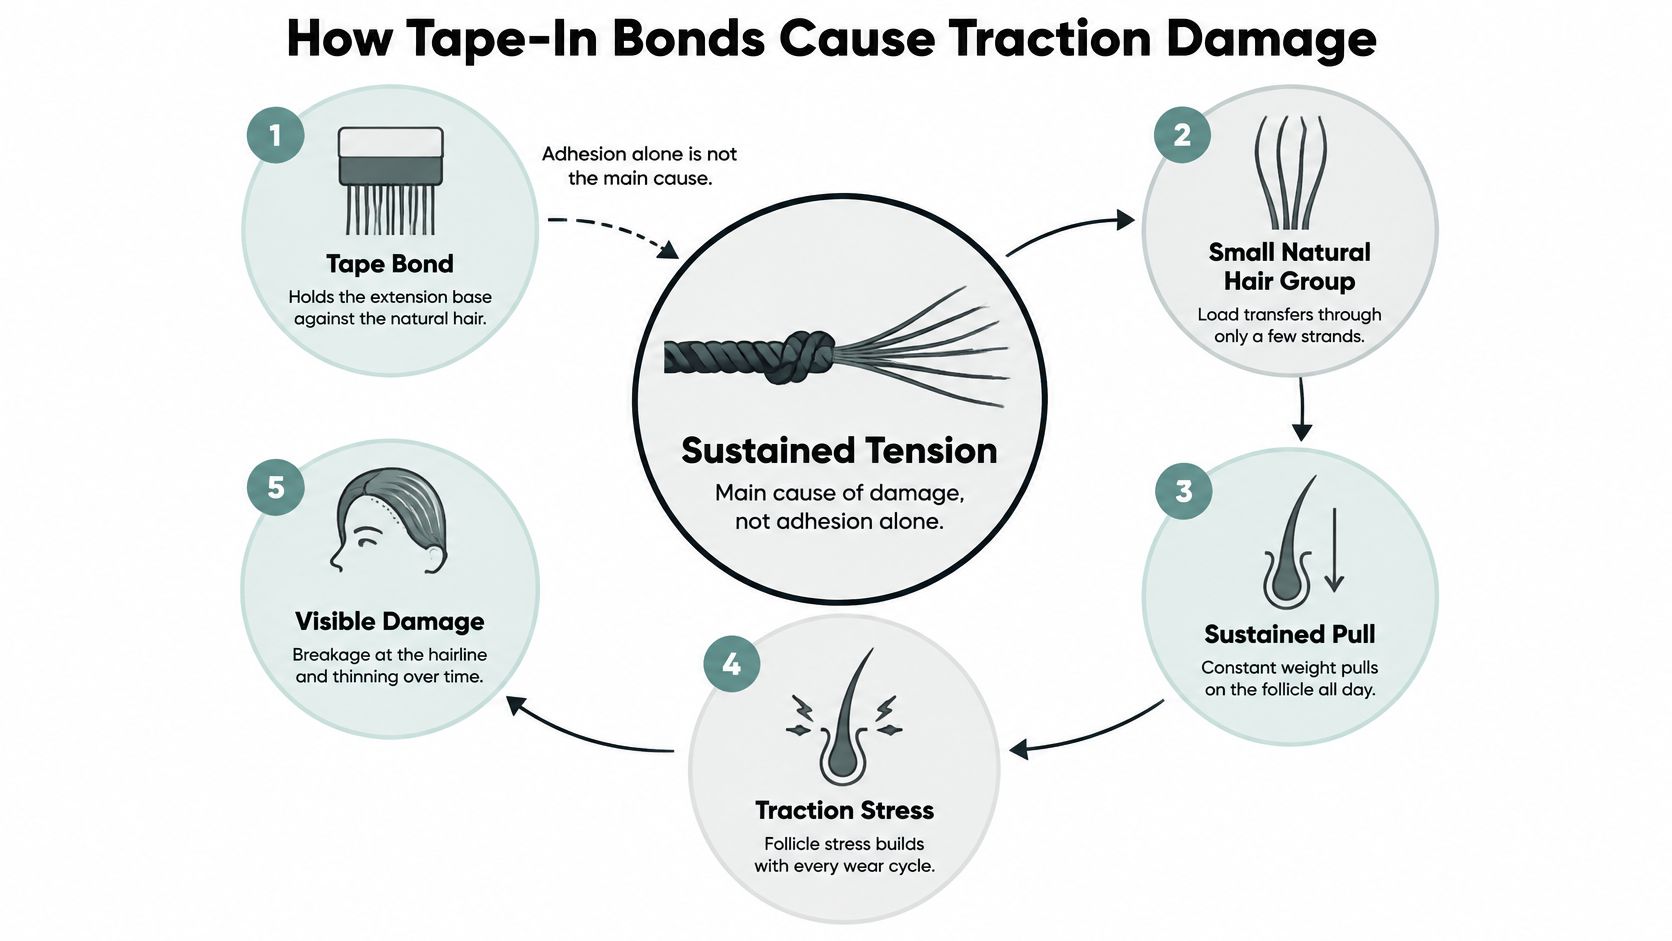
The injury sequence is mechanical before it's visible. Sustained pull loosens the shaft in its opening. Inflammation develops around the follicle. Tenderness, redness and short broken hairs follow, then small patches can appear where panels sat. Pain, headache, scalp tenderness or persistent tightness aren't normal settling symptoms. They're practical warnings that mechanical load exceeds tolerance, even before density loss is obvious.
A bond can look clean and still be wrong for the section carrying it.
Placement details matter because the lever effect magnifies the error. A panel angled upward, folded, or seated on an uneven section pulls from one edge instead of distributing force across the sandwich. Attachment over chemically compromised, miniaturized or actively shedding hair asks weak anchors to carry continuous weight. That's why the mechanics behind how tape-in panels sandwich natural hair should be reviewed as a load system, not only as an application format.
Before cutting any hair, stylists should sketch the load path for each proposed row. Mark section width, distance from fragile margins, planned length and density, and where tension will travel during styling. If the sketch depends on a narrow perimeter strip carrying a long row, the design fails before adhesive touches hair. Reduce length, reduce density, widen support with healthy hair, relocate the row, or choose another method. Tape in extensions damage becomes predictable once that load path is made visible.
Check scalp health and hair condition before every install, maintenance visit, and removal. A low-profile bond can still cause meaningful traction if the natural section is too small or the extension is too heavy. The adhesive alone does not determine risk. Assess the client's baseline density, scalp, planned length, and attachment-zone design, then look for changes at each appointment.
Early traction can be easy to miss. In a 2009 clinical report, dermatologists examined 12 women wearing extensions who had not complained of hair loss. Dermoscopy showed signs consistent with traction alopecia in all 12 patients, including sparse broken hairs while follicular openings remained visible, according to the British Journal of Dermatology clinical report. The report also described four additional extension-associated cases and hair matting linked with acute telogen effluvium.
These findings do not establish a tape-in failure rate. They show why a style that looks acceptable can still conceal early injury. Separately, a 2007 study published in the International Journal of Dermatology examined 874 adults in Cape Town and found traction alopecia in 22.6% overall and 31.7% of women. The rate reached 48% among women whose usual style was extensions attached to chemically relaxed hair, according to the Cape Town study. Chemically processed, fragile, or thinning hair calls for closer inspection and conservative load design. Appearance alone is not reassurance.
| Sign | Likely cause | Same-day action |
|---|---|---|
| Short broken hairs along the bond line | Hair shaft weakened under sustained load | Plan a lighter or shorter panel at the next visit and reassess the row |
| Redness or tenderness at attachment sites | Tension exceeds the client's tolerance | Remove or refit now; do not reinstall the same row |
| Sparse broken hairs with follicular openings still visible | Early traction injury | Photograph the area, reduce load, and shorten the planned wear interval |
| Headache, scalp pain, or persistent tightness during wear | Mechanical load exceeds tolerance | Remove the extensions; reassess before considering another install |
| Hair matting or sticky residue at the bond | Adhesive contact or incomplete removal | Detangle gently and review removal technique before the next session |
| Pustules, crusting, or folliculitis | Inflammation around the follicle | Stop installation and refer for dermatologic evaluation |
| Patchy loss at former attachment sites | Progressing traction damage | Refer and leave the affected area out of the design |
| Thinning at the temples or perimeter | Attachment too close to fragile margins | Move the row inward and shorten or lighten the panel |
Adjust when early breakage appears without pain, inflammation, or patchy loss. Reduce panel length or density, move the row away from fragile margins, and schedule an earlier reassessment. The next design must carry less load than the one that produced the breakage.
Stop the same day if the client has redness, tenderness, headache, or persistent tightness. Remove or refit before the client leaves. Hair that is breaking, inflamed, or visibly under tension should not carry another installation without reassessment.
Refer if you see pustules, crusting, folliculitis, or patchy loss. Stylists should not diagnose scalp disease or cover an active problem with another row. Arrange dermatologic evaluation and keep the affected area out of future designs unless medical guidance clears it.
Matting or residue at the bond usually points to removal technique, not insufficient density. Adding hair to conceal a messy attachment zone increases stress on the bond and can make removal harder. Detangle gently, clear residue where the hair can tolerate it, and review solvent use, separation speed, and section size.
Documentation standard: Photograph each row and the scalp under consistent light at every visit, then record symptoms in the client's own words.
Compare images over time and note row placement, panel length, density, wear interval, and client tolerance. Gradual perimeter thinning and breakage are easier to identify when each visit is documented, rather than recalled after visible loss.
A low-profile tape bond can still cause meaningful traction if the natural section is too small or the extension is too heavy. Tape-in damage risk is mostly visible in the client's hair and scalp condition before the first panel is cut. Assess the attachment zone, proposed length and load together, rather than treating adhesive type as the deciding factor.
A 2023 cross-sectional study of 223 women in Yaoundé, Cameroon found traction alopecia in 77 participants, or 34.5% of the sample, with a 95% confidence interval of 28.3% to 40.7%, while 95.1% regularly used extensions, according to the Yaoundé cross-sectional study. Extension use was statistically more common among participants with traction alopecia than among those without it. In the same study, mild disease accounted for 14.3%, moderate for 13.5%, and severe for 6.7%.
The study covered extensions generally, not adhesive tape systems, so it provides population context rather than a tape-in failure rate. For a stylist, the practical point is to screen for existing thinning, scalp concerns and hair fragility, then judge whether the planned attachment zone can support the requested length and weight.
| Client profile | Damage risk | Decision |
|---|---|---|
| Dense, healthy natural hair with a clear scalp | Lower with conservative sectioning | Suitable; plan the move-up interval at booking |
| Chemically relaxed or chemically processed hair | Higher; fibers may be more vulnerable | Reassess the row and reduce the load if appropriate |
| Fine or low-density hair | Higher; narrow sections carry more load | Consider whether shorter, lighter panels are supportable |
| Existing traction alopecia or thinning at the margins | High | Decline or refer; dermatology guidance discourages extensions here |
| Active scalp inflammation or folliculitis | High | Decline until the client's physician clears the scalp |
| Postpartum shedding | Higher while hair is shedding and fragile | Defer the installation |
| Curly or coily texture | Variable; depends on tension and sectioning | Test a section; do not proceed if the row cannot sit flat without tension |
| Client requests maximum length or weight | High; pull increases with length | Shorten the panels, reduce density or decline the request |
Assess risk by hair type, pre-existing scalp health, extension length and attachment-zone design, not by adhesive alone. Clinical guidance warns that extensions can worsen existing alopecia. Dermatology reviews also discourage extensions for people with pre-existing traction alopecia because even careful application may accelerate progression, as discussed in recommendations on camouflage and alopecia risk. A flat bond does not remove stress from compromised follicles.
Fine hair needs particular scrutiny: each panel relies on a smaller natural section to support its weight. Review method selection for fine and thin hair during consultation, before shade matching. The relevant decision here is whether the client's hair and scalp can support the proposed tape-in design. If the attachment zone cannot carry the load without strain, do not install tape-ins.
Chemically relaxed or otherwise processed hair may appear smooth while tolerating sustained pull and adhesive separation poorly. Postpartum shedding can change the amount of hair available to support a bond during wear. Curly and coily textures are not automatic exclusions, but the attachment must sit flat without forcing the natural pattern under tension.
Two or more high-risk rows in the profile table means decline, refer, defer, or reconsider tape-ins.
Use that threshold to protect the client and the salon. A client with margin thinning who requests maximum length presents risks in both the attachment zone and the requested load. Active inflammation paired with chemically compromised hair is not a situation to manage through optimistic adjustments. Declining an installation is the right call when the scalp, hair condition and proposed design do not support a tolerable bond.
A flat, low-profile bond can still cause meaningful traction if the natural section is too small or the extension is too heavy. Assess the client's hair condition, scalp health, intended length and attachment-zone design together. Keep the bond flat and distribute weight across a healthy section with enough density to support it. Avoid narrow, fragile perimeter sections and don't place adhesive over short or compromised fibers, following clinical prevention guidance on traction reduction.
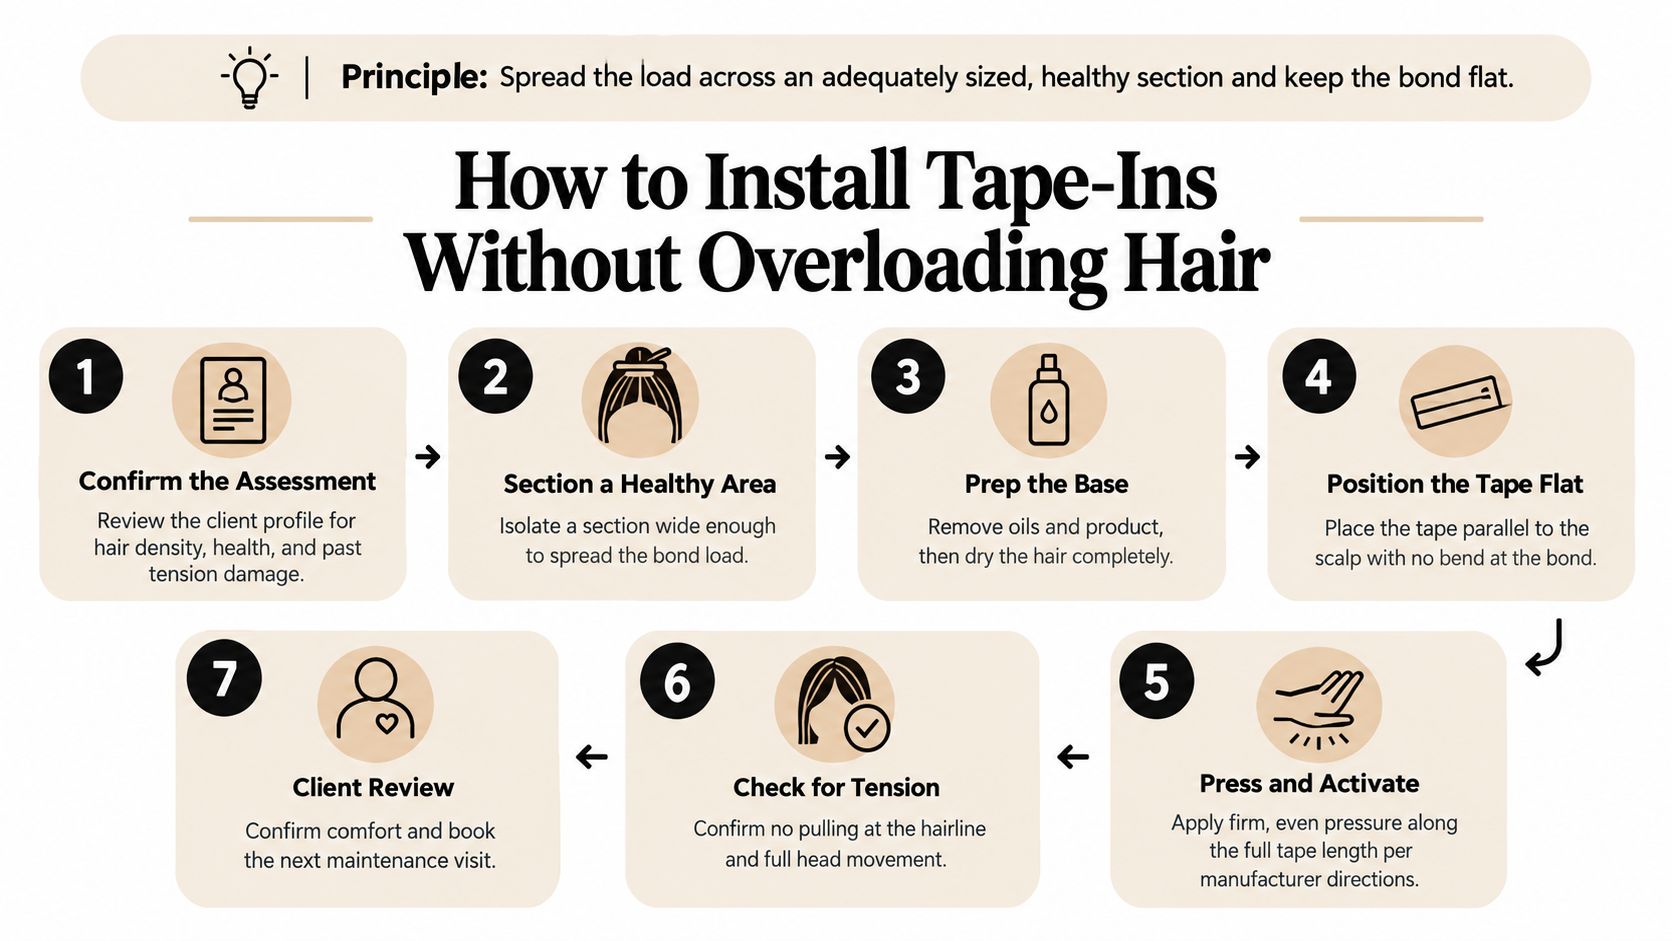
Before placing panels, check scalp condition, shedding, chemical compromise and density along the proposed row. Match extension length and density to what the natural section can carry. Where support is limited, use a lighter design or reconsider the method.
Keep frontal and temporal margins clear. For borderline density, follow these placement principles for thin hair. Sandwich a thin, even section between the adhesive surfaces without folding the hair or pulling upward. Press according to product directions, checking that the bond doesn't overlap short, broken or compromised fibers.
Test movement before finishing. Ask the client to turn their head, lift their arms and bend forward. Pain or tightness means the placement needs adjusting, not reassurance. Record the row design, panel length, density and client tolerance to guide future decisions.
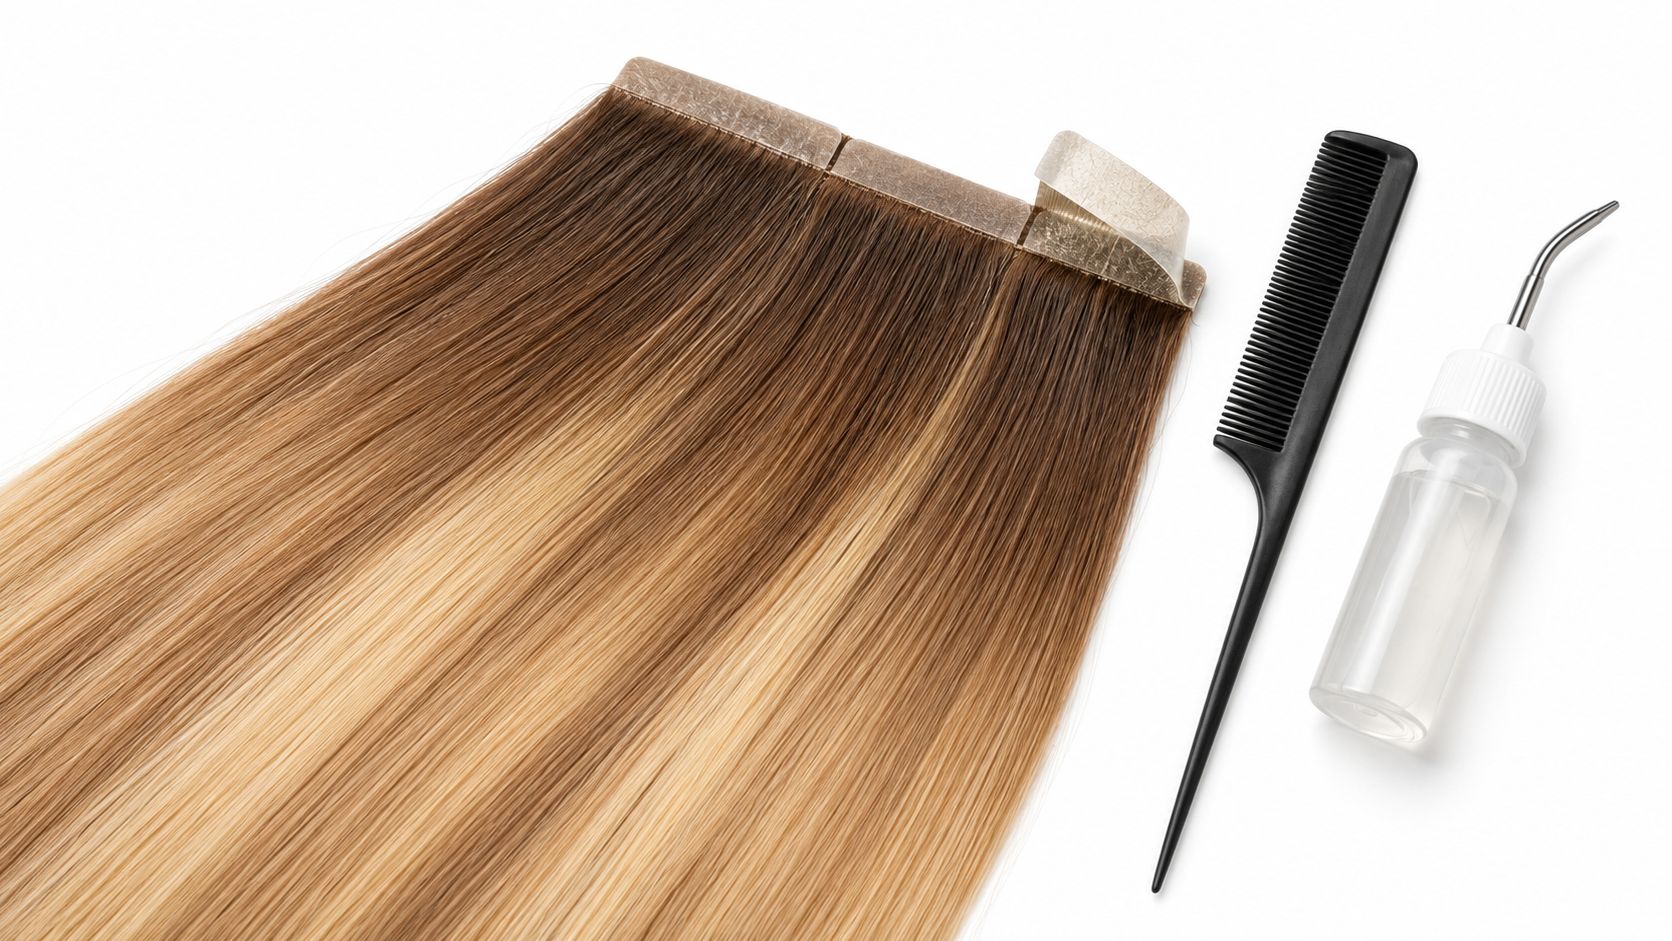
For shade planning within a flat sandwich format, Tape-In Brunette #6/7/10 Balayage suits balayage-style color matching. Choose length according to the section's capacity, not the look in a reference photo. Limit volume and length, allow breaks between installs, and don't reinstall over breaking, inflamed or visibly tense hair.
Removal creates risk because adhesive resistance pulls on fibers already weakened by sustained wear. A Johns Hopkins dermatology review classified extensions among high-risk styling practices under prolonged tension, weight, heat or chemical treatment, noted breakage during removal of glued hair, and recommended removing weaves and extensions after approximately 6 to 8 weeks to provide a break, according to Johns Hopkins guidance on traction alopecia risk. Treat that interval as a clinical reference. Set the actual date from row condition, chemical history and tolerance, not from a product claim.
Small breaks at one row mean the next design needs rebalancing, shorter length or lower density. Removal-related redness, crusting or patchy loss triggers the referral tier instead of cosmetic repair. Stylists reviewing professional tape-in removal sequence should document chemical history, density and caliber at each row, tension distribution and whether the planned move-up or removal interval was completed. Tape in extensions damage often becomes visible at removal because that appointment finally exposes what the row carried.
Clients must report pain, tightness or lifting early because load problems develop between appointments, outside the chair. Home care instructions should sound like risk controls, not generic beauty advice. The goal is reducing extra pull at the bond line while making symptoms impossible to ignore.
Detailed aftercare can be reinforced through extension care instructions for clients, but written material doesn't replace a direct conversation at checkout. Clients should know which sensations require a call the same day. Headache, scalp tenderness, persistent tightness, redness, pus, crusting, lifting bonds and hair loss at an attachment site aren't maintenance trivia.
Pain, tenderness, lifting or visible loss means contact the salon promptly. Redness with pustules, crusting or spreading inflammation means contact a physician rather than waiting for the move-up. Stylists can point clients to the signs table used in the salon, translated into plain language, without asking clients to diagnose themselves.
Missed maintenance changes the mechanics. As natural hair grows, the panel hangs farther from the scalp and the same natural hairs keep carrying accumulated load over a longer interval. A delayed appointment isn't a bonus week. It's extended wear on an attachment zone that was assessed for a shorter plan.
Closing script: "Tightness that stays, pain, redness, lifting or shedding at a panel isn't normal wear. Call before the next appointment so the row can be checked or removed."
That sentence gives the client permission to report problems without feeling difficult. Tape in extensions damage becomes harder to reverse when clients stay quiet to preserve the install.
Assess damage by the client's hair condition, scalp health, extension length and attachment-zone design, not by adhesive alone. A low-profile tape bond can still create meaningful traction if the natural section is too small or the extension is too heavy. Use the intake screen and decline criteria already established before making a method decision.
Ask suppliers specific questions about construction and performance. How is the hair processed, and what evidence is available for cuticle integrity, alignment, shedding, combability and wash durability? Confirm that the adhesive system is specified for the Tape Weft or Tape-In format being sold. Ask which solvent is recommended for removal, what directions govern bond separation, and whether training covers removal as thoroughly as installation. Also ask what documentation is required to open a licensed professional wholesale account.
Treat grade labels cautiously. Terms such as 6A through 10A are supplier marketing labels, not grades assigned by a governing body. They do not establish cuticle condition or expected wear. Ask about observable properties instead: whether cuticles remain intact and aligned, whether the hair is Remy, whether double-drawn consistency is maintained, and what shedding or combability has been observed. A grade number describes product positioning, not a measurable quality standard.
Supplier answers help clarify what is being purchased; they do not determine whether a client is a safe candidate. The final decision still rests on the hair's ability to carry the planned extension length and weight, and on a bond design that distributes load across an adequate natural section. If those conditions are not met, the tape format is the wrong choice, regardless of the adhesive specification.
A safe tape-in service depends on decisions the whole team applies consistently, not on one stylist's judgment. Put the protocol in writing, assign an owner, and review it before the next install. It should guide decisions without repeating the intake and symptom checks covered earlier.
Keep three operational items current: a referral list of local dermatologists, a named person responsible for escalating concerns, and a training schedule that covers install and removal technique as well as signs that warrant clinical input. Product education alone does not prepare a stylist to assess scalp concerns. Practise how to explain a declined service, too, so clients hear a clear reason and a practical next step.
For example, if a client requests maximum length but the planned attachment zones cannot support the added load, decline that install. Offer a follow-up consultation to reassess options after discussing a lighter length or another method. Record the decision and who will follow up, so the client does not leave with an unclear plan.
Keep records useful for team decisions: note the method chosen, any change from the proposed service, the reason for escalation, and whether a referral or follow-up was arranged. Use the photo and visit-documentation standards already established elsewhere in the protocol rather than creating a second version. Review declined installs and escalations with the team during scheduled training, then update responsibilities or practice guidance where staff are unsure.
Salons building a safer tape-in service need consistent hair, method education and shade support designed for licensed professionals, not retail checkout. Explore wholesale Tape-In options and working-stylist resources through Conde Professional, then put the damage protocol into practice before the next install.


